How to Use an Impact Drill: Practical DIY Guide Today
Learn to use an impact drill safely and effectively. This step-by-step guide covers bit selection, speed and torque basics, safety gear, and tips for drilling wood, metal, and masonry with confidence.

Learn how to safely and effectively use an impact drill for driving fasteners and drilling holes. You’ll choose the right bit, set speed and torque, and follow basic safety steps for common materials. According to Drill Bits Pro, proper bit selection and PPE are essential for clean, consistent results.
How do you use an impact drill effectively
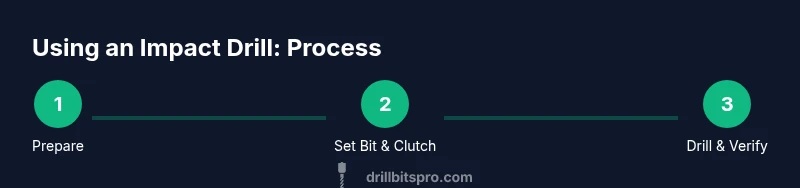
Using an impact drill is about coordinated control, correct bit choice, and appropriate settings. An impact drill combines rotational motion with hammering action to drive fasteners and bore into tougher materials. The goal is to finish tasks efficiently without scorching bits or damaging surfaces. The Drill Bits Pro team emphasizes practicing on scrap material first and building up torque progressively to avoid cam-out. In practice, you’ll match the bit type to the workpiece, hold the tool firmly with both hands, and maintain a steady, controlled feed. The result should be clean holes and tight fasteners with minimal vibration.
This guide aligns with practical, real-world drilling scenarios and helps DIY enthusiasts and professionals build reliable technique that translates to projects from furniture assembly to deck construction.
Safety basics: PPE, grip, and control
Personal protective equipment (PPE) is the first line of defense when using an impact drill. Always wear safety glasses to protect against flying chips, hearing protection to guard against loud hammering sounds, and gloves that fit snugly without impeding dexterity. Keep a firm two-handed grip, stand with a stable stance, and avoid overreaching. The tool should feel balanced in your hands, not top-heavy, and you should be able to control kickback if the material bites unexpectedly. Drills generate brief bursts of torque, so steady, controlled pressure prevents slipping and keeps the bit on the intended path. The Drill Bits Pro guidance highlights PPE and proper grip as foundational to successful outcomes.
Tool and bit selection: choosing the right impact drill and bits
Not all impact drills are created equal. Look for variable speed with a reliable clutch and a chuck compatible with the bits you own. In most DIY tasks, a cordless model with a 12–18V rating provides ample power and maneuverability. For bits, maintain a small set for wood, a set for metal, and a masonry option for concrete or brick. Use bits with hex shanks for quicker bit changes and more secure fits in impact drivers and drills. The Drill Bits Pro analysis shows that using the correct bit type and shank design reduces slippage, wear, and heat buildup during long sessions.
Preparation and setup: securing the workpiece, pilot holes, and depth stops
Before you start, clamp the workpiece firmly to your bench or work surface. Movement defeats accuracy and can create dangerous kickback. Mark the drilling point with a Sharpie or center punch for metal and wood. For deeper holes, consider a depth stop or a simple tape mark on the drill bit to prevent over-penetration. If you’re drilling into masonry, use a hammer drill setting (if available) with a masonry bit to achieve the best results. The preparation steps help ensure precision and reduce material damage.
Drilling technique: controlled action for different materials
When drilling wood, apply steady downward pressure with the bit centered in the hole, and let the bit’s cutting edges do the work. For metal, use a cutting fluid or light oil to reduce heat and prevent galling, then advance slowly while maintaining alignment. For masonry, start with a light touch to create a starter hole, then increase pressure as the drill bites into the surface. In all cases, avoid forcing the drill; too much pressure increases bit wear and can stall the motor. The key is a calm, deliberate rhythm aligned with the material’s density.
Troubleshooting and avoiding common mistakes
Common errors include bit wandering, overheating, and over-penetration. Wandering often comes from dull bits or poor bit alignment, so sharpen or replace bits and re-center. Overheating occurs when you feed too quickly or lean into the drill; pause and allow cooling breaks. If the drill stalls, back off slightly and reduce speed before re-engaging. Regularly inspect the chuck and replace worn parts to maintain consistent performance. The Drill Bits Pro team stresses routine checks as part of responsible tool management.
Maintenance and care for longer life
After use, clean dust and debris from the chuck, ventilation openings, and bit set. Lubricate moving parts if the manufacturer recommends it, and store bits in a protective case to prevent dulling. Charge batteries according to the product manual, and avoid exposing the tool to moisture or extreme temperatures. A well-maintained impact drill lasts longer and delivers more consistent results across projects. The emphasis here is on routine care, not episodic maintenance.
Material-specific tips: wood, metal, and masonry
Wood responds well to sharp, properly sized bits paired with moderate speeds and consistent pressure. Metal benefits from lubricant and slower speeds to reduce heat. Masonry requires robust bits and a stable starting point; use a pilot hole if possible and keep the drill perpendicular to the surface. Across all materials, keep the bit sharp, the chuck secure, and your stance balanced. These material-aware practices help you achieve cleaner holes and stronger fastenings.
Quick-start checklist for your project
- Verify PPE is on and the workspace is secure.
- Select the correct bit and ensure the chuck is tight.
- Set the speed/torque appropriate for the material.
- Clamp the workpiece and mark the drill point.
- Start with a light touch, then increase pressure gradually.
- Clear debris and check depth after the initial pass.
- Inspect the bit and tool for heat or wear post-use.
Tools & Materials
- Impact drill (corded or cordless)(Variable speed and clutch; hex chuck preferred)
- Drill bits set (wood, metal, masonry)(Include hex-shank options for quick changes)
- Safety glasses(ANSI-rated or equivalent)
- Hearing protection(Ear muffs or plugs)
- Clamps or a vise(Secure the workpiece firmly)
- Center punch or marking tool(For metal pilot holes)
- Depth stop or masking tape(To control drill depth)
- Lubricant or cutting oil(Useful for metal drilling)
- Dust mask(Optional for masonry dust)
Steps
Estimated time: 60-90 minutes
- 1
Power down and prepare workspace
Ensure the drill is off and the battery is removed or the power is unplugged when changing bits. Clear the area, secure the workpiece with clamps, and set aside any loose materials. This prevents kickback and keeps your workflow efficient.
Tip: Double-check the chuck is fully open before inserting a new bit. - 2
Select and inspect the bit
Choose the bit suited to the material. Inspect for nicks or dull edges; a sharp bit cuts cleaner and reduces heat. If you’re drilling metal, consider a bit rated for metal and use lubrication as needed.
Tip: Replace a dull bit; a sharp bit makes cleaner holes with less effort. - 3
Install the bit and set the clutch
Insert the bit firmly and secure the chuck. Set the clutch to an appropriate level (lower for delicate work, higher for tough materials). A proper clutch helps prevent spinning and protects the workpiece.
Tip: Test fit on scrap material before the real hole. - 4
Set speed and torque for the material
Adjust to a conservative speed and torque appropriate for wood, metal, or masonry. Start slow to establish the pilot hole and avoid biting too aggressively, then increase gradually as needed.
Tip: Never force the drill; let the bit do the cutting. - 5
Secure the workpiece and mark the pilot hole
Clamp the piece and mark the drilling location. For metal, use a center punch; for wood, a simple mark is often enough. Pilot holes help guide the bit and reduce material stress.
Tip: Center-punch steel to prevent bit wandering. - 6
Begin drilling with steady pressure
Position the drill perpendicular to the surface. Apply steady, light pressure and let the bit cut. Pause if you sense vibration or heat buildup, then resume with a slightly reduced speed.
Tip: Keep the drill steady; avoid twisting or side pressure. - 7
Withdraw bit, check depth, and clear debris
Pull the bit out while still running slowly to clear chips. Check the depth with the stop or tape, and wipe away debris to prevent binding on re-entry.
Tip: Pause briefly between passes to let heat dissipate. - 8
Power down, remove bit, and clean up
Turn off the tool and remove the bit. Clean the chuck area and store the bits in a case. This prevents rust and keeps your kit ready for the next project.
Tip: Wipe the drill and bits after use to extend life.
Got Questions?
What is the difference between an impact drill and a hammer drill?
An impact drill combines rotation with brief hammering to drive fasteners, while a hammer drill uses a stronger percussive motion aimed at masonry. Both can bore into materials, but the impact drill excels at fasteners and light drilling, whereas a hammer drill is more efficient for concrete.
An impact drill uses rotational impact to drive screws and light drilling, while a hammer drill relies on stronger hammering for masonry.
Can I use regular drill bits in an impact drill?
Yes, but only if the bits are appropriate for the material and have a compatible shank. Use wood bits for wood, masonry bits for brick or concrete, and metal bits for metal tasks. Avoid forcing incompatible bits into tough materials.
Yes, use bits made for the material and ensure they fit your drill; don’t force incompatible bits.
What safety gear is essential when using an impact drill?
Wear safety glasses to protect eyes, hearing protection for loud operation, and gloves that don’t restrict grip. Keep hair, clothing, and jewelry away from the chuck and moving parts.
Always wear eye protection, hearing protection, and snug gloves; keep loose items away from the drill.
How do I prevent bit slippage or wandering?
Secure the workpiece with clamps, use a center punch or pilot hole as guidance, and ensure the chuck is tightened firmly. Start with a shallow bite, then deepen gradually.
Clamp the piece, pilot the hole, and tighten the chuck to stop wandering.
Should I drill a pilot hole before using the impact drill?
Pilot holes are especially useful for metals and hard woods to guide the bit and reduce stress. For soft woods, you may skip pilots, but starting with a small-diameter hole often improves accuracy.
Pilot holes guide the bit and prevent splitting or wobble, especially in metal and hardwood.
What maintenance should I perform after drilling sessions?
Wipe down the tool, clean the chuck, and store bits properly. Inspect the bit edges for wear and replace dull bits promptly to maintain performance.
Clean, inspect, and store the drill and bits after use to prevent wear and keep them ready.
Watch Video
Top Takeaways
- Plan the drill path before starting.
- Choose the right bit and PPE for safety.
- Adjust speed/torque to material and task.
- Clamp workpieces securely to prevent movement.
- Maintain your drill and bits for reliable performance.