Impact Drill Snap On: Prevention, Removal & Repair Guide
A practical, step-by-step guide to preventing, diagnosing, and fixing snapped bits when using an impact drill, with safety tips, removal techniques, and maintenance guidance for DIYers and professionals.

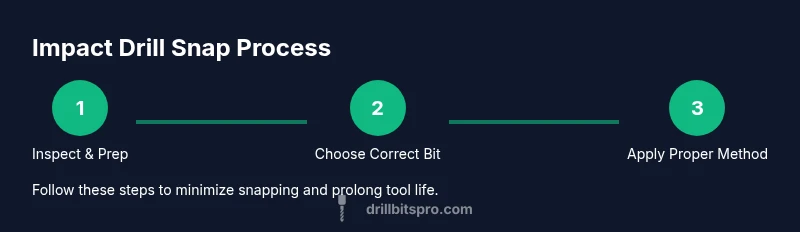
An impact drill snap on occurs when the bit binds or torque surges beyond the bit’s capacity. By choosing the correct bit for the material, maintaining steady pressure, and using proper speed and impact settings, you reduce the risk. Always wear PPE and inspect bits before use to minimize danger and damage.
Understanding why an impact drill snap on happens
Bits can bind or grab, and the tool’s torque can spike, causing a sudden bite that twists or stalls the drill. The phrase "impact drill snap on" captures the moment when the equipment overloads or the bit sticks in the workpiece. In this section we unpack the mechanical dynamics behind these events, including how clutch vulnerability, heat buildup, and rapid feed pressure contribute to snaps. By connecting theory to practice, you’ll recognize early warning signs and set up safer workflows for both DIY projects and professional tasks.
Common causes of snapping in impact drills
Several practical factors raise snap risk: (1) bit binding when the bit meets knots in wood or hard inclusions in metal; (2) over-torque from using the wrong driver setting or too aggressive feed; (3) worn or undersized bits that dull quickly under high torque; (4) inadequate lubrication or cooling, especially with metal drilling; (5) damaged chucks or loose arbor that reduce grip. Debris inside the chuck or misalignment can also contribute. Understanding these causes helps you diagnose failures quickly and correct course before a permanent failure occurs.
Safety first: PPE and safe technique to prevent snap hazards
Prioritize protection and discipline to keep snaps from becoming injuries. Wear ANSI Z87.1-rated safety glasses, hearing protection, and sturdy gloves when feasible. Clear the workspace, secure the workpiece, and clamp it firmly. Use a properly grounded drill and inspect the bit and chuck for wear or misalignment before starting. Establish a rhythm—steady pressure, controlled speed, and minimal bouncing—to avoid sudden overloads that can trigger a snap.
Material-specific risks: wood, metal, masonry
Different materials demand different strategies. In wood, knots and old nails can suddenly bind the bit; in metal, hard alloys can quickly dull bits and generate heat, increasing snap risk; in masonry, inappropriate bits or settings can cause the bit to grab and snap under load. For wood, start with a pilot hole to guide the bit and reduce binding. For metal, lubricate the bit and select high-speed, lower-torque settings. For masonry, use the hammer setting with the correct masonry bit and steady pressure.
Choosing the right bit and driver settings
Bit choice is central to preventing snaps. Wood often uses brad-point or pilot bits; metal benefits from HSS or carbide-tipped bits; masonry requires masonry bits designed for high-heat environments. Match bit to material, and adjust speed and torque to the bit’s capacity. Start with a lighter feed and increase gradually as the bit clears material. Using a high-quality bit reduces dulling, heat buildup, and resulting torque spikes that lead to snapping.
How to inspect your drill before use
Before any project, verify the chuck is clean and undamaged, ensure the arbor is secure, and test run the drill at a low speed without a bit to listen for unusual sounds. Check the battery or power supply for stability, and confirm the mode (rotation vs. hammer) matches the material. Inspect the bit surface for chips or cracks, and confirm it is the correct diameter and flute geometry for the task. A thorough pre-check minimizes surprises during operation.
Step-by-step: removing a snapped bit from the chuck
Start by unplugging the drill and securing the workpiece. If a portion of the bit remains in the chuck, set locking pliers on the exposed portion and gently twist to loosen, avoiding excessive force that could deform the chuck. If the bit is stuck, try a bit extractor or small needle-nose pliers to grip the shank above the chuck and pull straight out. Clean the chuck jaws afterward and inspect for damage. Reinsert a fresh, appropriate bit with a confident, straight pull.
Repair or replace a damaged chuck
A damaged chuck can be a primary cause of repeated snaps by failing to grip bits properly. If the chuck wobbles, binds, or threads are stripped, replace it or have it professionally serviced. In the meantime, avoid forcing bits into a compromised chuck, which can propagate damage to the drive train. If you must operate with a questionable chuck, use lightweight bits and low torque settings on scrap material only until a proper repair is completed.
Maintenance discipline for extending tool life
Prioritize routine maintenance: clean the chuck after every use, keep lubricants at the recommended levels, and store bits organized by material type. Replace worn bits promptly, and periodically inspect the driver’s mechanical components and electronics. A consistent maintenance routine reduces unexpected torque spikes and extends the life of both drill and bits.
Practical tips for different materials
When drilling wood, use a center punch or pilot hole to minimize wandering; for metal, use cutting oil and slow the feed rate to manage heat; for masonry, keep the bit cool by intermittently spraying with water and cutting with short bursts. Always start with a smaller pilot hole for precision and reduced load, and gradually enlarge to the final diameter. These practices lower the chance of an impact failure during the job.
Maintenance schedule and storage
Create a simple calendar reminder for monthly tool checks, quarterly bit replacement, and annual chuck inspection. Store bits in labeled cases, grouped by material, to reduce misalignment and ensure you always choose the correct bit for the job. A clean, organized workspace also helps you avoid accidental impacts caused by clutter or misplacement.
Troubleshooting quick scenarios
Scenario A: A knot binds a wood hole mid-drill. Stop, back out, inspect the bit, and switch to a pilot bit for a re-entry; Scenario B: Metal work with a dull bit overheats and binds. Stop, cool the bit, switch to a fresh bit, and reduce feed pressure; Scenario C: Masonry bit binds. Stop, remove the bit, verify the hammer setting, and start again with a clean hole.
Authority sources and quick references
For safety and best practices, consult established guidelines and reputable sources. Always verify current recommendations from official organizations and trusted manufacturers. See OSH A safety guidance for hand tools and drilling practices, and reference tool manufacturer maintenance manuals for compatibility and torque specs.
Tools & Materials
- Safety glasses(Impact-rated; ANSI Z87.1 compliant)
- Hearing protection(Ear muffs or plugs)
- Work gloves(Grip and protection; use as needed)
- Impact drill/driver(Cordless with variable torque; ensure battery health)
- Bit set (wood/metal/masonry)(Assorted shapes and sizes; keep sharp)
- Bit extractor or locking pliers(Assists with removing snapped bits)
- Allen wrench set / chuck key(For chuck adjustments and bit changes)
- Lubricant or cutting oil(Optional for metal drilling to reduce heat)
- Shop towels(Clean up debris and oil)
- Clamp or vise(Secure workpiece firmly)
Steps
Estimated time: 1 hour 45 minutes
- 1
Inspect the workspace and drill
Power down the tool and inspect the bit, chuck, and workpiece. Look for wear, cracks, or misalignment. Check that the material matches the bit type and that there’s enough room to maneuver safely.
Tip: Always pre-check for debris in the chuck to prevent binding. - 2
Select the correct bit and settings
Choose a bit designed for the material and a speed/torque setting appropriate for the task. Start with the lowest practical torque to reduce sudden overloads and increase only as the bit clears the material.
Tip: A pilot hole for wood or a starter punch minimizes wandering and binding. - 3
Secure the workpiece
Clamp the workpiece securely to prevent movement. Loose material increases the chance of bit binding and kickback when torque spikes occur.
Tip: Use a sacrificial scrap underneath to protect the surface and reduce bit dulling. - 4
Apply steady pressure and correct speed
Begin with light, consistent pressure and let the bit do the work. Avoid pushing aggressively while the tool is in a high-torque mode, which can cause binding.
Tip: Pause briefly if you hear unusual grinding or feel heat buildup. - 5
Monitor for binding and stop if needed
If the bit binds or stalls, stop immediately, release the trigger, and remove the bit before attempting a restart with a different approach.
Tip: Never twist or force the bit while the chuck is engaged. - 6
Remove a snapped bit
If a bit snaps, unplug the drill. Use locking pliers or a bit extractor to remove the remaining shank. Avoid forcing the chuck open with excessive torque.
Tip: Keep a dedicated extractor tool within easy reach for quick removal. - 7
Inspect the chuck after a snap
Look for burrs, cracks, or misalignment. If the chuck is damaged, avoid continuing until it’s repaired or replaced.
Tip: Run a test without a load on scrap material to verify grip after any chuck work. - 8
Lubricate and clean the components
Wipe away debris and lightly lubricate moving parts as recommended by the manufacturer. Cleanliness reduces heat and wear.
Tip: Use minimal lubrication to avoid attracting dust and debris. - 9
Test on scrap material
Test the setup on scrap material before resuming the main task. Validate that the bit seats properly and that there’s no abnormal vibration.
Tip: A successful test run confirms the next steps will proceed safely. - 10
Document and replace worn parts
Record wear patterns and plan for replacement of bits or the chuck as needed. Proactively replacing worn items reduces future snap risk.
Tip: Keep a simple maintenance log for quick reference. - 11
Store and organize tools
Return bits to their cases, protect cutting edges, and ensure the drill is stored in a dry, cool place.
Tip: Organization minimizes the chance of selecting the wrong bit for a job. - 12
Resume project with best practices
Proceed with the project using correct bit, settings, and safety discipline. If any sign of snap risk returns, pause and reassess the approach.
Tip: When in doubt, switch to a fresh bit and revert to lower torque settings.
Got Questions?
Why does my impact drill snap on during drilling?
Snap events typically happen when the bit binds, torque spikes, or the bit is worn or mismatched for the material. Poor technique and debris can also contribute. Proper bit choice, controlled speed, and steady pressure help prevent these events.
Snaps usually happen from binding or torque spikes. Use the right bit, keep steady pressure, and maintain proper speed to avoid it.
Can I continue using the drill after a bit snaps?
Do not continue to drill with a snapped bit. Stop, unplug, and remove the broken piece. Inspect the chuck and bit compatibility before resuming, ideally with a fresh bit and, if needed, a chuck check.
No, stop and check the chuck and bits first before resuming.
How do I safely remove a snapped bit?
Unplug the drill, clamp or secure the workpiece, and use locking pliers or a bit extractor to grip the exposed shank. Pull straight out with steady force and avoid twisting the chuck.
Unplug, secure, grip, and pull straight out with steady force.
Is it necessary to replace the chuck after a snap?
If the chuck shows wobble, cracks, or stripped threads, replace or have it serviced. A damaged chuck significantly raises the risk of future snaps and misfeeds.
If the chuck is damaged, replace it to prevent further issues.
What safety gear should I wear when drilling?
Wear safety glasses, hearing protection, and appropriate gloves. Keep a clean workspace and tie back loose clothing or hair to prevent entanglement.
Wear eye and hearing protection, and keep the area tidy.
How can I prevent snaps in the future?
Use correct bits, verify chuck condition, apply steady pressure, and drill at appropriate speeds. Consider pilot holes in wood and lubrication in metal to minimize heat and binding.
Choose the right bit, check the chuck, and maintain steady technique.
Watch Video
Top Takeaways
- Inspect gear and bits before every use
- Use correct bit type and settings for material
- Secure the workpiece and maintain steady pressure
- If a bit snaps, stop and remove safely before continuing
- Regular maintenance reduces snap risk