How to Prevent Drill Bits from Breaking: A Practical Guide
Learn proven, step-by-step techniques to stop drill bits from snapping. Includes material-specific tips, proper speeds, and maintenance rituals from Drill Bits Pro for DIYers and pros.

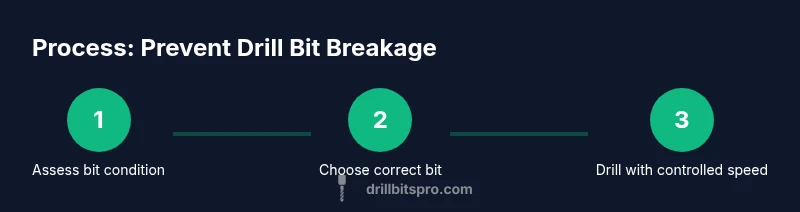
By the end of this guide you will know how to prevent drill bits from breaking. You’ll learn to choose the right bit for the material, start with a pilot hole, set the correct speed, apply a steady feed, and keep bits sharp through proper maintenance. These steps help DIY enthusiasts and professionals drill clean, accurate holes with reduced risk of breakage.
Understanding Why Drill Bits Break
Drill bits break for a few common reasons: using the wrong bit for the material, drilling at too high a speed or with excessive pressure, letting the bit bind in the material, and continuing to drill when the bit is dull. In addition, poor workholding, wobbling, or misalignment can cause uneven forces that fracture the tip. The key to reducing breakage is controlling heat, pressure, and stability while ensuring the bit type matches the job. According to Drill Bits Pro, most breakages come from not pairing the bit to the material or from forcing a dull edge through a tough surface. Recognizing these failure modes early lets you adjust technique before damage occurs.
If you’re new to drilling, think of bit health as a performance metric: sharper, properly maintained bits perform with less heat and resistance. The goal is to maintain a clean cutting edge and minimize side loading. By understanding why bits fail, you can apply targeted strategies that improve success rates from the first hole to the last.
Essential Preparations Before You Begin
Before you touch the drill, prepare your workspace and tools. Secure the workpiece with clamps or a vise to prevent movement, and lay out the correct bit for the material. Ensure your drill is set to an appropriate speed range and that you’re wearing safety goggles and gloves. Remove debris from the drill chuck and bit, inspect for nicks or chips, and replace any damaged bits. If you’re drilling metal, a cutting oil or lubricant can dramatically reduce heat buildup and delay dulling. For wood, a sharp bit and a clean, straight path are your best defenses against wandering and breakage. Keeping a spare bit in the kit minimizes downtime if a bit fails during the job.
The aim of this phase is to create a stable, precise starting point and a clean exit path, which reduces the chance of the bit catching and snapping.
Choosing the Right Tool for the Job
Not all drill bits are created equal, and material compatibility is your first defense against breakage. For wood, brad point or spade bits work well when used at moderate speeds with light pressure. For metal, use high-speed steel (HSS) or cobalt bits, and consider a smaller pilot hole to guide the larger bit. For masonry, a carbide-tipped masonry bit with a masonry hammer drill setting is essential. Pilot holes dramatically reduce stress at the cutting edge by guiding the bit through the material and reducing binding. Drill bit sizes should be chosen to balance hole diameter with the strength of the remaining material. A quick reference chart can help you pick the correct size range for your project. All along, keep a close eye on the bit’s cutting edge for signs of dulling and wear.
The choice of bit and the initial hole size set the stage for a clean drill with minimal resistance.
Technique: How to Drill Correctly to Minimize Breakage
Begin with a light touch and gradually increase pressure as the bit bites into the material. Keep the drill perpendicular to the work surface and avoid feeding the bit too aggressively. Use a slow, steady feed rate during the initial entry, then adjust to maintain consistent cutting without stalling. Pause periodically to clear chips and inspect the bit for heat coloring or dullness. When drilling metal, maintain lubrication to reduce friction and heat; for wood and soft materials, ensure the bit remains sharp and free of pitch or resin. If the bit begins to wander, stop, retract, and start again at a new, clearly marked point.
A controlled approach—steady speed, consistent pressure, and timely chip clearing—greatly reduces the risk of breakage and produces higher-quality holes.
Material-Specific Tips: Wood, Metal, Concrete
- Wood: Use sharp brad-point bits or Forstner bits. Start with a pilot hole for larger diameters and keep speeds moderate. Let the bit do the work with light, consistent pressure to avoid splintering. Slayer heat by lifting periodically to clear chips.
- Metal: Prefer HSS or cobalt bits. Lubricate generously and use a pilot hole to reduce binding. Clamp the workpiece securely and run at a slower speed to control heat buildup. When finished, deburr the hole edges to prevent stress risers.
- Concrete/Masonry: Use carbide-tipped masonry bits with a hammer drill setting. Apply steady, moderate pressure, but avoid pressing too hard. If the bit heats quickly, pause to cool and resume with a clean path to prevent carbide tips from wearing unevenly.
Following these material-specific tips helps keep cutting edges sharp and reduces the chance of breakage across common DIY projects and professional jobs.
Maintenance to Extend Drill Bit Life
Keep your bits sharp and free of debris. After use, clean chips from the flutes and inspect for chips or chips at the point. Sharpen or replace dull bits as soon as you notice reduced cutting efficiency. Store bits in a dry, organized tray to prevent rust and nicks. For metal drilling, apply a suitable lubricant to reduce heat; for wood, keep bits clean of pitch build-up. Periodically inspect the chuck for excess wear and ensure it grips bits securely. Proper maintenance translates into longer bit life and fewer breakages during demanding projects.
Maintaining your toolkit is an investment in reliability and safety on every job.
Common Pitfalls and How to Avoid Them
Common pitfalls include forcing the bit through material when resistance is high, starting with a dull edge, and misaligning the bit. To avoid these issues, confirm the correct bit type before you begin, perform a light pilot hole when necessary, and secure your workpiece. Avoid drilling on a misaligned or unstable surface, which increases lateral stress and can cause breakage. If a bit starts to drift, stop and reposition. Use proper lubrication for metal drilling and avoid overheating wood bits by using slower speeds and cleaner holes. A calm, deliberate pace reduces stress on the cutting edge and your bit's integrity.
The result is straighter holes with less wear on your bits and better overall outcomes for your project.
Tools & Materials
- Drill (corded or cordless) with variable speed(Use variable speed for better control; avoid running at maximum speed on hard materials.)
- Assorted drill bits (HSS, cobalt, masonry) including pilot bits(Choose the right type for the material; keep sharp and organized.)
- Clamps or vise to secure workpiece(Prevent movement that leads to binding and breakage.)
- Center punch or marking tool(Create a precise starting point to prevent wandering.)
- Safety goggles and gloves(Protect eyes from chips and fingers from sharp edges.)
- Pilot bit (for larger holes) and countersink(Reduces stress on the main cutting edge and helps finishing.)
- Lubricant or cutting oil (for metal) or wax/pencil (wood)(Reduces heat and friction; use as appropriate for material.)
- Flat, stable work surface(Keeps the drill aligned and reduces wobble.)
Steps
Estimated time: 30-60 minutes
- 1
Inspect bits and workpiece
Examine all bits for nicks, chips, or dull edges. Check the workpiece for warping or debris and clamp securely. Identifying issues early avoids wasted effort and potential breakage.
Tip: If a bit shows any damage, replace it before starting. - 2
Secure the material
Clamp the workpiece firmly to prevent movement during drilling. A stable surface reduces binding and side-load on the bit.
Tip: Use two clamps for long or large pieces to prevent rotation. - 3
Mark starting point and drill a pilot hole
Use a center punch to create a small dimple. Start with a smaller pilot bit to guide the larger bit and reduce stress on the cutting edge.
Tip: Pilot holes should be about 1/3 the final hole diameter for metal and about 1/8 inch for small wood holes. - 4
Set correct speed and feed
Select a speed appropriate for the material and bit size. Apply light, steady pressure—let the bit do the cutting rather than forcing it.
Tip: If the bit binds, stop, remove chips, and re-enter at a slightly different angle. - 5
Lubricate where needed
Apply cutting oil or lubricant when drilling metal to reduce heat. For wood, ensure bits are clean of pitch and avoid overheating.
Tip: Lubrication is not always necessary—assess heat buildup and adjust accordingly. - 6
Withdraw and clear chips
Periodically pull the bit out to clear chips; reapply light pressure upon re-entry. This prevents chip buildup that can burn the edging.
Tip: Pause every few seconds during larger holes to keep the cut clean. - 7
Complete the hole and inspect
Finish at a controlled pace, then deburr edges if required. Inspect the hole for straightness and clean exit path.
Tip: If the bit has become warm, allow it to cool before continuing. - 8
Store and maintain tools
Wipe and dry bits after use, sharpen or replace dull edges, and store in a dry place. Routine maintenance pays off in longer bit life.
Tip: Keep a sharpening file or tool in your kit for quick touch-ups.
Got Questions?
What causes drill bits to break while drilling?
Breakage is usually caused by using the wrong bit for the material, excessive force, dull edges, poor workholding, or misalignment. Heat buildup also weakens the cutting edge and can lead to chipping or snapping. By addressing these factors, you reduce the risk of breakage.
Bits break when you push too hard, use the wrong bit, or drill with a dull edge. Ensure correct bit choice and stable workholding to reduce risk.
Can pilot holes prevent drill bit breakage?
Yes. Pilot holes guide the main bit, reduce binding, and lower cutting resistance. They are especially helpful for larger holes and harder materials. Start with a small pilot and expand gradually.
Pilot holes guide the bit and reduce stress, especially for bigger holes.
Should I use a drill press for fragile materials?
A drill press provides greater stability and perpendicularity, which minimizes uneven forces on the bit. It’s highly recommended for metal and masonry projects or when drilling precise holes.
A drill press helps keep things steady and straight, especially for metal or masonry.
How do I know when to replace a drill bit?
Look for dull edges, chips, discoloration, and reduced cutting efficiency. If the bit struggles to cut or overheats quickly, it’s time to replace or sharpen. Regular inspection saves effort in the long run.
If cutting gets slow or the bit looks worn, replace or sharpen.
Is lubrication necessary when drilling wood?
Lubrication is typically not required for soft woods, but it can reduce heat and prolong edge life for harder woods or high-speed drilling. Use a light touch and ensure clean, residue-free bits after use.
Lubrication helps in tough woods or high-speed drilling; otherwise, keep bits clean and sharp.
Watch Video
Top Takeaways
- Use the right bit for the material.
- Secure the workpiece to avoid movement.
- Start with a pilot hole for larger holes.
- Maintain sharp bits and appropriate speeds.
- Lubricate where needed to reduce heat and wear.