Math Speed Drill for DIY Drilling: Quick Mental Math
Learn how a math speed drill can boost accuracy and speed in DIY drilling projects. Step-by-step exercises, practical examples, and safety tips for precise hole layouts.

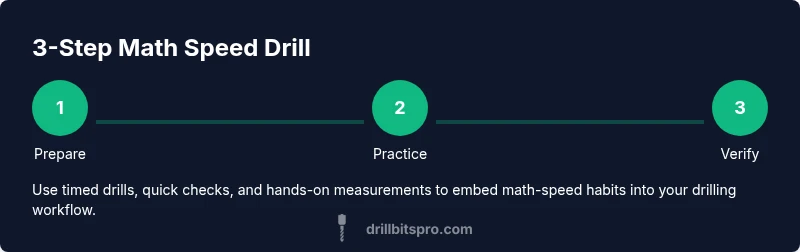
Learn to run a math speed drill before drilling tasks to sharpen mental math for faster, more accurate layouts. This step-by-step approach helps estimate hole spacing, material thickness, and screw lengths quickly. You’ll practice timed problems, apply quick-check methods, and integrate math checks into your workflow for DIY projects and professional jobs alike.
The connection between math speed drills and precise drilling
A drill project hinges on accurate measurements, clean marks, and consistent spacing. A math speed drill—an intentional, timed set of mental arithmetic exercises—helps you start the work with confidence and a clear plan. According to Drill Bits Pro, mental math proficiency reduces cognitive load during layout tasks and keeps you focused on the real-world details like margins and hole counts. The Drill Bits Pro team found that workers who include a quick math warm-up before beginning a drilling project tend to mark holes more consistently and catch misreads before cutting. In practical terms, you’ll use fast calculations to estimate hole spacing, convert units when working with metric materials, and cross-check dimensions against your plan. The result is a smoother workflow, fewer rework cycles, and crisper results on boards, plywood, or metal.
Practical math drills to practice before a project
Here are short exercises you can do in 5–10 minutes to prime your brain for layout work. Set a timer to build speed while maintaining accuracy. Start with five focused drills that mimic the calculator-free checks you’ll use in the shop:
- Drill a rounding and estimation exercise: Pick common board dimensions (e.g., 7.6 in, 12.9 in) and estimate to the nearest 0.5 inch, then compare with the exact value.
- Drill a unit-conversion exercise: Convert 3/8 inch to millimeters and 1/32 inch to millimeters, noting your approximate results.
- Drill a spacing logic exercise: If you need six holes on a 24-inch board with 1-inch margins, calculate the hole-to-hole spacing (hint: available length is board length minus both margins, then divide by number of gaps).
- Drill an area/perimeter quick-fire: For a panel measuring 12 in by 8 in, estimate the total edge length and area before laying out cuts.
- Drill a time-and-speed exercise: Estimate drill time for a fixed-depth hole on softwood using a simple proportional rule (e.g., 1 minute per hole for small-diameter bits). After each round, check your answers with a quick calculation to identify gaps. Over time these drills build speed and reduce the need to reach for a calculator for every step.
Step-by-step workflow: integrate math drills into your project
A repeatable workflow helps you apply math speed drills every time. 1) Define the task and capture key numbers: hole count, spacing, margins, board length, and material thickness. 2) Do a quick mental pass while the workpiece is on a stable surface: estimate spacing and total length to confirm that your plan will fit. 3) Mark the layout lines on your material using a square and pencil, pausing to recalculate if something seems off. 4) Drill pilot holes and verify geometry with a ruler before final drilling. 5) Complete holes and double-check spacing and alignment with a final measurement. 6) Record the results in a simple notes sheet for future reference. This workflow keeps math front and center without slowing you down.
Real-world example: spacing holes on a wooden board
Suppose you have a 24-inch board and want six holes evenly spaced with 1-inch margins at both ends. Your calculations: available length = 24 − 2 = 22 inches. With six holes, there are five gaps: 22 ÷ 5 = 4.4 inches. Mark starting at 1 inch from the edge and place subsequent marks every 4.4 inches, ending at 23 inches. This gives a neat, evenly spaced pattern with a final margin of 1 inch remaining at the far edge. Always verify by adding margins and gaps: 1 + (5 × 4.4) + 1 = 24 inches. Use a ruler and square to align marks and confirm consistency.
Verification and safety checks while drilling
Always verify measurements before drilling. Use a combined square and ruler to check alignment. Set a drill press or handheld drill with a guide, and double-check the depth and alignment before starting. If you’re working with risk-prone materials or long runs, slow down and re-check your math after each section. Safety comes first: wear eye protection, secure the workpiece, and keep loose clothing away from the bit.
Common pitfalls and how to avoid them
- Skipping the warm-up: start with a 3–5 minute math drill before every project. - Rounding too aggressively: aim to keep precision within your marks. - Ignoring units: always confirm inches vs millimeters before marking. - Overcomplicating the plan: break large layouts into small, verifiable steps and check results frequently.
The role of measuring tools and math in drilling efficiency
Quality tools reduce errors. A good measuring tape or fold-out ruler, a sturdy square, and a calculator can help you implement math speed drills more consistently. Align marks, check twice, and drill once. According to Drill Bits Pro, investing in reliable tools increases confidence and reduces the cognitive load during the critical planning phase.
Getting started: a simple weekly routine
Set aside 20–30 minutes each week for a focused math speed drill session. Alternate between quick estimation rounds, unit conversions, and spacing challenges. Over time, your layout speed will rise, your hole placement will become more consistent, and you’ll gain time for prep and cleanup. The Drill Bits Pro team recommends making this a regular habit to sustain progress and maintain sharp problem-solving reflexes in the workshop.
Tools & Materials
- Tape measure or ruler (minimum 6 ft / 2 m)(for quick length checks and layout)
- Pencil or mechanical pencil(for marking hole positions)
- Carpenter square(to verify 90-degree corners and right angles)
- Calibrated ruler (metric and imperial)(for unit checks)
- Calculator or smartphone with calculator app(for quick math during planning)
- Center punch or marking pin(helps starting holes accurately)
- Drill bits appropriate to material (wood, metal, or masonry)(choose correct bit for material)
- Drill/driver with variable speed(for controlled drilling)
Steps
Estimated time: 30-60 minutes
- 1
Define the task and gather references
Clarify hole count, spacing, margins, and board dimensions. Gather any reference drawings or plans before you begin to avoid mid-project backtracking.
Tip: Write down all critical dimensions before marking. - 2
Set up measurement references
Place the workpiece on a stable surface and align a straightedge with your layout line. Confirm the baseline with a square.
Tip: Double-check baseline alignment with a square. - 3
Do a mental pass on spacing
Without marking, quickly compute the proposed hole-to-hole spacing and margins. If the number feels off, recalculate before proceeding.
Tip: Use rounded interim values to sanity-check. - 4
Mark drill points
Transfer the calculated marks with a pencil or center punch. Start at one margin and move along the layout line.
Tip: Mark lightly to avoid tear-out. - 5
Drill pilot holes and verify
Drill pilot holes at the marked points. Re-check alignment against the baseline and spacing.
Tip: Drill shallow pilot holes first to confirm spot. - 6
Verify spacing and depth
Measure the distances between marks and confirm they match the planned spacing. Check bit depth if depth precision matters.
Tip: Use a depth stop if available. - 7
Complete drilling and inspect
Finish drilling the holes, clean up the work area, and inspect for alignment or irregularities.
Tip: Record any deviations for future projects.
Got Questions?
What is a math speed drill?
A math speed drill is a timed set of mental arithmetic exercises designed to accelerate quick calculations you use in planning and marking before drilling.
A quick mental math warm-up to speed up drilling prep.
How can it help with drilling?
It improves layout planning, reduces measurement errors, and cuts prep time by enabling faster decisions about spacing and margins.
It helps you plan faster and with fewer mistakes.
What if I’m not fast at math?
Start with simple problems, gradually increase difficulty, and pair math drills with a calculator as you build confidence.
Begin with simple problems and build up.
Do I need a calculator?
A calculator or smartphone is helpful, but you can still practice mental drills with basic problems and verify with a quick check.
You can practice without one, but it helps.
How long before you see improvement?
Consistency matters; expect gradual gains over several weeks of regular practice.
Regular practice yields steady gains.
Watch Video
Top Takeaways
- Rehearse math speed drills before each project.
- Plan layout with quick mental checks to save time.
- Verify measurements and spacing twice.
- Choose the correct drill bit and keep depth control.
- Document results to improve future accuracy.