7-Min Drill: Quick, Repeatable Drilling Guide
Master a 7 min drill that delivers quick, clean holes with safety and consistency. This step-by-step guide covers prep, timing, and verification for DIY and professional projects.

Learn a focused 7 min drill to complete a drilling task quickly, safely, and with consistent results. This guide outlines a 7–10 minute workflow: plan the hole, prepare the workspace, run a timed sequence, and verify accuracy. By sticking to a tight routine, you reduce rework and improve accuracy in DIY projects.
What is the 7 min drill and why it works
According to Drill Bits Pro, the 7 min drill is a time-boxed, repeatable drilling workflow designed to deliver fast, reliable holes with minimal setup. The idea is to compress planning, alignment, cutting, and verification into a tight sequence that you can repeat on similar tasks. The approach reduces misalignment, improves consistency, and lowers the risk of mistakes. For DIY enthusiasts and professionals alike, mastering this routine pays off by saving minutes per project while maintaining safety and quality. The core principle is simple: preparation, precise starts, controlled drilling, and quick checks, all within a short window. By following a fixed protocol, you can predict outcomes and improve efficiency in busy workdays.
Safety and workspace setup for speed
Speed is useful, but only if safety and stability are prioritized. Before you begin, clear the work area, secure the workpiece with clamps, and wear eye protection. Establish a clean spot for measuring and marking, and set the drill's clutch or torque to prevent overdriving. Use a center punch to create a precise starting point; this reduces wandering. Keep cords away from the drilling zone to avoid tangling. The combination of a stable setup and PPE ensures you can hit the mark quickly while protecting yourself. In the 7 min drill workflow, you’ll also verify the drill bit is sharp and correctly aligned before you start, which saves minutes later by reducing misdirection and rework.
Adapting the protocol to different materials
Different materials require different bits, speeds, and depths. For wood, use a sharp bit and a fast but controlled feed; avoid tearing by using a crisp pilot and consistent pressure. For plastic, choose a sharp bit and a slow feed to minimize heat and melting. For metal, pre-punch and drill at slower speeds with cutting oil; deburr edges afterward. The 7 min drill is adaptable: adjust the final diameter, use a pilot hole, and deburr. Always validate edge quality with a quick visual check and a smooth feel of the edge to confirm you’ve achieved a clean exit. In busy shops, rehearse the sequence on sacrificial stock to lock down timing and technique.
Tools & Materials
- Cordless or corded drill(18V+ cordless is common; choose one with a clutch)
- HSS or carbide-tipped drill bits(Select pilot bit (e.g., 1/8 in) plus final diameter)
- Center punch(Marks starting point to prevent wandering)
- Clamps or a vise(Secure the workpiece firmly)
- Tape measure or ruler(Helpful for marking depth or position)
- Safety glasses(Eye protection at all times)
- Lubricant or cutting oil (for metal)(Reduce heat and extend bit life)
Steps
Estimated time: 7-10 minutes
- 1
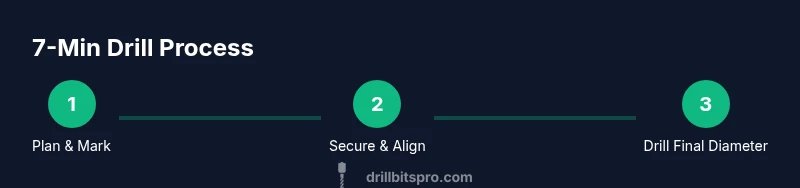
Plan and mark
Identify the hole location, measure its center, and mark with a center punch. This ensures a precise start and reduces wandering once the drill begins.
Tip: Verify marker alignment from multiple angles to avoid offset. - 2
Secure the workpiece
Clamp the material firmly to a stable surface or workbench to prevent movement during drilling. A steady base improves accuracy and safety.
Tip: Use a backup block under the workpiece if you can't clamp securely. - 3
Choose bit and set speed
Select the appropriate bit for the material and set an appropriate speed. Slower speeds and larger bits require more care; pilot holes help control drift.
Tip: Start with a small pilot hole if final diameter is large. - 4
Drill a pilot hole
Drill a shallow pilot hole at the marked center to guide the final hole. This reduces breakout and ensures concentricity.
Tip: Keep the drill perpendicular to the surface for a clean exit. - 5
Drill to final diameter and deburr
Gradually drill to the final diameter, then deburr the edge with a small file or sandpaper for a clean finish.
Tip: Back off slightly before the final pass to avoid chip-out. - 6
Inspect and cleanup
Inspect hole for alignment, diameter, and edge quality. Wipe away dust and store tools properly to finish the drill.
Tip: Note any deviations for future refinements.
Got Questions?
What is a 7 min drill?
A time-boxed drilling workflow designed to complete a small hole task in about seven minutes, including planning, setup, drilling, and verification.
It's a quick, time-boxed drilling routine that fits in seven minutes.
What safety gear do I need?
Wear safety glasses, secure the workpiece, and keep sleeves and hair away from the drill. Use gloves with caution to avoid entanglement.
Wear eye protection and secure the workpiece before starting.
Can the 7 min drill be used on metal?
Yes, but you’ll use slower speeds, cutting oil, and a pilot hole to manage heat and ensure smooth cutting.
Yes, adjust speed and lubrication for metal.
How do I know if my hole is the right size?
Compare the hole diameter to the final diameter using a caliper or go/no-go gauge and check for clean entry and exit.
Measure with a caliper to confirm size.
What if I run out of time?
Pause, resume the drill with a quick 2–3 minute follow-up pass, and adjust tool speed if needed.
If time runs out, finish with a quick follow-up pass.
Watch Video
Top Takeaways
- Plan before you drill and mark precisely.
- Secure the workpiece to prevent movement.
- Time-box the process to around 7 minutes.
- Verify hole size and deburr for a clean finish.