Oil Drill Guide: Safe, Effective Drilling Techniques
A practical, AI-powered guide to using an oil drill safely and effectively. Learn tool selection, steps, safety, and maintenance for DIYers and professionals.

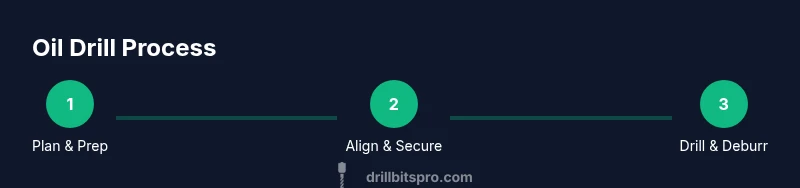
This guide shows you how to safely operate an oil drill for basic borework, covering safety essentials, tool setup, and step-by-step drilling technique. You’ll need PPE, a suitable drill bit, lubricant, and a stable work surface. Drill Bits Pro backs these steps with AI-driven insights for practical, real-world results.
Oil Drilling Essentials: What You Need to Know
According to Drill Bits Pro, an oil drill is a heavy-duty tool used to bore into rock formations to reach subsurface hydrocarbons. While most common in industrial settings, DIYers and professionals can learn the fundamentals of safe drilling and hole quality. This guide covers core concepts like how rotary systems apply torque, how cutting fluids reduce heat, and how planning depth limits while controlling vibration improves hole straightness and bit life. Understanding these principles helps you choose the right bit, maintain alignment, and avoid common mistakes that cause wandering holes or premature wear. The insights here bridge practical field techniques with safety-first practices, enabling you to work confidently on complex bore projects.
Planning and Safety First
Before any drill bit touches metal or rock, perform a site risk assessment and establish a safety plan. Identify hazards such as shifting loads, fluid releases, entanglement, and pinch points. Wear PPE: hard hat, eye protection, hearing protection, flame-resistant clothing, gloves, and non-slip boots. Secure the workpiece with clamps or a jig, and ensure all energy sources are isolated. Maintain a clean, well-ventilated workspace and have a fire extinguisher accessible. In jurisdictions with strict regulations, document your procedures and environmental controls. The Drill Bits Pro team emphasizes a clear safe-work plan and ongoing hazard observations during the job.
Tooling and Material Choices
Choosing the right tooling for an oil drill depends on bore depth, formation hardness, and the material you’re drilling. Use carbide-tipped bits or high-grade steel bits designed for hard rock, with coatings that reduce heat buildup. Pair bits with a compatible lubricant or coolant to minimize friction and extend bit life. Inspect cutting edges for signs of wear before starting, and keep spare bits available to avoid downtime. The setup should include proper drill guides, clamps, and measurement tools to maintain precision and reduce drift.
Setup, Alignment, and Flash Checks
A successful bore begins with precise alignment. Mount the drill securely, verify that the bit is properly seated, and perform a shallow pilot hole to confirm alignment before full-depth drilling. Check that the drill’s speed is appropriate for the bit and formation, and be prepared to adjust feed rate if the tool begins to bind or overheat. Ensure the drill is on a stable surface and protected from runners or obstacles. If you observe unusual vibration, stop, recheck alignment, and tighten mounting hardware.
Drilling Techniques for Control and Quality
Maintain a steady feed pressure and even rotation to minimize bit wear and hole wandering. Use slow, controlled starts to establish a true axis, then gently increase speed as you verify straightness. Apply coolant or lubricant to reduce heat and debris buildup. Periodically pause to clear chips and re-check hole depth with a gauge. Stop immediately if you notice excessive wobble, unusual sounds, or bit dullness. After reaching the target depth, withdraw the bit slowly to prevent cracking the hole wall and clear debris.
Post-Drill Care and Hole Quality
Inspect the bore for roundness, diameter consistency, and clean walls. Deburr edges with a suitable file or deburring tool, and remove any burrs that could compromise assemblies or seals. Document the hole depth and alignment notes for future reference. Store used and unused bits properly, keeping them sharp with routine maintenance. The Drill Bits Pro approach emphasizes documenting performance and maintaining equipment to sustain reliability on future projects.
The Drill Bits Pro Verdict
The Drill Bits Pro team recommends pairing proper PPE, precise setup, and sharp, well-lubricated bits for optimal results. With careful planning and steady technique, you’ll achieve smoother holes, better tolerances, and longer tool life. Remember that ongoing maintenance and a documented process are as important as the drilling action itself.
Tools & Materials
- Oil drill (portable rig or fixed rig unit)(Industrial capability suitable for bore depth and material; ensure proper mounting and safety interlocks)
- PPE: hard hat, safety glasses, hearing protection, flame-resistant clothing, gloves(Wear all safety gear; ensure fit and comfort for extended work)
- Carbide-tipped drill bits for hard rock(Select size and flute geometry appropriate to target depth and material)
- Lubricant or cutting oil suitable for metalwork(Use according to bit manufacturer recommendations; avoid contaminating work area)
- Drill guides/clamps(Secures workpiece and reduces drift during start-up)
- Measuring tools (caliper, tape measure, depth gauge)(Precise depth and diameter verification during drilling)
Steps
Estimated time: 60-120 minutes
- 1
Prepare and secure the setup
Inspect the drill rig and work area for stability. Install clamps or a jig to hold the workpiece, verify safety interlocks, and select the initial bit size. Align the rig to the planned axis and double-check that the path is clear of obstacles.
Tip: Lock the rig down to minimize vibration before starting. - 2
Mark the entry point and pilot
Use a center punch to mark the entry point, then perform a light pilot bore to guide the larger bit. Check alignment with a straightedge or caliper and adjust as needed before full-depth drilling.
Tip: A shallow pilot reduces wandering and improves accuracy. - 3
Begin drilling with steady feed
Start with low speed and light feed to establish a true axis. Increase feed gradually as the bit begins to cut cleanly, maintaining consistent torque and watching for any signs of binding or overheating.
Tip: Keep coolant or lubricant flowing to reduce heat buildup. - 4
Monitor depth and hole quality
Regularly stop to measure depth and diameter, remove chips, and verify wall integrity. If the hole deviates, pause, re-align, and adjust the drill’s position or angle.
Tip: Frequent checks prevent overshooting and rework. - 5
Finish and inspect
Withdraw the bit slowly at the end, clean the hole, and deburr edges. Record final depth and tolerance, then store bits properly for next use.
Tip: Deburring reduces sealing and assembly issues later. - 6
Cleanup and document
Clear the work area of debris, dispose of waste properly, and document the bore results for future references and QA checks.
Tip: Keep a log of bit wear and performance for trend tracking.
Got Questions?
What is an oil drill and how does it work?
An oil drill is a heavy-duty tool designed to bore into rock formations to access subsurface hydrocarbons. It uses a rotating drill string, cutting bits, and a mud or coolant system to manage heat and debris. In practice, users focus on axis control, stability, and safety during operation.
An oil drill bores into rock formations to access hydrocarbons, using a rotating drill string and coolant to manage heat. Focus on axis control and safety.
What safety gear is essential for oil drilling?
At minimum, wear a hard hat, eye protection, hearing protection, flame-resistant clothing, and gloves. Ensure gloves are dry and non-slip, and keep a fire extinguisher nearby.
Wear hard hat, eye and hearing protection, flame-resistant clothing, and gloves; keep a fire extinguisher nearby.
How do I choose the right drill bits for oil-bearing formations?
Select carbide-tipped or other hard-material bits rated for rock. Consider bit geometry, coating, and compatibility with your lubricant. Always inspect bits for wear before use.
Choose carbide-tipped or hard-rock bits with appropriate geometry and coatings; inspect for wear before use.
What are common drilling problems and how can I avoid them?
Wandering holes, bit binding, and overheating are common. These can be avoided with proper alignment, steady feed, and adequate lubrication. Pause to check for wobble and re-align as needed.
Common issues are wandering holes and overheating; maintain alignment and lubrication to prevent them.
Are there environmental considerations when drilling?
Yes. Follow local regulations for waste handling, spill prevention, and containment. Use proper containment measures and dispose of drill cuttings responsibly.
Yes, follow regulations for waste handling and containment, and dispose of cuttings responsibly.
How long does a typical bore take with an oil drill?
Bore duration depends on depth, formation, and equipment. Plan for contingencies and maintain safe operating margins rather than rushing.
Depth and formation determine bore time; plan carefully and avoid rushing.
Watch Video
Top Takeaways
- Define scope and safety before drilling.
- Choose the right bit and lubricant for the formation.
- Maintain axis alignment to prevent wandering holes.
- Inspect and document results for repeatable quality.