Soccer Drill for 8 Year Olds: Safe, Fun, and Effective Practice
Practical, kid-friendly soccer drills for 8-year-olds that build confidence, motor skills, and teamwork through safe, engaging, station-based practice plans and clear coaching cues.

You will run a safe, engaging soccer drill for 8 year olds that builds dribbling, passing, and shooting basics in a 45-minute session using 4 stations, clear cues, and simple coaching language. This guide outlines station setup, kid-friendly progressions, safety protocols, and coaching cues to keep 8-year-olds motivated and learning through play.
What makes a soccer drill suitable for 8-year-olds?
At this age, players are developing fundamental motor skills and basic game understanding. A soccer drill for 8 year olds should balance challenge with success to build confidence and keep motivation high. Use short, clear instructions, simple demonstrations, and lots of positive feedback. Keep drills fun, safe, and inclusive so every child participates. Emphasize ball control, spatial awareness, and teamwork rather than competition. Gentle progression in complexity helps players advance without frustration. Also consider individual pacing, as some players pick up skills faster than others. Finally, ensure the space is age-appropriate: a small grid with soft foam balls reduces pressure and accident risk. By focusing on technique, not scorekeeping, you create a love of the game that lasts beyond youth leagues. In this guide, we’ll outline a practical approach to implementing a soccer drill for 8 year olds that emphasizes skill-building and enjoyment.
Safety and coaching principles
Safety and thoughtful coaching are the foundation of any soccer drill for 8 year olds. Begin with a dynamic warm-up to raise heart rate safely and reduce injury risk. Keep drills within a kid-friendly space, use soft balls or size-3 balls, and ensure proper supervision with an air of encouragement rather than pressure. Hydration breaks should be integrated, especially in warmer weather. Clear rules and expectations set a positive tone—emphasize effort, teamwork, and respect for teammates and opponents. Positive reinforcement helps kids understand what they’re doing well and what to improve without feeling discouraged. For parents and assistants, establish simple communication protocols so instructions stay clear and consistent. According to Drill Bits Pro, maintaining safety and clear guidance is the quickest path to long-term participation and enjoyment.
Core skills to develop: dribbling, passing, receiving, shooting
The core skills in a soccer drill for 8 year olds are the building blocks of future performance: dribbling with both feet, accurate short passes, first touch control, and simple finishing technique. Dribbling drills should focus on ball feel and coordination rather than speed, using small gates or cones to encourage tight control. Passing activities should emphasize accuracy and tempo, with partners standing close enough to encourage quick decisions. Receiving work, with soft touches and spatial awareness, helps kids orient to where teammates and defenders are. Finishing practice can start with simple, target-based shots, reinforcing technique and goal-scanning. A well-rounded session rotates through these fundamentals, ensuring kids leave with a sense of achievement and concrete skills to practice at home. Throughout, coaches should model positive body language and celebrate small wins to build confidence.
4-station drill plan: setup and flow
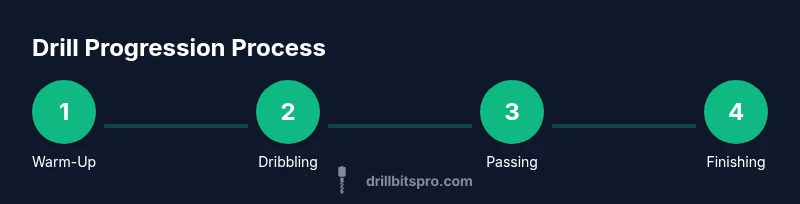
A four-station format keeps young players engaged and allows frequent rotation. Station 1 (Dribbling Relay) uses gate cones for quick, controlled dribbles. Station 2 (Passing Pairs) reinforces contact points and weight of pass. Station 3 (Receiving & Control) focuses on first touch and shield. Station 4 (Finishing) uses a small goal or target to emphasize accuracy. Each station should last 6–8 minutes with a 30–60 second rotation break. A quick group regroup after each round ensures visibility and feedback. For 8-year-olds, short, high-energy blocks achieve better retention than long, repetitive drills. Include a few quick challenges or mini-games within stations to maintain a playful atmosphere.
Progressions to challenge beginner players
As players master the basics, introduce light pressure by adding a passive defender or reducing space between gates. Increase task complexity gradually: combine dribbling with a pass into a moving target, or add a two-touch finishing sequence. Alternate routines with different themes (speed, accuracy, decision making) to avoid stagnation. For players needing more support, offer one-on-one coaching during transitions or pair them with a peer buddy. Always ensure progressions remain within a child’s capability; the goal is confidence-building and joy in the game, not perfection. Short feedback loops reinforce success, maintaining momentum across the session.
How to keep sessions organized and engaging
Structure is essential when coaching a soccer drill for 8 year olds. Start with a quick intro, then rotate through stations in predictable order, using a timer and visual cues to keep pace. Use color-coded bibs or flags to distinguish groups, and assign a station captain to explain tasks and demonstrate. Praise effort, not just results, and celebrate small improvements with badges or fun cheers. Snackable, game-like elements—like relay challenges or saving targets—help maintain high energy and attention. A clear end-of-session reflection invites kids to share what they learned and what they’d like to practice next time.
Adapting for different skill levels and group sizes
Not all players develop at the same rate. For a mixed group, implement three tiered tasks at each station: a basic, a steady, and a challenge version. This allows players to stay within their zone of proximal development while still feeling part of the team. If the class is large, split into smaller groups with rotating roles to ensure everyone participates. When space is limited, reduce the number of stations and use a larger grid to reduce crowding. Always include a quick, inclusive warm-up to bring late arrivals into the flow without singling anyone out.
Common mistakes and how to fix them
Common mistakes include overly complex instructions, excessive talking, and neglecting safety checks. To fix this, demonstrate tasks once, then step back and let kids try with minimal input. Use simple cues like “tap, pass, receive” or “dribble to the cone and back” to keep language short. Ensure equipment is safe and accessible; replace worn balls and check for uneven ground. Finally, monitor hydration and fatigue. If kids struggle, slow the pace and return to fundamentals before pushing forward.
Field setup and equipment tips
Plan the layout before players arrive. A 20–30 meter square grid offers enough space for fundamentals without overwhelming beginners. Use bright cones and clearly marked goals or targets to guide activity. Keep equipment within easy reach to minimize downtime between stations. Ensure the playing surface is safe; remove debris and check for hazards. Providing a dedicated water zone and shaded rest area helps keep learning sustainable throughout the session.
Tools & Materials
- Soccer balls (size 3 for most 8-year-olds)(Size 3 is typically appropriate; size 4 can be used if players master the basics and leagues permit.)
- Cones or markers(Set up 4–6 cones per station to create gates and paths.)
- Pinnies/Pennies(Different colors help distinguish groups or stations.)
- Whistle(Used to start/stop drills and signal transitions.)
- Water bottles(Hydration breaks between stations are essential.)
- First aid kit(Basic supplies for minor scrapes or heat-related issues.)
- Tarp or mat(Place under equipment to prevent ball roll-aways on hard surfaces.)
Steps
Estimated time: 60-75 minutes
- 1
Warm up and safety checks
Begin with light jogging and dynamic stretches to prepare muscles. Quick safety checks include ensuring the field is clear of hazards and all balls are properly inflated. Briefly explain expectations and structure for the session.
Tip: Keep the warm-up under 7 minutes and model each movement before letting kids copy. - 2
Brief players and set up stations
Gather the group, outline station goals, and demonstrate the first drill. Assign a point person at each station to guide newcomers and keep transitions smooth.
Tip: Use a simple, visual timetable and color-coded bibs to minimize confusion. - 3
Station 1: Dribbling relay
Kids dribble through gates in a relay format, focusing on close ball control and using both feet. Rotate groups after a set number of reps to maintain energy.
Tip: Encourage soft touches and head up to scan space. - 4
Station 2: Passing in pairs
Pairs stand a short distance apart, passing back and forth with correct weight and accuracy. Emphasize staying on the balls of the feet and locked ankles.
Tip: Provide immediate feedback on contact and follow-through. - 5
Station 3: Receiving and control
One touch receiving into space, then a light pass to a target. Focus on a soft first touch and keeping the ball close.
Tip: If a player mishits, adjust distance and remind them to slow the touch. - 6
Station 4: Finishing with targets
Players take a controlled shot at a small goal or target, aiming for accuracy over power.
Tip: Encourage aiming for corners or designated target zones. - 7
Cool down and reflection
Group jog or walk, followed by light stretching. End with a quick discussion: what did you learn and what would you like to practice next time?
Tip: Keep it positive and inclusive; invite volunteers to share one success.
Got Questions?
What ball size should I use for an 8-year-old in drills?
For most 8-year-olds, a size 3 ball is ideal. Some players with larger hands or feet or leagues that permit it may use a size 4 ball for more control. Check your local league guidelines and adjust accordingly.
Use a size 3 ball for most players, or size 4 if permitted by your league and the players’ comfort.
How long should a practice session last for 8-year-olds?
Keep sessions short and focused, usually around 45 to 60 minutes, with high-energy drills and frequent breaks. Structure warm-up, main activities, and a brief cooldown to prevent fatigue.
Aim for 45 to 60 minutes with short, energetic drills and a quick cooldown.
How can I keep kids with different skill levels engaged?
Group players by similar skill within stations or assign optional progressions for advanced players. Regularly rotate roles to ensure everyone participates and feels successful.
Create easy, medium, and hard options so every kid can participate and improve.
What if a child is not interested or anxious about drills?
Pair them with a friendly buddy, adjust the drill to a simpler version, and emphasize fun and social aspects of the activity. Offer a choice of tasks to regain motivation.
Pair them with a buddy and keep things light and fun.
Can these drills be adapted for indoor spaces?
Yes. Shorten distances, use smaller goals, and substitute light, soft balls to reduce risk of injury. Maintain clear instructions and quick transitions.
Yes—scale down space and equipment for indoor play.
How do I ensure safety during drills?
Inspect the space beforehand, use appropriate ball sizes, and monitor players for fatigue and signs of heat stress. Enforce gentle contact and immediate stop if a player is injured.
Do safety checks at the start and watch players closely for fatigue.
Watch Video
Top Takeaways
- Plan a clear, kid-friendly session with short activities.
- Prioritize safety, fun, and skill-building over competition.
- Rotate players through stations to maximize engagement.
- Use simple cues and positive feedback to reinforce learning.
- Adapt drills to fit space and skill level without sacrificing progress.