Volleyball Drill for Beginners: A Step-by-Step Guide
A practical, educator-friendly guide for beginners to learn passing, setting, serving, and footwork through progressive drills. Build fundamentals safely and efficiently for volleyball players.

This volleyball drill for beginners builds the fundamentals you need: passing, setting, serving, and footwork. The plan starts with a simple wall drill and progresses to short partner sequences that mirror game play, all in a safe, coach-friendly progression. Expect a 60-minute session with clear steps and practical tips that fit gyms or home courts.
Why volleyball drill for beginners matters
Volleyball is a dynamic team sport that rewards rhythm, communication, and consistent technique. For newcomers, a well-designed drill sequence accelerates learning by isolating skills, reducing unproductive movements, and building confidence. According to Drill Bits Pro, a structured beginner program should start with foundational movements and progress through controlled repetitions, gradually increasing complexity while keeping safety as a priority. The goal is to translate practice habits into game-ready decisions, even before stepping onto a full court. In this guide, you will learn the essential movements for beginners, including the forearm pass, overhead set, and controlled serve, plus safe warm-up routines that reduce the risk of shoulder and wrist strain. The drills emphasize steady progression, minimal equipment, and measurable milestones so players can see their improvement over time.
Core fundamentals beginners should master
- Ready position: Feet shoulder-width apart, knees slightly bent, weight on the balls of your feet, and eyes on the ball. This stance lets you react quickly and maintain balance during any contact.
- Platform and contact: For forearm passes, keep forearms together with relaxed wrists and a flat, stable platform. The contact should happen on the forearms, not the palms, to ensure control.
- Overhead set fundamentals: Hands form a triangle above the forehead, fingers spread, and wrists snap on release. A clean set directs the ball accurately to a teammate and reduces double-contact errors.
- Communication: Call for the ball and use clear cues with your partner. Strong communication reduces mis-hits and helps teammates anticipate plays.
- Footwork basics: Small, quick steps beat large, clumsy movements. Practice a three-step pattern (approach, adjust, contact) to position yourself for successful passes and sets.
- Breath control and tempo: Maintain steady breathing to stay relaxed during contact. A calm tempo improves touch and reduces mis-hits.
Warm-up and safety considerations
Warm-ups should incrementally raise heart rate and mobilize joints commonly used in volleyball. Begin with 5–7 minutes of light jogging, then perform dynamic stretches targeting the shoulders, hips, ankles, and wrists. Shoulder circles, arm swings, leg swings, and ankle hops are effective. Hydration is essential, and players should avoid overexertion that strains the shoulder or back. If you have a past shoulder or knee injury, adjust ranges and consult a coach or trainer before attempting new drills. A well-structured warm-up reduces injury risk and improves touch on the ball.
Drill progression: from solo practice to partner drills
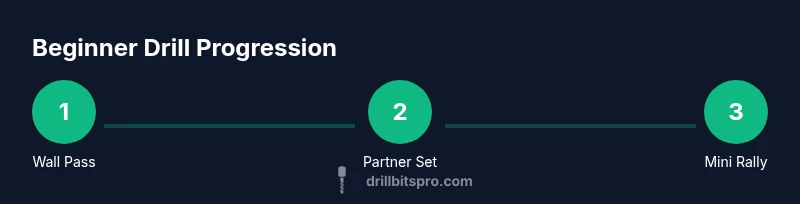
Beginners should move through a logical progression: solo wall work to partner-based drills, then small-sided games. Start with wall passes to build contact confidence, then transition to two-person drills that emphasize target passing. As consistency grows, introduce simple sequences like pass-set-pass, then move to short rallies with timed targets. This progression keeps drills manageable while providing clear milestones for improvement.
Essential drills: forearm pass, set, and service skills
- Forearm pass (bump): Focus on a stable platform, quick footwork, and directed contact. Wall or partner drills help you reinforce contact point and angle. Use a consistent pocket to guide the ball to a preferred target.
- Overhead set: Practice triangle hand position, eye contact, and an efficient release. Begin with stationary sets and advance to light tosses to simulate game-like pressure.
- Underhand/overhand serve basics: Start with a gentle toss and a controlled contact to build consistency. Aim for a target on the receiving side of the net to develop accuracy.
- Movement drills: Combine passing, setting, and lightweight serving while moving to a designated target zone. These drills link individual skills to on-court decision-making.
Sample 60-minute practice plan for beginners
- 0-5 minutes: Dynamic warm-up and mobility drills for shoulders, hips, ankles, and wrists.
- 5-15 minutes: Wall forearm passes to build touch and confidence with contact.
- 15-25 minutes: Partner forearm passes and settled sets, focusing on keeping hands and arms aligned.
- 25-40 minutes: Short rally sequences with a partner, alternating roles to emphasize communication and positioning.
- 40-50 minutes: Serve basics with toss practice; aim for a consistent contact and controlled flight.
- 50-60 minutes: Cool-down, review key corrections, and reflect on progress with a quick video review if possible.
Common mistakes and how to fix them
- Forearm pass too high or too low: Maintain a flat platform and contact the ball in the lower forearms. Visualize guiding the ball with your elbows and wrists to reduce bobbling.
- Set with sloppy fingers: Keep your fingers pointed upward and wrists relaxed. Use the fingertips to control spin and direction rather than relying on arm strength alone.
- Poor serve toss: A predictable toss makes serving mechanics hard to control. Practice a consistent toss height and location before striking the ball.
- Poor footwork: Narrow stances lead to late contact. Step into contact using a three-step approach to improve balance and reach.
How to measure progress and when to advance
Track improvements by consistency of contact, accuracy to targets, and transition speed between skills. Use simple targets on the wall or floor markers to estimate your hit zone or pass receive accuracy. When you can hit your targets reliably in practice with minimal coaching, you’re ready to introduce more complex drills or add a partner to increase game-like pressure.
Home practice equipment and space
Minimal equipment is enough for beginners: a volleyball, a wall or partner, and room to move. Mark boundaries with cones to create target zones and simulate court lines. If you lack a net, you can train with a chair or rope as an improvised net for timing and reach, but always ensure a safe, clear environment and proper footwear.
Tools & Materials
- Volleyball (size appropriate for age/level)(Indoor or outdoor ball; beginner-friendly model recommended)
- Walls or practice partner(Wall works for solo drills; partner needed for passing/setting sequences)
- Non-marking indoor shoes or court shoes(Supportiveity and grip; avoid running shoes that twist ankle)
- Boundary markers (cones or tape)(Create target zones for passes and sets)
- Net substitute (chair or rope)(Useful if practicing at home without a proper net)
- Water bottle and towel(Hydration and sweat management)
- Ball-friendly wall or partner surface(Soft rebound surface reduces impact on hands)
Steps
Estimated time: 60-75 minutes
- 1
Set up practice space and warm up
Clear a safe area, mark boundaries with cones, and perform a light jog followed by dynamic stretches to ready the shoulders and hips. A proper warm-up reduces injury risk and primes your touch for the first drills.
Tip: Do a quick shoulder circle sequence to loosen the joint before contact. - 2
Adopt the ready position and stance
Stand with feet shoulder-width apart, knees soft, and weight forward. Keep elbows relaxed and ready to cushion contact with a quick reaction to the ball.
Tip: Lightly bounce on the balls of your feet to maintain readiness. - 3
Master the forearm pass
Create a flat platform with forearms together, wrists relaxed, and contact on the lower forearms. Practice stationary passes against a wall to build consistent touch.
Tip: Keep eyes on the ball and lead with your elbows to guide direction. - 4
Wall drill to develop touch
Stand 6–8 feet from a wall and perform continuous forearm passes, aiming for a steady return to a designated target on the wall. This builds rhythm and accuracy without a partner.
Tip: Reset after each pass and focus on a smooth contact rather than power. - 5
Introduce overhead setting basics
Form the hands into a triangle above your forehead, lightly touch the ball with fingertips, and release with a controlled arc toward a target. Start with stationary tosses and progress to gentle tosses from a partner.
Tip: Keep the wrists relaxed and wrists snap on contact for control. - 6
Short partner drills for passing and setting
Pair up and alternate passing and setting sequences. Focus on communicating target zones and maintaining a soft touch to avoid double-contact errors.
Tip: Call for the ball and give your partner a clear cue for the next hit. - 7
Introduce serving basics
Practice a controlled serve with a consistent toss and a simple contact, aiming for a designated court area. Start with a short distance and gradually increase range as accuracy improves.
Tip: Toss height should be stable; avoid throwing toward your own head. - 8
Combine skills into a short sequence
Run a 6–8 sequence: pass, set, and serve, then recover to ready position. This links individual skills and starts building game-like flow.
Tip: Keep communication up; point to where you want the ball to go. - 9
Cool-down and review progress
Finish with light jogging or walking, then gentle stretches for shoulders, back, and legs. Review video or notes to identify one improvement for next session.
Tip: Note one successful touch and one area for improvement.
Got Questions?
What is the best beginner drill to start with for passing?
Begin with the forearm pass against a wall to develop reliable contact and feel. Progress to partner passing once you can control returns to a target consistently.
Start with wall passes to build touch, then move to partner passes as your control improves.
Can beginners practice volleyball drills alone?
Yes. Use a wall for solo drills to practice passes and sets, then bring in a partner for larger drills once basic form is established.
Yes, you can practice alone with a wall, then add a partner to build game-like rhythm.
How do I correct common passing mistakes?
Focus on keeping a flat platform, guiding the ball with your forearms, and maintaining consistent contact. Record yourself and compare to a model to identify where contact breaks down.
Keep a flat platform and check your contact point with a mirror or video.
What equipment is essential for home practice?
A volleyball, a wall or partner surface, cones for targets, and proper footwear are essential. A net substitute is optional but helpful for range and timing.
You need a ball, a wall or partner, and space to practice safely.
When should a beginner progress to more advanced drills?
Progress when you can consistently perform the fundamental touches with proper form and target accuracy. Pushing too soon can reinforce bad habits.
Move on when your basics are clean and you can hit targets reliably.
Is it safe to practice drills without a coach?
Yes, with proper warm-up, clear targets, and mindful technique. Use video reviews to self-correct and consider occasional coaching for feedback.
Yes—practice safely with warm-ups and use video to guide improvements.
Watch Video
Top Takeaways
- Master the forearm pass with a flat platform
- Progress from wall work to partner drills
- Maintain a consistent toss for serves
- Review progress to know when to advance