Volleyball Drill: A Complete How-To Guide
Master a complete volleyball drill with warm-ups, skill stations, progression drills, and coaching cues designed for players of all ages and skill levels. Learn session design, safety, and practical tips for consistent improvement.

This guide helps you run a focused volleyball drill session that builds passing, setting, serving, and defense in a structured practice. You'll learn how to design warm-ups, skill stations, progression drills, and coaching cues for players of all levels. According to Drill Bits Pro, a well-planned drill sequence boosts efficiency, confidence, and on-court decision-making.
Overview and goals of volleyball drill
A volleyball drill is a structured practice sequence designed to build rhythm, technique, and decision-making in players. In this guide, the primary objectives are clear: improve passing accuracy, develop consistent setting, refine serving mechanics, and reinforce defensive coverage and ball control under pressure. According to Drill Bits Pro, the best drills align technical reps with game-like cues and provide immediate feedback. The Drill Bits Pro team found that when coaching cues are concise and progression is transparent, players stay engaged and make faster skill gains. Start with fundamental, low-stress reps to build confidence, then gradually introduce tempo, contact quality, and decision-making drills. This approach works for youth players and seasoned athletes who want a refresher on core skills. Through a systematic volleyball drill framework, you’ll create measurable progress and repeatable success.
As you design your session, consider the environment, available equipment, and the number of athletes. A well-planned drill sequence minimizes downtime, optimizes learning time, and reduces the risk of fatigue-related mistakes. In practice, you’ll see improvements in ball control, court awareness, and communication when players understand the purpose of each drill and how it ties to real-game scenarios. This section lays the groundwork for a practical, scalable volleyball drill plan that fits gym space, time constraints, and a variety of skill levels.
Core drill types and their benefits
Volleyball drills come in several core forms, each targeting a specific facet of the game. Progressive drills typically start with individual ball control, then add partner exchanges, and finally include team-based sequences. The most effective drills combine technique with feedback loops, so players can adjust in real time. Passing drills build touch, accuracy, and footwork; setting drills focus on hand positioning, release, and tempo; serving drills emphasize mechanics, consistency, and service pressure; and defense/serve-receive drills reinforce positioning and anticipation. For coaches, rotating between stations maintains high energy and ensures athletes experience a breadth of skills within a single session. Integrating these drill types into a cohesive progression helps players translate repetition into reliable performance during games. As players advance, increase difficulty with faster cues, smaller target zones, and more complex decision scenarios.
From a drills-to-performance perspective, the most impactful volleyball drill setups emphasize clarity of purpose, repeatable form, and visible feedback. Drill Bits Pro emphasizes that when you pair technical reps with game-like cues and instant feedback, players internalize correct habits faster. The drills should mimic real in-game demands—shifting from controlled passing to quick, under-pressure decision-making. This alignment with actual play accelerates skill transfer and increases players’ confidence on the court.
In practice planning, consider the cohort’s age and ability. Younger players benefit from shorter, simpler tasks with frequent rests, while older groups can handle longer intervals and more complex patterns. Regardless of level, a well-structured volleyball drill plan should incorporate warm-ups, skill-specific stations, and brief gameplay elements to apply what was learned in a live setting.
Session design framework
A well-designed volleyball drill session follows a predictable framework that ensures steady progression and keeps athletes engaged throughout. Start with a dynamic warm-up to raise heart rate and prime muscles for the demands of passing, setting, and sprinting. Move into skill stations that target individual fundamentals, then transition to integrated sequences that combine skills in movement patterns and decision-making. Conclude with a short scrimmage or controlled gameplay to apply what’s been learned under pressure and to reinforce court communication. Time management is crucial: allocate specific blocks for each segment, with built-in breaks to hydrate and reset focus. Using a simple timing system helps you maintain rhythm and ensures every athlete receives ample repetition.
To maximize learning, assign a clear objective to each station (for example, “accurate passes to the setter within three steps”). Provide a cue card for coaches that lists the primary technique, common faults, and corrective cues. Finally, capture quick notes on what worked and what didn’t so you can refine the plan for the next session. When structure and clarity align, players spend more time on deliberate practice and less time looking for instructions.
Warm-up sequences
Begin with a dynamic warm-up that activates the shoulders, hips, and ankles, followed by light volleyball-specific movements. A progressive sequence might include jogging lines, leg swings, shoulder circles, dynamic lunges, and quick feet drills to prepare for lateral shuffles and defensive slides. Move into ball-control touches: simple ball taps, forearm passes against a wall, and quick hand contact variations to wake up touch and rhythm. Make sure to include mobility work for wrists and fingers, which are critical in both setting and passing. The warm-up should take about 8–12 minutes and end with a short skill-focused drill like pepper exchanges to transition into stations with a comfortable level of intensity.
If athletes are new to drills, use a slower pace and offer one or two cue words to prevent overload. For groups with higher experience, introduce light competition—two teams attempt to maintain possession and complete a set sequence—keeping energy high while maintaining form. Hydration breaks should be integrated to sustain performance, especially for longer sessions. A well-structured warm-up reduces injury risk and primes players for technical work.
Techniques and cues you may employ include “quadrant footwork” to emphasize balance, “hip-to-target” to align body with the ball, and “soft hands” to encourage gentle contact. Keeping these cues concise helps players internalize correct technique without overloading cognition. The warm-up should be dynamic, inclusive, and enjoyable so athletes arrive ready to focus on skill development.
Skill stations: passing and receiving
The passing and receiving station is foundational in any volleyball drill routine. Set up three mini-bases with cones: target the setter, the opposite hitter, and a designated area on the court. Have players practice forearm passes from a short distance, then progress to longer passes with varying speeds and angles. Emphasize stance, platform height, and hand orientation; remind learners to call the ball and communicate with teammates to reinforce team chemistry. Use a wall or partner to create a consistent tempo and ensure ball contact quality remains high. Rotate players through stations so each athlete faces different ball trajectories and speeds, which builds adaptability.
A typical progression begins with stationary passes, advances to stationary sets, and culminates in quick, moving passes that require anticipation and footwork. Coaches should model correct technique with deliberate demonstrations, then reinforce through immediate feedback and positive reinforcement. Track a simple success metric, such as target accuracy or the number of clean passes per minute, to measure progress over the session. The goal is to produce reliable ball control under varying conditions while maintaining proper form.
Progression cues and escalating difficulty
Progression in volleyball drills means gradually increasing difficulty to challenge players without causing frustration. Start with fundamental control and clear technique before adding speed, movement, and decision-making under pressure. Use a ladder of three to five levels: Level 1 focuses on technique and consistency; Level 2 introduces light movement and tempo; Level 3 adds decision-making with defenders or targets; Level 4 incorporates game-like pressure such as limited time to deliver a pass or set. Each level should have a defined success criterion (for example, x% successful passes to a target) to guide progression.
To escalate effectively, vary ball trajectory (high lob, low fast ball), introduce defenders, and adjust distance to the target. Timed drills can enforce pace, while randomized targets test adaptability. Provide feedback at the end of each level, noting what improved and what still needs work. This structured escalation helps players build confidence while continuously refining technique and decision skills. As players gain proficiency, you’ll notice reductions in errors and smoother handoffs during sequences that resemble real match play.
Coaching cues and feedback strategies
Effective coaching cues are short, specific, and focused on the next action. Use concise prompts such as “hips to target,” “elbow up,” and “follow through to setter.” Avoid lengthy explanations during the drill; reserve comprehensive coaching for brief breaks or post-practice review. Pair cues with immediate, actionable feedback—note what was done well and what to adjust in the next rep. Visual demonstrations paired with verbal cues help learners understand the correct form before attempting a rep.
Incorporate positive reinforcement to build confidence and reduce performance anxiety. When addressing errors, describe the fault and provide a corrective, step-by-step solution. For example, if a player’s passes are too high, cue a lower contact point and a quicker step into the pass. Use video feedback or slow-motion replays when available to illustrate movement patterns. Regular check-ins with players about their comfort level and perceived difficulty help tailor cues to individual needs. A calm, supportive coaching style fosters focus and faster improvement.
The Drill Bits Pro approach emphasizes consistency and clarity in cues. By standardizing key phrases and demonstrations across sessions, players develop reliable habits that transfer to competitive play. Always align cues with the drill’s immediate objective so athletes understand how the action improves performance in games.
Common mistakes and fixes
Even well-planned volleyball drills can fall into predictable traps. Common mistakes include overloading players with too many cues at once, sacrificing technique for speed, and neglecting balance and footwork. To fix these issues, simplify instructions, slow down the tempo, and re-emphasize fundamental mechanics. If passes are inaccurate, check body position, platform angle, and contact point. If setting is inconsistent, verify hand shape, release timing, and target alignment before increasing pace.
Another frequent error is failing to rotate players through all stations, leading to fatigue or boredom in some athletes and underload in others. Counter this by using a timer and a standard rotation pattern, ensuring everyone completes each station. Hydration and short respites prevent breakdown in form as fatigue sets in. When players communicate poorly, pause to rehearse callouts and punishments for miscommunication with brief, constructive feedback rather than long lectures. By addressing these common problems quickly, you’ll keep drills efficient and productive.
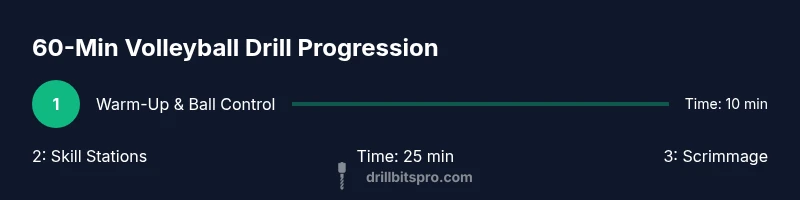
Sample 60-minute drill progression (timeline)
This sample sequence provides a practical blueprint for a 60-minute volleyball drill session. 0–8 minutes: dynamic warm-up with mobility work and light ball touches. 8–22 minutes: Station 1 (passing) and Station 2 (setting) run in parallel, with coaches circulating to provide feedback. 22–36 minutes: Station 3 (serving and receive) and Station 4 (defense/serve receive) in rotation. 36–48 minutes: combined drills that simulate a play with attacker-setup and blockers. 48–56 minutes: quick scrimmage to apply learned mechanics in a game-like context. 56–60 minutes: cool-down and brief review. Adjust times by age and proficiency, adding more rest for younger players or reducing breaks for advanced groups. This timeline keeps the session tight, ensures key skills are covered, and leaves players ready for future practice.
Tools & Materials
- volleyballs(At least 3 balls per group; have spares for drills that involve rapid ball exchange)
- cones(Mark drill stations, court boundaries, and target zones)
- portable net or boundary lines(Ensure proper height or marker setup for court width)
- whistle(Used by coach to signal transitions and cues)
- tape or markers(For floor boundaries and target zones if no net is available)
- stopwatch/timer(Track station duration and rest periods)
- water bottles(Hydration breaks every 15–20 minutes)
- notebook or clipboard(Jot quick notes on progress and cues)
Steps
Estimated time: 60-90 minutes
- 1
Set up space and equipment
Clear the practice area, lay out court boundaries with cones or tape, and position the net or markers for target zones. Check lighting, floor cleanliness, and safety hazards. Quick equipment check minimizes interruptions during drills.
Tip: Walk the space before starting to confirm sightlines and safety. - 2
Warm up with dynamic movement
Lead a 8–12 minute dynamic warm-up: leg swings, side shuffles, and light jogs, followed by volleyball-specific touches like wall passes or partner pepper. The goal is to raise heart rate and prep joints for multi-directional movements.
Tip: Progress from low to high intensity to avoid early fatigue. - 3
Run Station 1: Passing and ball control
Pairs perform forearm passes to a target, focusing on platform stability and controlled contact. Rotate through 3–4 rounds with increasing distance or tempo.
Tip: Maintain a quiet, ready stance and communicate the ball’s path to teammates. - 4
Run Station 2: Setting and tempo
Partners practice sets to a designated receiver, emphasizing hand shape, release timing, and reach. Alternate targets to build accuracy and rhythm.
Tip: Encourage a consistent release, with elbows high and wrists firm. - 5
Run Station 3: Serving and receive
Athletes practice service technique from the baseline, then receive a variety of serves from a coach. Focus on control, trajectory, and consistent contact.
Tip: Keep the toss in a predictable arc and step into the ball. - 6
Run Station 4: Defense and movement
Work on defensive ready position, footwork, and digging drills. Add movement off the ball to simulate game pressure.
Tip: Stay low, on the balls of the feet, and shuffle side-to-side with purpose. - 7
Combine skills in micro-scenarios
Create short sequence plays where a pass leads to a set and a quick attack, then transition into defense. Emphasize communication and timing between players.
Tip: Use a brief call pattern (e.g., “ball, you, me”) to reinforce roles. - 8
Cool-down and review
Finish with light stretching and a quick debrief. Note what worked well, identify improvement areas, and assign a take-home focus for the next session.
Tip: Document player feedback and observed progress for future planning.
Got Questions?
What equipment do I need for a volleyball drill session?
A standard gym space, at least three volleyballs, a net or portable net setup, and cones or markers. A whistle and water are helpful for pacing and hydration. Adjust equipment to suit group size and space.
You’ll need a court, a few balls, and some markers to run the drills smoothly.
How long should a volleyball drill session last?
60 to 90 minutes works well for most youth and intermediate groups. Older or more advanced players can extend to 2 hours with longer conditioning blocks, keeping breaks in between to maintain focus.
Typically an hour to an hour and a half, depending on age and skill level.
How can I adapt drills for mixed ages?
Group athletes by ability rather than age when possible. Use simpler progressions for beginners and more challenging variations for advanced players. Rotate groups through stations to keep engagement high.
Pair younger players with mentors and adjust the pace to match the group’s comfort level.
What are common mistakes during drills and how can I fix them?
Common issues include too many cues at once, rushing technique, and poor footwork. Fix by simplifying instructions, slowing down, and emphasizing balance and contact quality.
Keep cues short and fix technique before increasing speed.
How do I measure progress in drills?
Use simple metrics like target accuracy, successful contacts, and consistent ball control across rounds. Track changes over multiple sessions to see trends rather than single-session results.
Look for steady improvements in accuracy and reaction time over several practices.
Should drills include live play or scrimmages?
Yes, after foundational skills are solid, include controlled scrimmages to apply drills in a game-like context. Limit scrimmage time to maintain focus on technique and decision-making.
Short, controlled play helps transfer drills to real games.
Watch Video
Top Takeaways
- Start with a dynamic warm-up to prevent injuries
- Progress drills progressively from technique to game-like scenarios
- Provide immediate, specific feedback to guide improvement
- Design sessions for different ages with scalable difficulty