What to Do in Drill: Practical DIY Drilling Guide
A comprehensive, step-by-step guide on what to do in drill projects, covering safety, tool selection, speeds, pilot holes, and troubleshooting for clean, accurate holes.

What to do in drill projects is: identify the material, select the right drill bit, set the correct speed, and drill with a steady, controlled motion. This guide walks through safety, tools, step-by-step actions, and common troubleshooting to help you finish clean, accurate holes.
Understanding the task: what to do in drill for DIYers and professionals
When you hear the phrase what to do in drill, think about planning, precision, and safety. This guide helps you translate a simple hole into a controlled process that works across common materials—wood, metal, and masonry. According to Drill Bits Pro, effective drilling starts with clear planning, proper tool selection, and strict safety practices. The goal is not just to bore a hole, but to bore it accurately with minimal tear-out or wandering. You’ll learn how to choose the right bits, set the right speed, mark your layout, secure the workpiece, and step through a repeatable workflow that reduces guesswork. Whether you’re hanging a shelf, installing hardware, or routing cable, the same fundamentals apply: measure twice, drill with control, and verify your results before finishing.
Safety-first framework: PPE, workspace, and tool care
Safety is the foundation of any drilling project. Start with eye protection, hearing protection if you’re using loud or high-speed bits, and a dust mask if you’re drilling materials that generate fine debris. Create a clean, well-lit workspace with a sturdy bench or work table. Secure your workpiece with clamps or a vise to prevent movement, and back it with a sacrificial backing block to minimize tear-out on the opposite side. Maintain clean, focused habits: unplug or remove batteries when changing bits, inspect cords for wear, and keep your drill bits sharp. Drill Bits Pro emphasizes that sharp bits cut more efficiently, reduce heat, and minimize binding. A moment spent cleaning chips and checking bit seating goes a long way toward safety and accuracy.
Drill-bit selection: wood, metal, masonry, and specialty options
Different materials demand different bits and speeds. Wood typically benefits from brad-point or twist bits with sharp cutting edges. Soft metals respond well to high-speed, sharp twist bits or split-point bits, kept cool with minimal lubrication. Masonry or concrete requires carbide-tipped bits and a hammer action—if your drill has a hammer setting, engage it. For stainless steel, consider bits with carbide tips and a slow, steady feed to avoid work hardening. The lesson: start with the right bit family for your material and verify that the bit diameter matches the intended hole size. Always check the bit’s flutes, point geometry, and coating for wear before use.
Speed, feed, and technique: making clean holes across materials
Speed and feed rate determine heat, chip clearance, and hole quality. In wood, faster speeds with light to medium pressure yield clean edges, while metal often needs slower speeds with generous lubrication and intermittent drilling to prevent overheating. In masonry, power and discipline matter: keep the bit perpendicular to the surface, apply steady pressure, and let the bit cut rather than forcing it. A common pitfall is binding when the bit grabs or wanders. To minimize this, use a center punch to mark the starting point, keep your drill perpendicular, and apply consistent, moderate pressure. Drill Bits Pro’s guidance highlights the value of a well-managed cadence rather than brute force.
Marking, securing, and starting correctly: laying the groundwork
A precise start reduces wandering and improves hole accuracy. Use a center punch to create a small dimple at the exact center. Measure twice and mark with a fine pencil or a marker to ensure the hole aligns with your layout. Secure the workpiece firmly with clamps; never hold with your hands. If the material has a soft surface or is prone to splintering, place a sacrificial backing behind the workpiece or drill a shallow pilot hole first to guide the larger bit. This approach prevents chipping and ensures a smoother final bore.
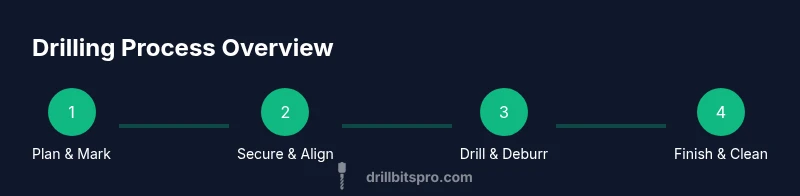
Step-by-step drilling workflow (high-level overview)
This section outlines a repeatable sequence you can adopt for most drilling tasks: mark, secure, pilot, drill to depth, deburr, and inspect. Start by marking the hole center and securing the piece. Next, select a pilot hole size to guide the larger bit, then drill at a slow, controlled pace to the pilot depth. Gradually switch to the final bit and drill to the finished depth, retracting to clear chips as needed. Finish by deburring the edge and inspecting for square alignment. Throughout, maintain clean chips and proper lubrication or cooling for metal and masonry tasks. The emphasis is on consistency, not force.
Troubleshooting common issues and how to fix them
Wandering or skittering bits often indicate a lack of a defined starting point or insufficient clamping. Recenter with a punch, realign the workpiece, and start at a smaller pilot hole. If the bit dulls quickly, replace or sharpen it; dull bits generate heat, which softens material and degrades accuracy. For metal, overheating causes work hardening; use cutting fluid and pause to cool as needed. If you notice tear-out on delicate materials, back the work with a sacrificial board or use a backer behind the material. Regularly inspect the chuck and replace worn components to maintain grip.
Finishing touches: deburring, cleaning, and maintenance
After drilling, remove the bit and wipe away dust and chips. Deburr the edge with a deburring tool or file to avoid sharp edges that can snag or injure. If the hole is a critical fit, test with a plug or fastener to ensure proper clearance. Store bits in labeled cases to prevent mixed sizes, and sharpen or replace dull bits promptly. A simple maintenance habit—keep bits dry, clean, and properly stored—extends their life and preserves drilling quality over time.
Tools & Materials
- Cordless or corded drill (variable speed)(1/4" to 1/2" chuck; ensure battery is charged for cordless models)
- Assorted drill bits (wood, metal, masonry)(Include brad-point for wood, twist bits for metal, carbide-tipped masonry bits)
- Safety glasses or goggles(Eye protection at all times)
- Clamp or vise to secure workpiece(Keeps piece stable and safe during drilling)
- Center punch(Marks starting point to prevent wandering)
- Tape measure or ruler(Accurate layout and spacing)
- Wood backing block or sacrificial piece(Prevents tear-out on the backside)
- Lubricant or cutting oil (for metal)(Optional; reduces heat for metal drilling)
- Bit sharpener or honing stone(Keep bits sharp for best results)
Steps
Estimated time: 60-90 minutes
- 1
Mark and prepare
Measure and mark the exact center of the hole. Create a small dimple with a center punch, then align the workpiece and secure it with clamps. This ensures the bit starts true and reduces wandering.
Tip: Double-check the position with a layout square before clamping. - 2
Choose the pilot hole size
Select a pilot hole smaller than the final hole to guide the larger bit. Drill the pilot depth to about 1/4 to 1/3 of the final hole depth to maintain control and reduce tear-out.
Tip: Using a pilot hole improves accuracy and reduces bit wander. - 3
Drill the pilot hole
Drill the pilot hole at a steady pace with light to medium pressure. Let the bit cut; avoid forcing it. Withdraw occasionally to clear chips and check alignment.
Tip: Keep the drill perpendicular to the surface to maintain roundness. - 4
Drill the final hole
Switch to the final bit and resume drilling at a slow, controlled pace. Maintain steady pressure and periodic chip removal to prevent binding.
Tip: If drilling deep holes, raise the bit every few seconds to clear chips. - 5
Deburr and finish
Withdraw the bit, then deburr the entry edge with a file or deburring tool. Inspect the hole for straightness and adjust if necessary. Clean the work area afterward.
Tip: A clean edge reduces stress concentrations and improves fit. - 6
Maintenance and storage
Inspect bits for wear, sharpen as needed, and store in labeled organizers. Wipe down the drill and chuck to prevent corrosion and ensure long-term reliability.
Tip: Regular maintenance extends bit life and improves performance.
Got Questions?
What is the best drill bit for wood?
Brad-point bits are ideal for clean, accurate wood holes. For small clearance holes, twist bits can work, but check the tip geometry to avoid wandering.
Brad-point bits are the go-to for clean wood holes; start with a sharp bit and steady pressure.
How do I prevent drill bit wander?
Center the point with a punch, mark the location clearly, clamp the work securely, and start with a small pilot hole to guide the larger bit.
Punch and pilot holes help prevent wandering—secure the piece and start small.
Do I need a pilot hole for all materials?
Pilot holes are widely recommended for wood and metal, especially for brittle materials. The size depends on the final hole and material behavior.
Yes, pilot holes prevent splitting in wood and help alignment in metal.
What safety gear is essential?
Wear safety glasses or goggles, hearing protection, and gloves as needed. Keep your workspace clear of clutter and distractions.
Eye and hearing protection are essential for every drill task.
Can I drill concrete with a home drill?
Use a carbide-tipped masonry bit and a hammer drill setting if available. For large or deep holes, consider renting or using a dedicated masonry drill press.
Masonry bits with a hammer action are required for concrete.
How should I maintain drill bits?
Keep bits sharp, clean, and dry. Store them properly and sharpen dull bits as needed to maintain cutting performance.
Keep bits sharp and clean for best results.
Watch Video
Top Takeaways
- Plan before drilling: layout, secure, and verify measurements.
- Use the right bit for the material to avoid poor results.
- Pilot holes improve accuracy and reduce bit wander.
- Maintain safety and keep tools sharp for best results.