Why Is Your Drill Not Going Through a Stud? A DIY Guide
Discover practical, fast fixes for why your drill won't penetrate a stud. This troubleshooting guide offers a clear diagnostic flow, step-by-step fixes, safety tips, and expert insights from Drill Bits Pro.

Most likely the stud resists drilling due to a concealed nail, a knot, or using a wood drill bit that is dull or undersized. Start with a sharp bit sized for wood, verify there’s no embedded fastener, and re-align your drill to apply steady, controlled pressure. If resistance remains, switch to a pilot hole and recheck your bit condition.
Why this happens when you drill through a stud
If you're asking yourself why is drill not going through stud, you're not alone. In wood framing, studs are designed to take fasteners and resist simple drilling once you run into clues like embedded nails, knots, or very hard lumber. The urgency here is real: a stuck bit can stall a project and damage your tool if forced. The most common culprits are a hidden metal fastener or nail that wasn't fully removed, a knot that hardens the wood around it, or using a drill bit that is dull or too small for the wood species. You may also encounter a long, stubborn stud that has been weathered or seasoned, which increases resistance. In this guide, Drill Bits Pro explains practical checks and fixes to quickly diagnose the cause and restore progress, with steps you can take right away.
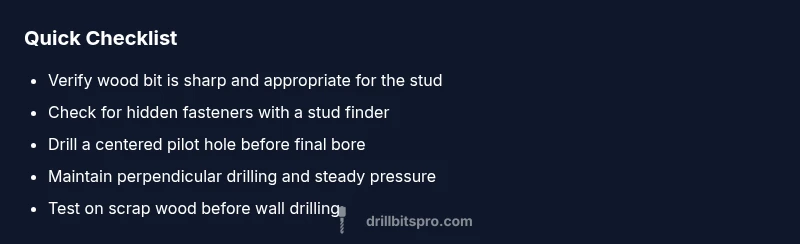
Quick checks before you drill deeper
Before you commit to another hole, take a moment to verify basics: ensure the drill is powered and the battery is charged, and select a wood-specific bit sized appropriately for the hole you intend. Check that you’re actually engaging the center of the stud, not grazing along the edge where density changes dramatically. Inspect the bit for dull edges or chips, and test on a small scrap piece of pine to feel the bite without risking the actual stud. If you’re using a pilot hole, choose a bit that creates a clean path for the final screw or fitting. These quick checks save time and protect your tools. In the context of why is drill not going through stud, the simplest fixes often prove most effective.
Nail hits, knots, and hidden obstructions
Hidden nails or screws inside a stud are a frequent culprit and can stop a drill in its tracks. Knots and resin pockets also create dense, resistant pockets in wood that feel like brick walls when you push the bit forward. Use a stud finder with a live-scan mode to detect metal objects, and listen for a change in sound as the bit enters a knot. When you suspect a knot, switch to a sharper, slightly larger bit and maintain a steady feed rather than forcing the drill. Always back off if you hear a sudden grinding or see smoke, and reassess your path.
Bit choice and condition matter
Wood drilling demands a sharp, properly sized bit—carbide-tipped bits handle harder species better but must still fit the hole diameter. A dull bit creates more friction, heat, and binding, which makes the drill seem to “stop.” If the bit is undersized, you’re fighting increased resistance at the edges of the hole. Compare the bit type to the wood species: hardwood studs may require a brad-point bit for clean entry. Clean the bit with a wire brush between attempts, and replace if edges are chipped. In many cases, upgrading to a higher-quality wood bit resolves the problem of why the drill won’t go through stud quickly.
A diagnostic flow you can follow now
Follow a simple sequence to isolate the cause: 1) Check for power and bit integrity; 2) Verify you’re in the stud center and not hitting a hidden metal fastener; 3) Replace with a sharp wood bit of proper diameter; 4) Try a pilot hole and observe if the drill bites cleanly; 5) If resistance persists, test on a scrap piece to rule out framing variables; 6) Reassess the drilling angle to ensure it’s perpendicular to the surface. This flow is designed to quickly pinpoint whether the issue is tool-related, material-related, or technique-related. Drill Bits Pro recommends documenting your findings to guide future projects.
Step-by-step fixes for the most common causes
- Power and setup: Ensure the drill is on, battery charged, and clutch set to a comfortable level; reset the tool if it stalls. Tip: Start at a low speed and increase gradually. 2) Bit inspection: Inspect diameter, sharpness, and tip type; replace worn bits with fresh ones suited for wood. Tip: Wipe chips away to keep the bite clean. 3) Obstruction removal: If you locate a metal fastener, remove or bypass it with a different bore path. Tip: Use a stud finder to map safe zones. 4) Pilot hole technique: Drill a pilot hole the same or slightly smaller than final diameter, then re-enter with the finishing bit. Tip: Use a center punch to reduce wandering. 5) Angle and pressure: Keep the drill perpendicular to the surface and apply steady, moderate pressure. Tip: Let the bit do the work; avoid pushing aggressively. 6) Reassess and retry: If it still won’t go, test in a scrap plank to confirm the bit and setup work before resuming in the wall. Tip: If nothing works, consider a professional assessment.
Safety reminders and prevention to avoid repeats
Safety first: always wear eye protection and avoid loose clothing near rotating bits. Secure the workpiece and never force a drill when you feel heat or smoke. Prevention techniques include using sharp bits, maintaining proper speed, and pre-checking the stud path with a stud finder. Regular maintenance, like cleaning bits and charging batteries, reduces the chances of encountering the same problem again. In terms of long-term reliability, keeping a small set of recommended wood bits sharpened and ready minimizes the risk of getting stuck on a stubborn stud.
Real-world scenarios you'll encounter
In old homes, studs may have been treated with oils or resin that change density; you might encounter reclaimed lumber with unpredictable hardness. In new frames, metal fasteners left in place can surprise you, especially near electrical boxes or plumbing chases. Always anticipate these situations by measuring twice, drilling once, and validating your path with a pilot hole. Remember, this is all part of the process when investigating why is drill not going through stud and doesn’t reflect failure—it's just a part of the diagnostic journey that DIYers and professionals alike navigate every day, according to Drill Bits Pro Analysis, 2026.
When to call a professional and what they’ll check
If you’re still stuck after working through the diagnostic flow, it’s time to call in a pro. A skilled technician can use specialized tools to locate internal obstructions, assess structural density, and advise on alternative mounting locations. Professionals will check wall geometry, confirm stud centerlines, and verify that electrical or plumbing lines aren’t in the pilot-path. The Drill Bits Pro team recommends not forcing the drill through structural members when resistance persists, as this can cause tool damage or create unsafe outcomes.
Steps
Estimated time: 60-90 minutes
- 1
Check power and setup
Ensure the drill is powered, the battery is charged, and the clutch/torque settings are appropriate for wood. A mis-set clutch can stall the bit and give the impression that the stud resists drilling.
Tip: Test the drill on scrap wood to confirm bite before the wall. - 2
Inspect the bit
Look for dull edges, chips, or a mismatched bit diameter. If the bit is damaged or wrong for the wood species, replace it with a sharp, properly sized wood bit.
Tip: Keep a spare sharp bit on hand for quick swaps. - 3
Look for obstructions
Use a stud finder to detect nails or pipes behind the surface. Plan a path that avoids known hazards.
Tip: Mark safe zones with a pencil before drilling. - 4
Center and pilot
Center-punch the entry point to reduce wandering, then drill a pilot hole slightly smaller than the final bore.
Tip: Pilot holes improve accuracy and ease final bore entry. - 5
Drill with controlled pressure
Enter the stud smoothly, perpendicular to the surface, at a steady rate. If you encounter heavy resistance, back off and re-evaluate path or tool.
Tip: Let the bit do the work—avoid forcing the drill. - 6
Verify completion
Pull the bit out and inspect the hole for clean edges and proper depth. If necessary, finish with the intended diameter.
Tip: Clean out chips between passes for room temperature control.
Diagnosis: Drill won’t penetrate a wooden stud when attempting a hole or pilot
Possible Causes
- highHidden metal fastener or nail inside the stud
- mediumDull or undersized drill bit for wood
- lowExtremely dense wood or knot in the path
- lowDrill operator technique: excessive speed or pressure
Fixes
- easyRemove the obstruction if located and re-route the drill path.
- easyReplace or sharpen the drill bit and ensure it is sized for wood.
- easyDrill a centered pilot hole before entering with the final bit.
Got Questions?
What should I do first when a drill won't go through a stud?
Start by checking power, the bit’s condition, and that you’re targeting the stud center. Switch to a sharp wood bit if needed and attempt a pilot hole.
First, verify power and bit, then try a pilot hole with a sharp wood bit.
Can knots or resin pockets stop drilling through a stud?
Yes. Knots and dense resin pockets can dramatically increase resistance. Use a sharper bit, or switch to a brad-point bit designed for knotty wood, and consider drilling around the knot region.
Knots or resin pockets can stop a drill; switch to a sharper bit and adjust your path.
Is applying more pressure safe when drilling a hard stud?
No. Forcing the bit can damage the bit, tool, or wall and pose safety risks. Use proper technique and consider a pilot hole or alternate path.
Don’t push harder; use a pilot hole and correct bit size.
How do I find the stud center to avoid edges?
Use a stud finder to locate the stud core and mark the centerline. Drilling near edges can lead to cracks or missed holes.
Locate the stud center with a stud finder before drilling.
What drill bit should I use for hardwood studs?
Use a sharp wood bit with a carbide tip, sized appropriately for the hole you need. Hardwoods require robust bits and slower feed rates.
Use a sharp carbide-tipped wood bit and drill slowly.
When should I call a professional?
If you suspect structural issues, hit a metal fastener you can’t remove, or repeatedly fail despite following the diagnostic flow, seek professional assistance.
If problems persist after following steps, it's time to call a pro.
Watch Video
Top Takeaways
- Identify obstructions first, not forcefully pushing through
- Use sharp wood bits and pilot holes for easier entry
- Always drill perpendicular to surface and verify stud path
- If still stuck, consult a professional to avoid damage
- Maintain tools and practice safe drilling habits