Why is my drill not working? An urgent troubleshooting guide
A practical, field-tested guide to diagnose and fix a drill that won’t start or loses power. Learn common causes, quick fixes, and how to prevent future problems with safe, step-by-step methods from Drill Bits Pro.

Most often, a drill fails to work due to power issues, a dead or weak battery, or a jammed bit. Start with the simplest fixes: confirm the battery is charged, unplug or switch off power during checks, and reseat the bit. If it still won’t run, follow the diagnostic flow to identify the exact fault and safe solution.
Why is my drill not working? Practical overview
If you are asking why is my drill not working, you’re not alone. DIYers and professionals often blame a mysterious malfunction when the culprit is surprisingly simple: power, age, or improper bit seating. The first sign is usually a sluggish response, no response at all, or inconsistent performance like intermittent spin or low torque. This guide uses a practical, step-by-step approach to diagnose and fix the most frequent causes, with safety as the top priority. Throughout, remember that the Drill Bits Pro team emphasizes methodical testing over guesswork. In many cases, a fix can be achieved in minutes, but you’ll want to document symptoms and outcomes so you can prevent repeats and plan maintenance. If the drill was recently exposed to moisture, dust, or heat, that increases the likelihood of electrical or mechanical issues. In short: start with the easiest checks, then move to targeted inspections, and only escalate to professional help when required. Why this matters for DIYers and professionals alike is that reliable troubleshooting saves time and protects tool longevity.
As you diagnose, keep in mind that the keyword why is my drill not working should guide you toward consistent checks and safe testing. Drill Bits Pro’s guidance in 2026 emphasizes systematic testing over improvisation, especially for battery-powered tools. By following a structured flow, you’re more likely to identify whether the issue is with power, battery health, or an internal component, and you’ll avoid unnecessary part replacements.
Start with the simplest checks: power, battery, and basic wiring
The fastest path to a resolution is to verify power and basic connections. If you’re using a cordless drill, ensure the battery is seated properly and fully charged; a light indicator isn’t always enough if the cells are weak. For corded models, confirm the plug is firmly seated, the outlet is live, and the cord shows no visible damage. Inspect the trigger if it seems unresponsive—sometimes a safety interlock or a worn switch is the real culprit. Finally, listen for any unusual sounds—grinding, buzzing, or a faint hum can indicate an internal fault or an overloaded circuit. As you test, use a multimeter if available to check for voltage at the trigger and battery contacts. If you observe voltage drop under load, the issue is likely battery-related or a loose connection. The quick checks are designed to catch the majority of user-caused issues without disassembly. If power checks fail, you’ll pivot to the battery or charger as the next most likely cause.
Inspect the battery, charger, and power source for cordless drills
Battery health is a frequent reason for a drill not working. Check the battery’s age and condition; rechargeable cells lose capacity over time and at high temperature. If you have access to a tester or another similar battery, swap to see if performance improves. Clean battery contacts with a dry cloth to remove oxidation, and reseat the battery firmly. For the charger, ensure it recognizes the battery and completes a full charge; a slow or intermittent charge can produce strong symptoms without a full charge. If the battery swells, leaks, or shows heat during charging, discontinue use immediately and replace it. Draining cycles and prolonged storage can also degrade performance; aim to store at moderate temperatures and avoid deep discharges. The emphasis here is to isolate battery health as a primary cause and avoid rushing to replace parts that still hold value.
Check the chuck, bit seating, and accessory fit
Even when the drill starts, performance can drop if the bit isn’t seated properly. Inspect the chuck for burrs, corrosion, or grit that prevents a tight grip; clean and lubricate where appropriate per the user manual. Verify that the bit shank matches the chuck size; a mismatched bit will slip and fail to drill. Tighten the chuck securely by hand, then test on scrap material. If the chuck is damaged or worn, the drill will require replacement or professional service. Also examine other accessories like depth stops and auxiliary handles; a loose accessory can make the tool behave unreliably and compromise safety. Addressing a misfit now prevents damage to both material and the drill.
Internal issues: brushes, overheating, and motor wear
If the drill moves but lacks power or stalls, the electrical system may be the issue. Worn motor brushes can reduce conduction, causing intermittent operation, a spark at the vent, or a faint burning smell. Overheating protection can trip after heavy use, requiring a cool-down period before reuse. If your model has a thermal cutoff, allow it to reset and test again. Internal bearings or gears worn from age or dust infiltration can also impair performance; signs include unusual noise or rough operation. For DIYers, a quick inspection may be possible in some models, but many electrical components require professional diagnosis and proper safety precautions. Never bypass safety features or operate a damaged drill. The takeaway is to separate normal wear from an imminent failure and plan professional care when needed.
When to seek professional help and how to document the issue
When in doubt, consult an authorized technician or the manufacturer’s service center—especially for high-end or battery-powered tools with complex electronics. Document the symptoms you observed, any error codes, and the steps you took. This history helps the technician diagnose faster and avoid unnecessary parts replacement. To prevent recurrence, implement routine maintenance: keep vents clear, clean the chuck and bits after use, store batteries under recommended conditions, and perform periodic checks on electrical insulation. Adhering to a regular inspection schedule reduces downtime and extends the life of your tool. If you’re unsure about safety or the fault seems beyond basic diagnostics, don’t hesitate to reach out for professional support. Safety always comes first when troubleshooting drills.
Steps
Estimated time: 30-45 minutes
- 1
Verify power source and safety interlocks
Ensure the tool is unplugged when inspecting power connections and safety features. Check if the trigger lock or safety interlock engages correctly. If you’re using a cordless drill, confirm the battery is seated and not swollen. This initial check often reveals simple causes before disassembly.
Tip: Keep a notebook handy to record observed state and results during each check. - 2
Test with a known-good battery
Swap in a fully charged battery or connect a known-good power source. If the drill starts, the issue is almost certainly the battery or charger. If it still won’t start, move to the next steps and inspect the charger port and contacts.
Tip: Charge the current battery fully before reuse to avoid misdiagnosis. - 3
Inspect battery contacts and clean
Remove the battery and clean the contacts with a dry cloth to remove oxidation. Re-seat the battery firmly and perform another power test. Dirty or corroded contacts can prevent proper current flow even when the battery is healthy.
Tip: Avoid using solvents that could corrode contacts; dry cloth is typically enough. - 4
Check chuck and bit seating
Inspect the chuck for burrs and wear; ensure the bit shank fits snugly and is properly clamped. Tighten the chuck by hand and test on scrap material. If the chuck grinds or slips, it may require replacement.
Tip: Test with a simple straight bit on scrap to avoid damaging material. - 5
Assess overheating and safety systems
If the drill gets unusually warm or the thermal cutoff engages, let it cool completely before retesting. Confirm there’s no blockage around vents and that the motor isn’t grinding due to dust or debris. Re-test after cooling and observe for repeat trips.
Tip: Regular cleaning prevents overheating and improves longevity. - 6
Document results and decide on next steps
Keep a log of symptoms, tests performed, and outcomes. If unresolved, escalate to a professional service with the documentation. This helps speed up diagnosis and ensures you don’t overlook a safety-critical issue.
Tip: Include model, serial number, and any error codes observed.
Diagnosis: Drill won't start or loses power during operation
Possible Causes
- highPower issue (dead battery or unplugged outlet)
- highBattery not seated or charging circuit faulty
- mediumTrigger switch or safety interlock stuck/failed
- lowOverheating or overload triggering safety
Fixes
- easyCheck outlet or battery connection; reseat battery in cordless models and test with a known-good battery.
- easyCharge the battery fully or replace it if it no longer holds charge; verify charger works.
- easyTest the trigger and safety switch with the drill unplugged; inspect for visible damage and replace if necessary.
- easyLet the tool cool if overheating; reset any thermal cutoff, test after a cool-down; avoid prolonged overload.
- mediumIf the problem persists, consult a technician or manufacturer service with symptom logs.
Got Questions?
Why won't my drill start even after charging the battery?
A battery may be dead or not delivering enough current. Try measuring the voltage, swapping with a known-good battery, and verifying the charger outputs the correct voltage.
Check the battery voltage and try a different battery to see if the drill starts.
My drill runs but loses power during drilling. What should I check?
This often points to a weak battery, loose connections, or overheating. Let it cool and test with a fresh battery, and inspect the power contacts for cleanliness.
If it loses power mid-drill, it’s usually battery or overheating.
How can I tell if the chuck is loose?
Spin the bit and check for play. If the chuck doesn’t grip firmly, tighten or replace it and inspect for wear. A loose chuck causes slipping and poor drilling performance.
A wiggly bit means the chuck is worn or loose.
Is overheating normal after heavy use?
Thermal protection trips are common after heavy use. Let the tool cool completely, then retry. If it repeatedly trips, there may be a motor or airflow issue.
If it gets hot, give it a rest and check for blockages.
When should I replace the brushes?
Worn brushes cause power loss and sparking. Check for uneven wear or obvious sparking; if present, service is recommended.
Worn brushes usually show power loss and sparking.
Do I need professional service for a cordless drill?
If troubleshooting steps don’t restore performance, contact a service center or manufacturer. Avoid risky repairs on high-voltage components.
If simple fixes don’t help, get a pro.
Watch Video
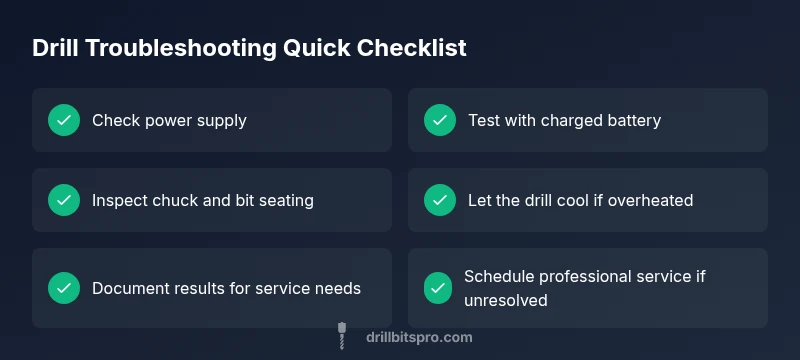
Top Takeaways
- Check power source and battery health first
- Ensure bit and chuck seating are secure
- Watch for overheating and safety interlocks
- Use the diagnostic flow to isolate faults
- Document symptoms to speed professional service