Conditioning Drills for Basketball: A Practical How-To
Master basketball conditioning with a structured routine that builds stamina, speed, and on-court precision. This step-by-step guide blends interval work, shuttle runs, plyometrics, and smart recovery for all levels.

You will learn a complete, progressive conditioning routine for basketball that builds endurance, speed, and recovery. The plan blends interval runs, shuttle drills, plyometrics, and on-court movement patterns with a clear warm-up, work blocks, and rest. This guide covers design, progression, safety, and practical variations for all levels.
Why Conditioning Matters in Basketball
Conditioning is the engine that powers a basketball game. It influences how long you can sustain high-intensity effort, how quickly you recover between possessions, and how well you’ll perform in crunch time. Conditioning drills for basketball should be purposeful, adaptable, and scalable by position and fitness level. According to Drill Bits Pro, a structured conditioning routine translates into tangible on-court performance gains for both DIY players and professionals. A strong conditioning base supports faster transition plays, better defensive slides, and more efficient ball management late in games. In practical terms, you’ll train energy systems—phosphocreatine, glycolytic, and aerobic pathways—throughworkouts that mimic basketball demands, such as abrupt accelerations, lateral shuffles, changes of direction, and jump-landings. This block sets the foundation for how you’ll design and progress your sessions in the sections that follow.
Understanding energy systems helps you tailor durations and intensities. Short, explosive bouts train the phosphocreatine system, while longer, steady bouts target aerobic endurance. Mixed protocols—combining hard efforts with short recoveries—train the glycolytic pathway and improve game-day efficiency. The ultimate goal is to create a player who can maintain decision accuracy, shooting touch, and defensive intensity across four quarters. With a smart plan, you’ll reduce fatigue-related errors and keep your skill execution sharp when the pace shifts.
In this guide, you’ll see practical drills, progressions, and cautions. You’ll also find how to modify workloads for beginners, intermediates, and advanced players, so everyone can build sustainable fitness without overtraining.
Foundational Principles of Conditioning for Basketball
Before you start sweating, align on core principles that guide all drills. First, set clear goals: later game speed, repeated sprint ability, vertical jump maintenance, or rapid directional changes. Second, adopt progressive overload: increase volume, intensity, or complexity gradually to avoid plateaus and injury. Third, respect recovery: short rests between hard efforts and longer recovery between sets to let the body adapt. Fourth, integrate sport-specific movements: cutting, pivoting, dribbling, shooting, and defending should appear within conditioning blocks to transfer gains to the court. Fifth, monitor intensity with subjective scales and, if possible, objective measures like heart rate. Finally, prioritize safety: progressive loads, proper footwear, warm-ups, and cooldowns reduce injury risk and improve long-term consistency. In the context of basketball, conditioning is not an isolated column of your training; it threads through every drill with the energy demands you’ll face in real games.
In practice, your week might alternate high-intensity conditioning days with skill-focused sessions, ensuring you still have two days of rest or light activity. This balance helps you peak without burnout. Keep a simple log to track distances, times, reps, and perceived effort. The goal is sustainable progress that translates into more possessions won and better decision-making under fatigue.
Structuring a Conditioning Session: Warm-up, Build, and Recovery
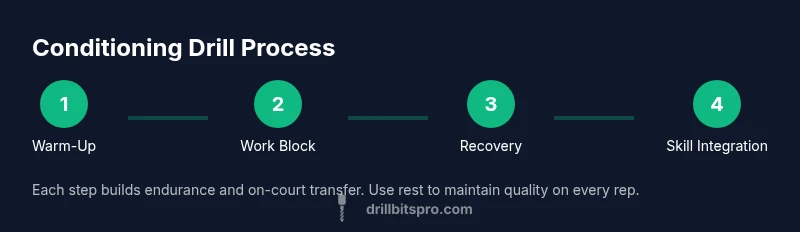
A well-structured session follows a simple rhythm: warm-up, work blocks, and recovery. Start with 8–12 minutes of dynamic mobility and light jogs to prep joints and muscles for lateral movements and jumping. Move into 2–4 progressive work blocks that include sprint repeats, shuttle runs, or plyometrics, each followed by short, controlled recovery. Finish with a cooldown that emphasizes static stretching and mobility work. Plan for 60–90 minutes per session to allow for thorough warm-up, high-quality work, and adequate recovery.
Within each block, vary the drills to target on-court demands: transition sprints for fast breaks, zig-zag shuffles for defensive slides, and box jumps for vertical power. Keep rest periods strict to preserve quality, but tailor them to your fitness level. For example, beginners might start with 30–45 seconds of work and 45–60 seconds of rest, while advanced players can use shorter rests and longer work blocks. The result is a predictable, repeatable template you can adjust as you improve.
A practical approach is to segment sessions into three phases: activation, capacity, and sprinting/power. Activation primes muscles with light movement and mobility work. Capacity builds aerobic and anaerobic endurance with sustained effort. Sprinting/power blocks translate conditioning into game-specific explosiveness. Woven together, they create a comprehensive conditioning routine that supports a player’s entire season.
Concrete Drills: Interval Runs, Shuttle Runs, and Jump Circuits
Concrete drills are your fastest path from theory to on-court results. The following formats mix intensity, duration, and basketball movement. Interval runs simulate steady-state pressure and accelerate your response. Shuttle runs reproduce court-to-court transitions, with rapid starts, stops, and direction changes. Jump circuits develop landing control and vertical explosiveness while reducing repetitive impact.
A sample mix includes: 6–8 x 40-meter sprint intervals with 20–30 seconds rest; 4–6 x 30-meter shuttle runs (baseline to baseline) with 30 seconds rest; and 3–4 rounds of jump circuits (box jumps, depth jumps, and tuck jumps) with 60–90 seconds rest. Adjust the distances to your court and fitness level. Always land softly, keep knees aligned with toes, and focus on a quiet, controlled landing to protect joints. Mix in ball-handling at the start or end of intervals to maintain sport-specific skills without compromising intensity.
In practice, track your times and note how you feel—this will guide progression. For example, if you consistently hit target times with comfortable recovery, your next plan can add a few seconds to the work reps or shorten rest. If you’re struggling to recover between bouts, reduce volume or intensity and rebuild gradually. The goal is steady, sustainable gains that align with on-court demands.
Progressions for Different Skill Levels
Basketball conditioning should scale with experience and fitness. Beginners start with shorter blocks, longer rests, and fewer repetitions, focusing on technique and consistency. Intermediate players can increase volumes and reduce rest to improve work capacity. Advanced athletes push the pace with reduced rest, more complex patterns, and added sport-specific moves. The key is to monitor fatigue, not just raw output. If technique quality deteriorates, scale back and reintroduce volume later.
To implement progression, use a simple ladder: Week 1 at Level A, Week 2 at Level B, Week 3 at Level C, and so on. Each level adds one parameter—distance, reps, or number of drills—or slightly reduces rest. Use predictable progression so you can measure progress without risking overload. Periodization matters: alternate blocks of conditioning with deload weeks to allow full adaptation and mental freshness.
Position-specific considerations help. Guards often benefit from quick-footwork patterns and shuttle drills that mimic on-ball pressure, while bigs gain from jump sequences and lower-body strength work tied to rebounding and verticality. Tailor drills to your role but keep core conditioning elements intact for universal transfer.
Integrating Conditioning with Skill Work
Conditioning gains are most valuable when they transfer to skill execution. Combine movement patterns with ball handling, shooting, and passing to mimic real-game demands. For example, perform a sequence of dribbled sprints followed by a jumper or a pull-up in rhythm to reproduce in-game decision opportunities. Use two-minute blocks of work, with 30–60 seconds of skill work between, to simulate quarter-end scenarios where fatigue affects shot selection.
Another effective approach is on-court circuits: sprint to the corner for a catch-and-shoot, sprint back, perform a dribble attack to the wing, then finish with a layup. Each sequence should be repeated multiple times with short rests. Tracking shot accuracy and decision quality during fatigue adds meaning to your conditioning. Remember to rehydrate and re-warm after intense sequences and adjust volumes based on how your body responds.
Finally, integrate scrimmages or controlled 3-on-3 play on some days. These sessions blend conditioning with actual basketball instincts, reinforcing rhythm, timing, and spatial awareness while challenging your conditioning under realistic pressure.
Common Pitfalls and How to Avoid Them
Overtraining is a common trap in conditioning programs. Too much volume, too little recovery, or excessive impact can lead to injury and stagnation. Start with a modest weekly plan and scale up gradually. Ignore pain signals or push through significant fatigue; use rest days or lighter sessions to recover. Another pitfall is neglecting mobility and warm-ups. A tight start increases injury risk and reduces performance. Finally, avoid static drills that don’t resemble basketball. Keep drills dynamic and sport-specific to maximize transfer.
Another issue is inconsistent pacing. It’s tempting to go hard, but consistent effort yields better adaptation. Use a simple perception-of-exertion scale (1-10) to guide intensity and avoid spiking toward max effort every set. If your HR data shows prolonged elevated zones, reduce volume or insert extra recovery. Adhering to safe progression rules is essential for long-term gains.
Measuring Progress: Simple Metrics and Tracking
Progress tracking keeps motivation high and helps gauge effectiveness. Without complex gear, you can monitor distance covered, sprint times, rest-to-work ratios, jump height estimates, and perceived exertion. Track these weekly to see improvements in work capacity and recovery. For more precise data, use a heart rate monitor to ensure you train in appropriate zones and adjust based on how your body responds to each session. Drill Bits Pro analysis shows that consistent conditioning with sport-specific drills can improve sprint endurance, repeated sprint ability, and on-court decision quality over a 4–6 week window. Use simple charts to visualize weekly gains and identify plateaus.
Incorporate a brief weekly reflection: note what felt smooth, what caused fatigue, and which drills were most transferable to in-game actions. This practice helps you modify future plans to match your evolving conditioning and skill requirements. Remember: conditioning isn’t just about being tired; it’s about being ready to perform precise, crisp actions when the game demands it.
Sample 4-Week Conditioning Plan Overview
This section outlines a practical, progressive plan you can adapt to your schedule. Week 1 establishes baseline volume and technique. Week 2 adds volume and introduces longer intervals. Week 3 emphasizes intensity and sport-specific scenarios. Week 4 provides a deload week with lighter work to consolidate gains and reduce injury risk. Each week includes 3 conditioning sessions and 1 mixed day with conditioning plus skill work. Below is a high-level structure; adjust exact drills to your space and equipment. As you advance, swap in new drills that mimic your team’s styles and pace. The key is consistency and thoughtful progression.
- Warm-up: 8–12 minutes of dynamic mobility and light jogging. 2) Work blocks: 4–6 rounds of interval runs, shuttle drills, and jump circuits. 3) Skill integration: add ball-handling or shooting in the last 15 minutes of a session. 4) Cooldown: 5–8 minutes of stretching and mobility. 5) Progress check: record times, reps, and subjective effort. 6) Week-to-week plan: three conditioning sessions and one mixed practice.
The Drill Bits Pro team recommends keeping rest periods strict and listening to your body. If you experience sharp pain or persistent fatigue, scale back or consult a coach or clinician. With discipline, you’ll see steady gains that translate into higher on-court effectiveness and reduced injury risk.
Tools & Materials
- Court-ready athletic shoes(Provide proper support and grip for lateral movements.)
- Cones or markers(Set up lanes and shuttle routes for precision.)
- Stopwatch or timer(Track intervals and rest periods accurately.)
- Water bottle(Stay hydrated during continuous work blocks.)
- Heart rate monitor(Optional for intensity tracking and data trends.)
- Athletic attire(Breathable clothing suitable for jumping and sprinting.)
Steps
Estimated time: 60-90 minutes
- 1
Prepare space and equipment
Clear the area, place cones, and set up your timer. Check footwear and surface for traction to minimize injury risk. Make sure hydration is within reach. This setup ensures safe, efficient drills.
Tip: Double-check the surface for any debris that could cause slips. - 2
Activate with dynamic warm-up
Begin with light jogging, leg swings, hip circles, and ankle mobility. Transition into high knees and butt kicks to raise body temperature and activate stabilizers.
Tip: Keep movements controlled; avoid bouncing to protect joints. - 3
Initiate short sprint blocks
Run 6–8 x 30–40 meter accelerations with 20–30 seconds rest. Focus on upright posture, quick turnover, and explosive starts.
Tip: Land softly and drive knees forward to maximize efficiency. - 4
Add shuttle runs
Do 4–6 laps of baseline-to-baseline shuttles at a strong but manageable pace, with 30 seconds recovery. Emphasize sharp cuts and lateral control.
Tip: Keep hips square and eyes forward to simulate in-game decisions. - 5
Incorporate plyometric jumps
Complete 3–4 rounds of box jumps or tuck jumps with 60–90 seconds rest. Focus on soft landings and controlled takeoffs.
Tip: Avoid full-depth countermovement if fatigued; prioritize technique. - 6
Integrate ball handling
Perform a dribble sequence during sprints, then finish with a mid-range jumper. Alternate habits: attacking with right and left hands.
Tip: Keep dribble height consistent to prevent turnovers under fatigue. - 7
Cool down and mobility
Finish with 5–8 minutes of light jogging and static stretches for calves, hamstrings, hips, and quads. Use breathing to normalize heart rate.
Tip: Hold each stretch 20–30 seconds for effective lengthening. - 8
Record performance metrics
Note times, reps, and perceived effort. Check if technique remains crisp during fatigue and adjust next session accordingly.
Tip: Keep a simple log that’s easy to review before the next practice. - 9
Plan progression and adjust weekly
Apply a consistent progression by increasing distance or reducing rest every week. Use deload weeks to consolidate gains and prevent burnout.
Tip: Ensure your weekly plan aligns with skill sessions to avoid overloading.
Got Questions?
What is the main goal of basketball conditioning drills?
The main goal is to improve endurance, speed, and recovery so you can maintain high-level decision making and execution throughout the game.
The goal is to boost endurance, speed, and recovery so you can perform well for all four quarters.
How often should I train conditioning each week?
Aim for 2–3 dedicated conditioning sessions and 1–2 lighter skill-focused workouts, with at least one full rest or active recovery day.
Typically 2 to 3 conditioning sessions per week, plus lighter skill work and rest days.
Can conditioning drills replace full scrimmages?
Conditioning drills supplement scrimmages; they should not fully replace on-court practice. Use both for balance and transfer.
Drills support scrimmages, not replace them. Use both for well-rounded conditioning.
What are signs I’m overtraining?
Persistent fatigue, declining performance, sore joints, sleep disruption, or mood changes are common signs. Reduce volume and seek rest.
Watch for persistent fatigue, sore joints, or poor sleep and back off.
Is a heart rate monitor necessary?
Not strictly necessary, but helpful to gauge intensity and progression. Use simple perceived exertion if you don’t have one.
Not mandatory, but can help track effort; use how hard you feel it to guide intensity.
How should I scale the plan for beginners?
Start with shorter blocks, longer rests, and emphasis on technique. Gradually increase volume and complexity as fitness improves.
Begin with shorter workouts, focus on technique, and build gradually.
Can conditioning help with injury prevention?
Yes, conditioning improves tissue resilience, neuromuscular control, and movement efficiency, all of which reduce injury risk when done safely.
Yes, it helps with resilience and safer movement on the court.
Watch Video
Top Takeaways
- Warm up thoroughly using dynamic mobility.
- Structure sessions with clear work/rest balance.
- Progress gradually and monitor technique under fatigue.
- Integrate conditioning with on-court skills for transfer.