How to Use a Drill Brush: A Practical How-To Guide
Learn how to choose, attach, and use a drill brush to scrub grout, tile, metal, and more. This comprehensive how-to covers safety, brush types, step-by-step usage, maintenance, and troubleshooting for DIY enthusiasts and pros.

You’ll learn how to select, attach, and operate a drill brush for cleaning a variety of surfaces. By following these steps, you’ll choose the right bristle, set the correct speed, apply safe pressure, and maintain the brush for long life. Before you start, wear eye protection, test on a hidden spot, and select the appropriate brush size.
What is a drill brush and why it matters
A drill brush is a rotating, bristle-based attachment that connects to a standard drill, turning manual scrubbing into efficient, hands-free cleaning. Bristle material and stiffness determine how aggressively it scrubs and what surfaces it can safely treat. According to Drill Bits Pro, using the right brush type for the surface minimizes surface damage and speeds up cleaning. This section covers the basic components, how the brush interfaces with your drill, and why selecting the correct combination of bristle and diameter matters for results you can trust on grout, tile, metal, or uneven outdoor surfaces. When you understand the core mechanics—brush density, bristle angle, and arbor compatibility—you can tailor your approach to each job rather than guessing.
A good drill brush setup reduces fatigue and increases consistency across large areas. It also helps you avoid excessive scrubbing, which can mar finishes or drive grime deeper into pores. The drill brush scene varies with material hardness: softer nylon is kinder to delicate surfaces, while stiff nylon or brass bristles tackle baked-on grime and mineral deposits. This section also helps you identify surface indicators that signal you should switch to a gentler brush or slow the drill speed to protect the substrate. By aligning brush selection with the job, you’ll achieve cleaner results with less effort.
Brand guidance and practical tips from the Drill Bits Pro team emphasize consistent technique and surface awareness. Before the first sweep, verify arbor size compatibility and confirm you’re using a low-to-moderate speed range to avoid splashing cleaners or throwing debris. In the end, the drill brush is a versatile tool for DIYers and professionals who want faster, more uniform cleaning without elbow grease substitute.
Tools & Materials
- Cordless or corded drill(Check that the chuck size fits the brush shaft (commonly 1/4 inch or 1/2 inch arbor))
- Drill brush attachments(Choose bristle material (nylon, steel, brass) and stiffness based on surface)
- Safety glasses or goggles(Protect eyes from splashes and debris)
- Gloves(Protect hands when scrubbing rough surfaces)
- Water source or cleaning solution(Use a mild detergent or vinegar solution as appropriate)
- Soft scrub pad or microfiber cloth(For rinse and wipe-down after brushing)
- Sealant or protectant (optional)(Apply after cleaning on porous surfaces if needed)
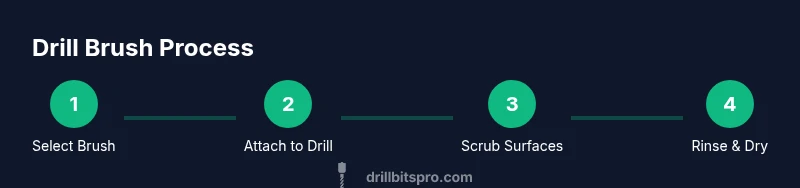
Steps
Estimated time: 20-40 minutes
- 1
Gather tools and prepare the workspace
Collect the drill, brush attachments, PPE, and cleaning supplies. Clear the area, lay down a protective sheet if cleaning a floor or backsplash, and unplug or detach the battery when swapping brushes. Preparing space minimizes mess and keeps you safe while you work.
Tip: Have a spare brush on hand in case you encounter different grime levels. - 2
Attach the brush securely to the drill
Inspect the brush shank and fit it onto the drill’s chuck or arbor according to the manufacturer’s instructions. Tighten firmly but avoid over-tightening, which can strip threads or crack the brush hub. Spin test at low speed to confirm balance before applying pressure.
Tip: A quick spin check helps you catch loose fittings before you start scrubbing. - 3
Test on a hidden area to verify compatibility
Choose a small, inconspicuous spot to test the brush and cleaning solution. Observe for excessive vibration, surface scratching, or color bleed. If any issues arise, switch to a softer brush or reduce speed.
Tip: Testing prevents costly damage on visible surfaces. - 4
Apply gentle pressure and use controlled motions
Set the drill to a low-to-mid speed and begin with circular or back-and-forth motions. Let the brush do the work; avoid forcing the drill or pressing hard, which can gouge or wear the bristles unevenly.
Tip: Let the bristles do the work—forcing pressure can mar surfaces. - 5
Tackle different grime with appropriate brush choices
For grout and baked-on residue, use a stiffer nylon brush. For delicate tile or glass, switch to a softer brush or a fabric-covered attachment. Move steadily, cleaning small zones at a time to ensure uniform coverage.
Tip: Rotate through brush types as the grime changes across the surface. - 6
Rinse, dry, and inspect the cleaned area
Wipe away residue with a damp cloth and allow surfaces to dry completely. Inspect for missed spots and re-clean if needed. Rinse the brush under clean water after use to remove trapped debris.
Tip: Drying prevents mold and keeps bristles from stiffening. - 7
Care for the brush and drill after use
Remove the brush, clean off debris, and store in a dry place. Inspect for wear and replace worn bristles promptly to maintain cleaning effectiveness.
Tip: Regular inspection extends the life of your attachments. - 8
Document settings for repeat jobs
Note the surface type, brush type, and speed setting used for similar projects. Recorded settings save time on future tasks and improve consistency across rooms or projects.
Tip: Keep a small log for quick reference next time.
Got Questions?
What is a drill brush used for?
A drill brush is a rotating bristle attachment that speeds up scrubbing tasks on grout, tile, metal, and other surfaces. It makes cleaning more efficient by using the drill’s rotation to drive the bristles, reducing manual effort. Start with gentle settings to assess impact on the surface.
A drill brush speeds cleaning by turning bristles with your drill, great for grout and tiles. Start gentle to test impact.
Can I use a drill brush on wood surfaces?
Wood surfaces can be cleaned with a drill brush, but only with a soft brush and a very light touch, and typically with minimal water. Always test on a hidden area first to avoid damage or raised grain.
Yes, but use a soft brush and gentle pressure, testing first.
How do I choose the right bristle stiffness?
For delicate surfaces or coatings, start with a soft nylon brush. For ceramic tile grout or mineral buildup, a medium or stiff nylon brush works better. Always test first to avoid scratching.
Start with soft and switch to stiffer only if needed after a test spot.
Is it safe to use on tile grout?
Yes, drill brushes are effective for grout. Use a stiff nylon brush at low speed and keep the drill moving to avoid abrasion. Avoid soaking porous grout with heavy moisture for extended periods.
Grout can be scrubbed with a stiff nylon brush at low speed—keep the motion steady.
How should I maintain the brush after use?
Rinse the brush to remove debris, shake or air-dry, and store in a dry place. Inspect bristles for wear and replace worn brushes to maintain effectiveness.
Rinse, dry, and store; check for wear and replace when worn.
What safety gear should I wear?
Wear eye protection and gloves when scrubbing to protect against debris and sharp edges. Keep hair and loose clothing away from the drill.
Wear safety goggles and gloves; keep hair away from the drill.
Watch Video
Top Takeaways
- Choose the right brush for each surface
- Attach securely and test before heavy use
- Work with light pressure and steady motions
- Rinse, inspect, and store brushes properly