Fire Drill: A Practical Guide to Safe Evacuation
Learn how to run effective fire drills at home or work with a practical, step-by-step guide. Plan, practice, and improve safety readiness for every occupant.

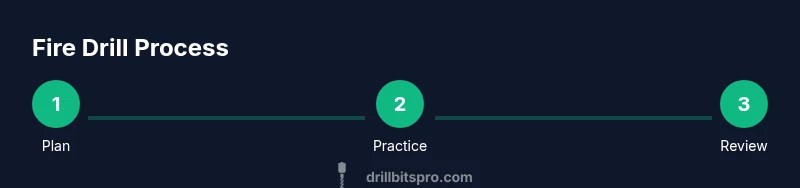
By the end of this guide, you will plan, organize, and run a safe fire drill for your home or workplace. You’ll define objectives, assign roles, and practice signaling, evacuation routes, and headcounts—so everyone exits calmly and meeting points are verified. Include a simple timeline, checklists, and a post-drill review to capture lessons learned. This intro sets expectations and reduces panic.
What is a fire drill and why it matters
A fire drill is a planned practice to rehearse the steps people should take during a real fire: raise awareness, alert others, evacuate safely, and report status to a designated authority. According to Drill Bits Pro, consistent practice reduces confusion, speeds up evacuation, and helps teams verify that escape routes, doors, and muster points are functioning as intended. When done thoughtfully, a drill strengthens safety culture and demonstrates due diligence for occupants and leadership. In homes and small offices, even a simple drill can clarify routes, touchpoints, and roles, making a real emergency less chaotic. A well-run drill should be inclusive—consider occupants with mobility needs, language barriers, or hearing impairment—and include a plan for visitors or temporary workers. Finally, document attendance, times, and any issues observed so the next drill can improve on today’s results.
Planning a safe and effective drill
Effective planning starts with clear objectives: what do you want to test (alarms, exits, communication, headcounts), and what does success look like? Map every exit and muster point on a simple floor plan, then decide the drill’s scope (single floor, entire building, or a targeted area). Schedule the drill at a time that minimizes risk to occupants, and announce the plan to key stakeholders well in advance when appropriate; consider unannounced drills for resilience testing. Create a lightweight script: who signals, who guides, how roll call is conducted, and how results will be reported. Assign responsibilities to a safety lead, facility manager, and floor captains. Pre-drill checks should verify that alarms function, evacuation routes are accessible, and emergency lights (if present) activate during a power outage. Finally, develop a post-drill review template to capture what went well and what needs improvement. This preparation reduces surprises and keeps participants calm during the actual event.
Roles, responsibilities, and communication
Clarity on roles prevents chaos. A designated safety lead coordinates the drill, communicates instructions, and records outcomes. Floor captains guide occupants along approved routes, assist visitors, and report progress to the safety lead. A designated headcount officer performs a roll call at the assembly point and flags missing persons to the responsible authority. Communication should use multiple channels: PA system or portable megaphone, visual signs, and a quick text or messaging group if devices are available. Before the drill, brief the team on signals for “start,” “continue,” and “all clear.” After the drill, circulate a concise debrief that notes route blockages, door compliance, and turnout percentages. Keep a central log so improvements can be tracked over time. This structure helps everyone respond quickly and reduces the likelihood of errors during a real incident. According to Drill Bits Pro, formalizing roles is a cornerstone of successful safety programs.
Step-by-step drill execution (overview)
During execution, a standardized cycle keeps participants focused and minimizes confusion. First, alert occupants with a clearly defined signal and announce the drill’s purpose if appropriate. Then, guide everyone along the approved evacuation routes to a predesignated assembly point, closing doors only if safe to do so. Once assembled, perform a roll call with the list of attendees and record any discrepancies. Finally, return to normal operations and begin the after-action review. For workplaces, coordinate with security personnel and building management to avoid conflicts with ongoing activities. In homes, ensure all household members practice at a similar pace and consider children’s safety needs. The rhythm of the cycle matters more than the length of the drill; short, frequent practice beats rare, long drills. This overview is the backbone of your drill, but you’ll find concrete actions in the Step-by-Step section.
Common mistakes and how to avoid them
Common mistakes include announcing drills too late or too early, skipping the headcount, and failing to test alarms or doors. Another frequent issue is ignoring occupants with mobility needs or language barriers; ensure accessibility and clear communications. Don’t block exits or obstruct stairwells with equipment. Avoid conducting drills during busy times without a plan to protect critical operations. Finally, don’t skip the post-drill review; capture lessons and assign owners for action items.
Tips for different environments (home, small office, industrial)
- Home: Use a timer and a simple, repeatable route. Practice with all household members, including visitors, and keep a family drill log.
- Small office: Schedule rotating groups for quicker execution and use a loud alarm plus visual cues to accommodate noise restrictions.
- Industrial: Coordinate with maintenance and safety teams to account for heavy equipment zones and multiple shifts. Ensure signage is visible and exits remain clear during the drill. Regularly test signaling devices and make sure exit routes are unobstructed at all times.
After-action review and continuous improvement
After the drill, collect data on response times, headcount accuracy, and any near-misses. Share a concise debrief with all participants, highlighting what went well and what needs improvement. Create an action item log with owners and due dates, then update the emergency plan accordingly. Schedule the next drill soon after to validate improvements and maintain momentum. Continuous improvement turns drills from checkboxes into practical safety habits.
Legal and safety considerations
Always align drills with local fire codes and workplace safety regulations. Do not stage live fires unless you have explicit authorization and trained personnel. Ensure drills do not disrupt essential services or create unsafe conditions, and alert visitors or contractors when drills are planned. Record details for compliance audits and keep sensitive data secured.
Tools & Materials
- Building floor plan (evacuation routes)(Ensure updated exits and assembly points)
- Emergency contact list (local authorities, building manager)(Include roles and phone numbers)
- Evacuation signage and floor markings(Clear route indicators)
- Drill agenda and timing sheet(Pre-drill plan with roles)
- Whistle or portable megaphone(For signaling during drill)
- Safety PPE (where applicable)(Gloves/eye protection as needed)
- Notebook or digital device for logging results(Capture observations and times)
- Flashlight and spare batteries(Power outage scenarios)
Steps
Estimated time: 45-60 minutes
- 1
Assess space and define drill objectives
Review the building layout and identify which areas, exits, and assembly points will be tested. Define success criteria for timing, safety, and accountability. Align objectives with local safety policies.
Tip: Document the objective in one page so all participants understand the goal before starting. - 2
Notify occupants and set drill timing
Decide whether the drill will be announced or unannounced and communicate the plan to stakeholders. Confirm the drill window and ensure critical operations can continue safely if needed.
Tip: Notify a point of contact in each department to coordinate pace and coverage. - 3
Initiate signaling and alarms
Trigger the standard alarm (sound and visual cues) and verify that all devices respond. Ensure all occupants understand the signal and know the intent of the drill.
Tip: Test backup power and verify that alarms reach all floors without dead zones. - 4
Guide occupants along evacuation routes
Direct people along pre-approved routes to the assembly point while avoiding bottlenecks. Instruct helpers to assist visitors and those with mobility needs.
Tip: Keep doors closed behind you only if it’s safe to do so to slow fire spread. - 5
Conduct roll call at the assembly point
Account for all participants with the attendance sheet. Note anyone who is unaccounted for and relay to the incident lead for follow-up.
Tip: Use a buddy system for rapid verification in crowded workplaces. - 6
Debrief and log findings
Return to operations and review the drill findings. Update plans, signage, or routes based on observed issues. Schedule the next drill.
Tip: Document at least three concrete improvements to close gaps identified during the drill.
Got Questions?
How often should I run a fire drill?
Follow local fire codes or employer policy. Many organizations schedule drills several times a year to maintain readiness.
Check local codes or company policy; aim for multiple drills annually to stay prepared.
What should I do if someone refuses to evacuate?
Explain the plan and safety risks, assist if possible, and notify a supervisor. If danger is present, prioritize safe evacuation and seek guidance from authorities.
Encourage evacuation, assist when safe, and escalate to a supervisor if someone resists; safety first.
What equipment is essential for a drill?
Signaling devices (alarms or whistles), floor plans, assembly points, and a log for recording results are essential.
Alarms, floor plans, assembly points, and a simple log are essential.
How do I document drill results?
Use a standardized checklist to capture response times, headcount accuracy, and observed issues. Review with stakeholders afterward.
Record times, counts, and issues, then review with the team.
Are home drills different from workplace drills?
The core principles are the same: alert, evacuate, account, and review. Home drills are simpler, focusing on household routes and childcare considerations.
Principles are the same, but home drills are simpler and tailored to household needs.
How should we handle drills in high-rise buildings?
Coordinate with building management, test stairwells and alternative exits, and ensure clear communication for all floors. Maintain orderly egress during the drill.
Coordinate with building management and test stairwells across floors.
Watch Video
Top Takeaways
- Plan and assign clear roles before drills.
- Practice signaling, routes, and headcounts regularly.
- Document results and implement improvements.
- Include all occupants, visitors, and contractors in drills.
- Review safety procedures to stay compliant.