Fire Drill Melanie Martinez: A Practical Workshop Safety Guide
Learn how to plan and run a safe, effective fire drill in your workshop. This step-by-step guide uses a practical drill scenario named fire drill melanie martinez to illustrate roles, timing, and post-drill debrief for continuous safety improvement.

With this guide, you will plan and run a safe, effective fire drill in your workshop. The focus is on a practical drill scenario—named fire drill melanie martinez—to illustrate how teams should move, communicate, and verify who is accounted for during a real emergency. You’ll cover preparation, alerting occupants, safe evacuation, and post-drill debrief to improve your safety culture for teams of all sizes.
Why a Structured Fire Drill Improves Safety
According to Drill Bits Pro, a structured fire drill reduces hesitation, clarifies roles, and shortens evacuation times, especially in noisy or crowded workshops where audible alarms can be drowned out by machinery. In this guide we explore a practical drill scenario named fire drill melanie martinez to illustrate how teams should move, communicate, and verify who is accounted for during a real emergency. By defining a clear chain of command, pre-planned routes, and repeatable cues, you turn a chaotic event into a repeatable safety process. A well-designed drill also helps identify equipment gaps such as blocked exits, faulty alarms, or poorly labeled muster points. Throughout, you’ll see how to scale the plan from a small hobby shop to a larger, multi-room fabrication environment, while maintaining rigorous safety standards.
This introduction is not just about compliance; it is about cultivating a safety culture where everyone knows their duties, can act confidently under pressure, and can participate in ongoing improvement. As you read, consider how your current drills benefit or hinder fast, safe evacuations. The case study approach in this guide offers actionable templates you can adapt to your space, whether you run a wood shop, metal shop, or mixed-space facility. The emphasis is practical, repeatable, and focused on reducing risk through structure and practice.
To set the stage for a robust drill, gather your leadership, wardens, and floor staff into a single planning session. Use a simple agenda, assign roles, and decide on a single point of contact for communications during the drill. A well-executed drill depends on preparation, clear instructions, and timely feedback, all of which empower your team to respond decisively if a real emergency occurs.
-3
Tools & Materials
- Fire extinguisher (ABC-rated)(Place within 30-75 meters of all work zones; ensure current inspection tag.)
- Working smoke alarm or audible alert system(Test before drill; ensure alarms reach all areas even with machinery running.)
- Evacuation route map and muster point sign(Post at entry points and near all exits.)
- Personal protective equipment (PPE): safety glasses, gloves, and sturdy footwear(Eye protection for all participants; avoid sandals or open-toed shoes.)
- High-visibility vests for staff(Useful in large spaces or outdoor drills to identify staff quickly.)
- Stopwatch or timer(Timing evacuation, headcount, and re-entry.)
- Clipboards, forms, and a debrief template(Capture attendance, times, and observations for improvement.)
- Floor plan or layout diagrams(Pre-annotated routes, hazards, and blocked aisles.)
- Cones/tape to mark drill zones(Optional for large facilities to simulate blockages.)
- Spare batteries or backup power for alarms(Backup option if primary power is unstable.)
Steps
Estimated time: 60-90 minutes
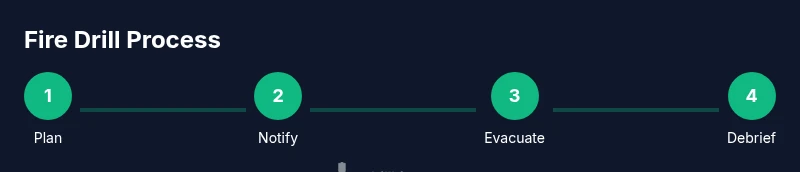
- 1
Define scope and roles
Create a simple drill scope (which zones participate, what constitutes a complete evacuation, and who is in charge). Assign an incident commander, safety lead, floor wardens, and a head counter. Confirm communication protocols and a backup contact in case the primary line fails.
Tip: Keep the scope small for the first run; you can expand in later cycles. - 2
Prepare the drill plan and map
Review the space, list all exits, hazards, and muster points. Print a one-page map and a short script for participants to follow during the drill to ensure consistency.
Tip: Double-check exits with real-time pathfinding to catch bottlenecks. - 3
Notify teams and initiate alarm
Inform affected personnel of the drill timing and trigger the alarm. Use both audible and visual signals if the space has heavy machinery or noise interference.
Tip: Assign a runner to announce drill status to areas not reached by the PA system. - 4
Evacuate to muster point
Guide staff to the designated muster point, avoiding known hazards. Conduct a rapid headcount and compare with the attendance roster.
Tip: If someone is unaccounted for, initiate a secondary sweep with the wardens. - 5
Conduct a quick safety check
While at the muster, verify that critical areas are clear and that no one returns to a hazardous zone prematurely.
Tip: Avoid re-entry until cleared by the incident commander. - 6
Debrief and capture lessons
Gather participants, review what went well and where delays occurred. Record improvement actions and assign owners with deadlines.
Tip: Focus on concrete actions, not blame. - 7
Document results and plan a follow-up
Complete a drill report with times, observations, and corrective actions. Schedule the next drill and adjust procedures based on findings.
Tip: Re-test after changes and before new equipment installation.
Got Questions?
What is the main purpose of a fire drill in a workshop?
The main purpose is to train staff to evacuate safely, locate exits, and account for everyone. It also helps identify gaps in protocols.
The main purpose is to train staff to evacuate safely and identify gaps in the plan.
How often should drills be conducted to stay compliant?
Most workplaces run drills quarterly or semi-annually depending on regulations and space; adjust to changes in layout or personnel.
Drills are typically quarterly or semi-annually, and anytime the space or staff changes.
What should you include in a drill plan for a small shop?
Include the scope, roles, routes, muster points, alarm triggers, timing targets, and a post-drill debrief template.
Include scope, roles, routes, alarms, timing, and a debrief plan.
How can I tailor drills for multiple trades and layouts?
Assess space layouts, equipment locations, and traffic flow; create alternate routes and designate wardens for each area.
Look at the space, plan alternate routes, and assign wardens by area.
How do I measure drill effectiveness after the debrief?
Use a debrief template to track times, participation, obstacles, and corrective actions; compare against previous drills to gauge improvement.
Use a simple form to track times and improvements after each drill.
Watch Video
Top Takeaways
- Plan with clear roles and routes
- Use a simple, repeatable drill format
- Debrief quickly and close the loop with action items
- Document and re-test after changes
- Involve all shifts for full coverage