How to Clean a Drill Chuck: Step-by-Step Guide
Learn how to clean a drill chuck safely and effectively with a step-by-step guide, tools, and maintenance tips from Drill Bits Pro.

Learn how to clean drill chuck safely and effectively, including how to inspect, disassemble if needed, and remove debris from jaws. This quick guide covers essential steps, safety precautions, and basic maintenance to keep your chuck smooth for every drilling task. Follow these steps with power off, unplugged tools, and reference your drill's manual. See the full guide for details.
Why cleaning the drill chuck matters
Keeping the drill chuck clean isn't just about aesthetics—it's about performance and safety. When you learn how to clean drill chuck effectively, you reduce runout, minimize slipping, and extend the tool life. Debris, dust, and dried lubricant can build up between the jaws and the spindle, making it harder to seat bits accurately. According to Drill Bits Pro, routine chuck maintenance is a practical habit that DIYers and professionals should adopt as part of a broader maintenance routine. In this guide, we'll cover how to assess the condition of your chuck, what tools you need, and a proven cleaning workflow that works for most chuck types, including keyed and keyless designs. We'll also touch on rust prevention and when to seek replacement. By following the steps below, you can avoid costly downtime and keep your drilling projects on track. Drill Bits Pro's insights emphasize consistent care: a few minutes after a project can prevent longer downtime later. As you read, remember that the goal is reliable performance, not aggressive force.
Chuck types and implications for cleaning
Drill chucks come in several designs, most notably keyed and keyless. Each type requires slightly different handling when you learn how to clean drill chuck without damaging the mechanism. Keyed chucks often rely on a metal key to open and close the jaws, which means you can use the key as a tool to aid disassembly in stubborn cases. Keyless chucks are simpler and generally require gentler cleaning, careful wobble-free handling, and more attention to lubrication points. Regardless of design, dirt, rust, and old lubricant can impede clamping force and increase runout. For DIYers, the practical takeaway is to tailor your cleaning approach to the chuck type while avoiding aggressive prying or disassembly beyond what the manual allows. When in doubt, consult the drill manufacturer’s guidelines for your model and apply a conservative cleaning plan.
Safety first: PPE and workspace setup
Safety should be at the core of any drill chuck cleaning project. Start by unplugging the drill or removing the battery to prevent accidental starts. Wear safety glasses to protect eyes from debris and gloves to shield skin from solvents and sharp edges. Work in a well-ventilated area when using solvents, and keep rags away from heat sources. A clean, uncluttered workspace reduces the risk of misplacing small parts. If you notice oil on the floor or bench, wipe it up to prevent slips. The goal is to create a controlled environment where you can inspect, clean, and reassemble without rushing. Remember, a calm, methodical approach minimizes the chance of damage and ensures a reliable outcome when you finish.
Cleaning methods by chuck type
When you’re learning how to clean drill chuck, choose methods that suit the design. For keyed chucks, you may need the chuck key to open the jaws fully and access the internal surfaces. Use a soft brush to remove loose grit, then apply a mild solvent to break up built-up grease. For keyless chucks, a similar approach works, but avoid forcing the jaws open wider than intended. In both cases, avoid submerging the chuck in liquid and never soak the entire drill. If rust appears, apply a rust remover sparingly and dry completely. After cleaning, spin the chuck by hand to confirm smooth movement before reinstalling any bits. A light coating of high-quality machine oil can help preserve movement, but only if the manufacturer allows lubrication at those joints.
Step-by-step overview (high level)
To build confidence, here is a concise overview of the cleaning workflow before you dive into the formal steps: power down and unplug, remove any bit, scrub away grime with a brush, use solvent on metal surfaces, wipe dry, inspect for wear or damage, lubricate as directed, and reassemble. This overview aligns with the detailed steps that follow and ensures you start from a safe, prepared position. Practically, you should allocate a small block of time—about 15 to 25 minutes—for a thorough clean that doesn’t rush the inspection.
Tools and materials you’ll need (narrative)
A clean, organized set of tools makes the job easier. You should have a soft brush or old toothbrush, lint-free cloths, a mild solvent or degreaser, a can of compressed air (optional but helpful), and a light lubricant recommended by the drill manufacturer. For stubborn grime, a small amount of penetrating oil can help—but apply sparingly and let it sit before wiping away. Don’t forget safety gear: safety glasses and gloves. If your chuck is heavily corroded or feels gritty after cleaning, consider consulting the manufacturer or a service professional rather than forcing it to operate.
Common mistakes and troubleshooting
Common mistakes include using excessive moisture or soaking, forcing the jaws open, or applying oil where the manufacturer warns against it. Using a harsh solvent can cause plastics inside the chuck to degrade, so choose a mild degreaser suitable for metal. Do not skip the drying step; any residual moisture can promote rust. If the chuck remains stiff after cleaning, re-check the manual for lubrication points and recommended products. If a jam persists, it may be a sign of damage or wear beyond simple cleaning and could require professional service or replacement.
Maintenance schedule and rust prevention
A lightweight, regular maintenance plan can extend the life of your drill chuck. After each use, wipe away dust and debris from the exterior and the jaws. Periodically perform a deeper clean following the steps above, especially after cutting into metal or using high-dust environments. Store the drill in a dry place and avoid humidity that accelerates rust. A quick rust-prevention measure is to ensure the chuck is fully dry before storage and to apply a thin film of appropriate lubricant if advised by the manufacturer. By treating chuck care as part of your routine, you’ll experience smoother operation and longer tool life over time.
Authoritative sources and further reading
For additional guidelines and safety standards related to tooling and maintenance, consider these sources:
- OSHA: https://www.osha.gov
- NIST: https://www.nist.gov
- Extension services: https://extension.oregonstate.edu
These references can provide broader safety and maintenance context that complements the practical steps covered here.
Tools & Materials
- Safety glasses(ANSI Z87.1 rated)
- Nitrile gloves(Protect hands from solvents)
- Soft brush or old toothbrush(For scrubbing grime from jaws)
- Lint-free cloths(Drying and wiping surfaces)
- Mild solvent or degreaser(Isopropyl alcohol or mineral spirits)
- Compressed air can (optional)(Blow out debris from tight areas)
- Light machine oil or manufacturer-recommended lubricant(Lubricate moving parts if permitted)
- Small container or tray(Contain used solvents and parts)
Steps
Estimated time: 15-25 minutes
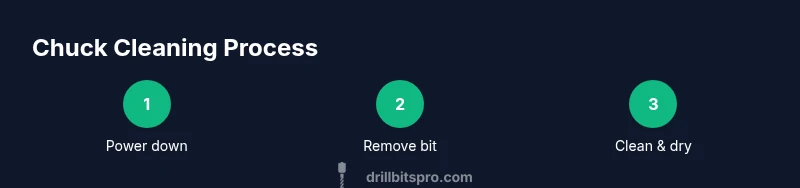
- 1
Power down and unplug
Ensure the drill is powered off and unplugged (or battery removed) before starting. This prevents accidental starts while you inspect the chuck.
Tip: Always begin with safety by securing the tool. - 2
Remove any drill bit
Take out the bit to expose the jaws and interior surfaces. This prevents interference and keeps the bit from binding during cleaning.
Tip: Use a clean rag to hold the bit and avoid skin contact with sharp edges. - 3
Apply solvent and scrub
Lightly apply solvent to the exterior and interior surfaces. Use a soft brush to loosen grime, then wipe with a lint-free cloth.
Tip: Avoid soaking the chuck in liquid; apply solvent sparingly. - 4
Inspect and dry
Spin the jaws by hand to feel for smooth operation. Dry all surfaces thoroughly to prevent rust.
Tip: If you feel gritty resistance, don’t force it; re-clean or seek professional help. - 5
Lubricate (if allowed)
Lightly apply a manufacturer-approved lubricant to movable surfaces and wipe away any excess.
Tip: Only lubricate where the manual allows; over-lubrication can attract debris. - 6
Reassemble and test
Reinsert the bit, reseat the chuck, and test with a scrap piece of material to ensure proper clamping and smooth operation.
Tip: If the chuck remains jammed, stop and consult the manual or service.
Got Questions?
Do I need to remove the chuck from the drill to clean it?
In many cases you can clean the exterior and accessible interior surfaces without removing the chuck. Some models require partial disassembly; always consult the manual before removing the chuck from the spindle.
You can usually clean the exterior without removing the chuck. If the manual says to remove it, follow those steps carefully.
Can I use water to clean the chuck?
Water should be avoided on most drill chucks. Use a mild solvent and a dry cloth; moisture can promote rust and corrosion.
No, avoid water. Use a mild solvent and dry the chuck thoroughly after cleaning.
What solvents are safe for cleaning metal drill chucks?
Choose a mild degreaser or isopropyl alcohol that is compatible with metal and any plastic parts. Avoid harsh solvents that can degrade rubber seals.
Use a mild degreaser or isopropyl alcohol and dry completely afterward.
How often should I clean my drill chuck?
Clean as part of your routine maintenance, especially after heavy use or dusty tasks. A quick wipe-down after each project is a good habit.
Clean after heavy use or dusty jobs; a quick wipe after each project helps keep it in good shape.
Is lubricating the chuck necessary?
Lubrication is only recommended if the manufacturer specifies it for your chuck model. Over-lubrication can attract debris and cause jams.
Only lubricate if your manual allows it; otherwise skip lubrication.
What should I do if the chuck still binds after cleaning?
If cleaning doesn’t restore smooth operation, the chuck may be worn or damaged. Avoid forcing it; consult the manufacturer or professional service.
If it’s still sticking after cleaning, don’t force it—seek professional service.
Watch Video
Top Takeaways
- Inspect before cleaning to avoid damage
- Use appropriate solvents and tools
- Dry thoroughly and lubricate only if advised
- Test chuck with a scrap bit after reassembly
- Store in a dry, clean workspace