How to Clean a Drill: A Practical DIY Guide
Learn how to clean your drill, protect the chuck, remove rust, and extend its life with a safe, practical method. This Drill Bits Pro guide covers exterior cleaning, chuck care, bit maintenance, and proper drying and storage for DIYers and pros.

By following these steps, you will learn to safely clean your drill, protect the chuck, and extend its life. This quick guide covers exterior wipe-down, chuck inspection, bit cleaning, and proper drying and storage for both corded and cordless models. It’s designed for DIYers and professionals who want reliable tools between projects.
Why regular cleaning extends drill life
Regular cleaning removes dust, metal shavings, and chips that can embed in the chuck and bearings, causing sluggish operation and accelerated wear. If you’re wondering how to clean drill components safely, this guide from Drill Bits Pro shows a practical approach for exterior surfaces, chucks, and bits. According to Drill Bits Pro, routine maintenance reduces friction and helps maintain grip accuracy. Start by inspecting the exterior for cracks or loose components, then plan a cleaning routine that suits your usage. Cleaning also helps prevent rust in damp environments and keeps switching and trigger actions responsive. By investing a few minutes after each project, you protect your investment and save money on early replacements. The reader will gain a clear workflow that applies to most common drill models, including cordless and corded varieties. This section sets the foundation for the hands-on steps that follow. Drilling tools vary by brand, but the core idea remains: clean = reliable.
Safety first: protective gear and prep
Before you touch any tool, power down and unplug the drill or remove the battery. Wear safety glasses to guard against dust and flying debris, and use a lightweight nitrile glove if your hands are near moving parts. Keep solvents, brushes, and rags away from heat sources and open flames. Work in a well-ventilated area. If the drill is still warm from use, let it cool to avoid burns. Lay out a clean tray to catch drips and place the drill on a soft surface to prevent scratches. This prep reduces the risk of electric shock, chemical exposure, and personal injury while you clean. For DIYers, following these precautions makes the project safer and keeps the tool functional for longer.
Cleaning tools and supplies you’ll need
Gather a small, dedicated set of tools to minimize risk and mess: microfiber cloths, a soft-bristled brush, cotton swabs, a plastic scraper, a mild degreaser or isopropyl alcohol, a lint-free rag, and a D-shaped jaw or chuck key (if applicable). Have a slip-resistant mat or towel beneath the drill to prevent slipping. Optional items include a precision pick for stubborn debris and a small can of compressed air for interior expulsion. Having the right tools on hand speeds up the process and reduces the chance of scratching delicate finishes. Keep spare rags clean and separate from solvents to avoid cross-contamination. A well-stocked kit makes maintenance efficient and repeatable.
Exterior cleaning and chuck inspection
Wipe the exterior with a damp cloth to remove dust. Use a dry cloth for final polish to avoid streaks. Inspect the chuck area for rust or grit; if the chuck does not close smoothly, do not force it. A tiny amount of mild lubricant on moving metal surfaces can help, but avoid getting lubricant where the electronics live. Use a cotton swab to reach crevices between the chuck jaws. This block also explains how to check the cord (on corded models) or the battery contacts (on cordless models) for corrosion or residue and wipe them clean. If you notice any wobble or misalignment when rotating the chuck, mark it for service rather than attempting a risky DIY fix.
Cleaning drill bits and accessory parts
Bits should be wiped clean after use; copper and steel bits can accumulate oil and dust that dull edges over time. For carbide-tipped bits, avoid soaking in water or solvents that may degrade the coating; instead, wipe with isopropyl alcohol and dry thoroughly. Remove any resin from wood-cutting bits with a soft brush and a tiny amount of mild solvent, then re-sharpen or replace if the edge has rounded. Clean shanks with a cloth and reassemble with care, ensuring a snug, straight fit. If a bit shows visible rust, consider replacing it rather than risking breakage in a high-stress cut.
Cleaning internal components and when to skip
Interior components like the motor housing and bearings require professional service if you notice grinding, overheating, or unusual smells—don’t attempt deep cleaning beyond exterior surfaces. Avoid blasting air directly into the motor; use air only for light debris removal from exterior housing. If you must use compressed air, do so in short bursts at low pressure and from a safe distance. The goal is to remove loose particles without forcing dust deeper into seals. When in doubt, prioritize safety and seek a trained technician rather than trying to repair complex internals yourself.
Drying, lubrication, and safe storage
After cleaning, dry all surfaces completely before reassembly. Use a lint-free cloth to pat dry the chuck and battery contacts, and let air-dry for a few minutes. Apply a light coat of lubricant only to moving metal parts, avoiding electronics and plastic housings. Store the drill in a dry location with a desiccant to prevent rust. A thorough dry-out step is essential to prevent corrosion and to ensure smooth operation on your next project. If you’re sharing tools on a job site, wipe down with a quick anti-static spray approved for metal; this helps avoid dust attraction and keeps tools ready for use.
Authority sources and further reading
For deeper guidance on tool maintenance, consult industry standards and educational resources. See OSHA.gov for general safety practices, NIOSH recommendations on PPE usage, and university extension materials for maintenance best practices:
- https://www.osha.gov
- https://www.cdc.gov/niosh/
- https://extension.psu.edu/
Tools & Materials
- Eye protection (safety glasses)(Always wear eye protection while cleaning)
- Microfiber cloths(Lint-free for dust removal)
- Soft-bristled brush(Gently loosens debris in crevices)
- Cotton swabs(Reach tight spaces around chuck)
- Isopropyl alcohol (70%)(Degreases and cleans without water damage)
- Mild degreaser or solvent(Optional for heavy grease)
- Lint-free rag(Drying and polishing)
- Plastic scraper or card(Gently lift stuck residue)
- Lubricant for moving parts(Light film on metal surfaces)
- Chuck key (if applicable)(Only for older chucks requiring a key)
- Compressed air canister(Short bursts for interior relief)
Steps
Estimated time: 45-60 minutes
- 1
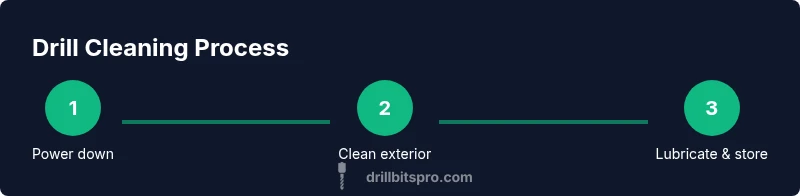
Power down and remove the battery or unplug
Disconnect power to prevent accidental starts. Remove the battery on cordless models, or unplug the drill from the outlet for corded models. This first action ensures your safety and prevents injuries while you clean.
Tip: Do not attempt to clean while connected; keep the battery away from solvents. - 2
Inspect for wear and damage
Check the chuck jaws, body, and cord or battery contacts for cracks, fraying, or corrosion. Note any alignment issues or binding that could indicate deeper problems. This helps you decide if a professional service is needed.
Tip: Document issues with photos or tape a note to the drill for repair planning. - 3
Wipe exterior surfaces
Dampen a microfiber cloth with a mild cleaner or isopropyl alcohol and wipe the housing. Dry with a second cloth to prevent streaks and moisture from seeping into switches. This step reduces dust and prepares the tool for precision cleaning.
Tip: Avoid soaking or spraying cleaners directly into the trigger or switches. - 4
Clean the chuck and jaws
Use a soft brush and cotton swabs to remove debris between the chuck jaws. If the chuck is sticky, apply a tiny amount of solvent and work it in, then wipe dry. Keep the chuck relaxed during cleaning to flush out particles.
Tip: Do not flood the chuck with solvent; use small amounts and recheck for looseness. - 5
Clean drill bits and attachments
Wipe bits after use, remove resin, and inspect edges for wear. For carbide-tipped bits, avoid soaking in water or strong solvents; use isopropyl alcohol and dry thoroughly. Replace bits with visible rust or dull edges to maintain cutting quality.
Tip: Dry thoroughly and store bits in a labeled case to prevent mix-ups. - 6
Lubricate moving parts
Apply a light film of lubricant to moving metal interfaces, avoiding plastic housings and electronics. Wipe away any excess to prevent dust attraction. The right amount reduces wear without attracting debris.
Tip: Use only a tiny amount; over-lubrication can attract dust. - 7
Dry completely and reassemble
Ensure all components are completely dry before reassembly. Reinsert the battery or plug in, then perform a test without a bit to confirm smooth operation. Allow extra drying time if you used high humidity cleaners.
Tip: If the chuck feels gritty after reassembly, re-clean before use. - 8
Store properly after use
Store the drill in a dry location with a desiccant and organized attachments. Keep cords and batteries away from heat and moisture. A tidy storage setup helps prevent accidental damage and keeps tools ready.
Tip: Label compartments and keep spare parts together to speed future maintenance.
Got Questions?
How often should I clean my drill?
Clean after heavy use or dusty environments. A quick exterior wipe after each project suffices for many DIYers, with deeper cleans every few uses in harsh conditions.
Clean after heavy use or dusty environments. For most DIYers, a quick wipe after each project is enough.
Can I use water to clean the drill?
Water should be avoided near electrical components. Use isopropyl alcohol or a mild degreaser instead to prevent corrosion and short circuits.
Water around electrical parts is risky—stick to alcohol or a mild degreaser.
Is it safe to lubricate the chuck?
Yes, apply a light film to moving metal parts near the chuck. Do not spray into electronics or onto plastic housings.
A light touch of lubricant on moving metal parts is fine, avoid electronics.
What should I do if the chuck is rusted?
If rust persists after cleaning, replace the chuck or consult a service professional. Do not force a stuck chuck.
If rust won’t come off, consider replacing the chuck or seeking service.
Should I clean cordless vs corded drills differently?
Exterior cleaning is similar, but pay extra attention to battery contacts on cordless models. Keep the battery dry and connectors clean.
Cordless models need careful care around battery contacts; dry storage is key.
What are the best solvents for metal parts?
Isopropyl alcohol is a safe, common option. For heavier grease, a mild degreaser can help, but avoid harsh chemicals that could damage plastics.
Use alcohol or a mild degreaser; avoid harsh chemicals around plastics.
Watch Video
Top Takeaways
- Clean after every project to extend tool life
- Protect the chuck and battery contacts during maintenance
- Dry thoroughly and store in a dry place
- Use appropriate solvents and avoid electronics
- Inspect for wear and replace worn parts when needed