How to Get Rid of Disk Drill: Uninstall and Clean Up
Learn how to get rid of Disk Drill on Windows and macOS with a complete uninstall plan, cleanup steps, and safety tips from Drill Bits Pro.

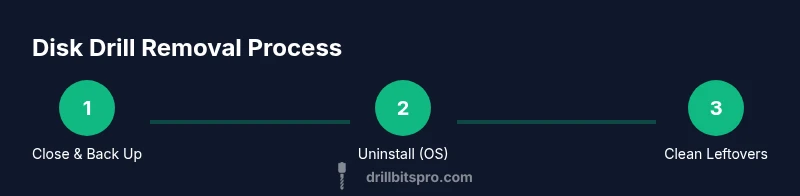
If you're asking how to get rid of disk drill, this guide shows you how to safely uninstall Disk Drill and remove traces from Windows or macOS. You’ll learn the official uninstall paths, how to clean registry entries or macOS plist files, and how to verify the software is gone. Have admin access and a data backup before you start.
How to get rid of disk drill: Why removal matters
Disk Drill is a data-recovery tool used on Windows and macOS. If you no longer need it, removing the software reduces clutter, minimizes potential security risk, and prevents accidental data recovery tasks from running in the background. According to Drill Bits Pro, proper uninstallation decreases leftover traces and helps keep your system clean for future projects. This section explains why a thorough removal matters and the key steps you will follow to get rid of disk drill safely and effectively. A clean uninstall also helps ensure your backups stay reliable and your system runs smoothly, especially if Disk Drill has interacted with disk images or raw volumes. Keeping the workspace lean reduces the chance of conflicts with other recovery tools you might install later. The overarching goal is to remove the application safely while preserving data integrity and system performance.
Beyond the obvious goal of freeing disk space, a complete removal minimizes the risk of background processes consuming CPU cycles or triggering notifications. While Disk Drill itself is designed to be non-destructive when not actively running recovery jobs, failed uninstalls can leave orphaned services or startup items that reappear after a reboot. By understanding the rationale behind a thorough removal, you’ll approach the process with a clear, methodical mindset that aligns with the best practices Drill Bits Pro advocates.
Preparation before uninstall
Before you start removing Disk Drill, take a few precautionary steps to protect your data and your system. First, back up any important files that may have been recovered using Disk Drill, even if you think you don’t need them. Next, close all Disk Drill windows and ensure no recovery jobs are running in the background. Then, confirm you have administrative rights on the computer you’re using and an up-to-date OS backup in case you need to restore settings after cleanup. Finally, decide whether you want to remove only the core application or also related components such as drivers, helper tools, and startup items, which can influence the depth of cleanup required. A well-prepared plan reduces the risk of data loss and helps you complete the uninstallation with confidence. Using a backup strategy that includes a separate drive or cloud storage adds an extra layer of protection should anything go awry during the cleanup.
Preparation also involves understanding what else might be tied to Disk Drill. Some versions install companion services or drivers that facilitate recovery scanning; these can linger if you only uninstall the main application. If you’re unsure, begin with the standard uninstallation and then perform a targeted search for Disk Drill-related files in common locations like Program Files, AppData, Library folders, and the Registry. This ensures you aren’t leaving behind components that could trigger future reinstallation or confusion during system maintenance. Finally, note your OS version and Disk Drill version so you can tailor the steps to your environment and avoid unnecessary detours.
Uninstall Disk Drill on Windows (step-by-step)
Removing Disk Drill on Windows typically follows the standard uninstall path, but there are a few OS-specific nuances. Start by opening Settings > Apps, then locate Disk Drill in the list of installed programs and click Uninstall. If the program isn’t visible in Settings, switch to Control Panel > Programs > Programs and Features, select Disk Drill, and choose Uninstall. Follow the on-screen prompts to complete the removal. After the main uninstaller finishes, inspect the common cleanup locations like Program Files, ProgramData, and AppData to ensure no residual folders remain. Use Windows Search to look for any files or folders named after Disk Drill and delete them if found. If you notice startup entries or services associated with Disk Drill, disable or remove them via the Services console or Task Manager. Finish by rebooting the system and validating that Disk Drill no longer appears in the Applications list, and that there are no start-up tasks reappearing. The goal is a clean slate where Disk Drill cannot secretly restart itself.
Tip: If Disk Drill is not listed in Apps & Features, try the uninstaller from the Disk Drill folder in the Start menu or the program’s installation directory. Also, consider creating a system restore point before making registry changes to protect against unintended side effects.
Uninstall Disk Drill on macOS (step-by-step)
On macOS, uninstall Disk Drill via the Applications folder and then clean up related system components. Begin by opening Finder > Applications, locate Disk Drill, and drag it to the Trash. Empty the Trash to remove the main application. Next, check for lingering LaunchAgents or LaunchDaemons in /Library/LaunchAgents, /Library/LaunchDaemons, and ~/Library/LaunchAgents; delete any files referencing Disk Drill. After removing startup items, search for Disk Drill in your Library folders (Application Support, Preferences, Caches) and delete related folders or plist files. Finally, restart the computer to ensure changes take effect and verify that Disk Drill no longer appears in Applications or Activity Monitor. For completeness, run a search across the system for any remaining traces and remove them if found.
Cleaning up leftovers: registry, caches, and plist
Even after a successful uninstall, traces can linger in Windows registry, macOS plist files, caches, and startup configurations. On Windows, use Registry Editor with care: search for Disk Drill-related keys and carefully delete them after exporting a restore point. Remove associated startup items that could trigger the reappearance of Disk Drill at boot, and clear registry entries that map to recovery components. On macOS, inspect /Library/LaunchAgents, ~/Library/LaunchAgents, /Library/Preferences, and /Library/Caches for Disk Drill-related entries; remove the files to prevent automatic reloading or recovery prompts. Don’t forget to check hidden folders and system-wide directories like /Library/Application Support for any leftover folders. After cleanup, run a system-wide search for “Disk Drill” to confirm there are no residual references.
Verifying removal and preventing reinstallation
Verification is essential to ensure Disk Drill cannot automatically reinstall or reappear. On Windows, search in Programs and Features (or the equivalent Settings page) and confirm Disk Drill is not listed. Check Task Scheduler and startup folders for any Disk Drill entries; disable them if present. On macOS, search in Applications, LaunchAgents, LaunchDaemons, and Login Items for any Disk Drill associations and remove them. Finally, perform another full-system search for “Disk Drill” across your user and system directories, including hidden ones. If any results appear, repeat the uninstall steps or use a reputable cleanup tool to remove stubborn traces.
Troubleshooting common removal issues
If Disk Drill resists removal, try rebooting into Safe Mode (Windows) or Safe Mode on macOS and retry the uninstall process. Some security software may block uninstallers; temporarily disable antivirus or anti-malware tools, then attempt the uninstall again. For stubborn registry keys on Windows, carefully edit the registry with a restore point handy and avoid deleting unrelated keys. If Disk Drill reinstalls after reboot, confirm that no scheduled tasks or login items are reintroducing it and consider using a fresh user profile to rule out user-level settings creating the issue. When in doubt, consult Disk Drill support or your OS vendor’s help resources for advanced cleanup steps.
Alternatives and safe data recovery practices
If your goal is data recovery rather than the Disk Drill experience, consider alternatives with different feature sets or licensing models. Built-in OS tools (such as Windows File History or macOS Time Machine) can provide foundational recovery capabilities, while third-party options may offer deeper scans or safer risk-free recovery workflows. When evaluating alternatives, focus on scan depth, speed, safety, and user reviews to ensure you select a tool that aligns with your needs. Always practice safe data handling: stop using the affected drive to prevent overwriting data, perform recoveries on a separate drive, and verify recovered files with a test restore before relying on them for critical work.
What to do after removal: maintenance and future-proofing
With Disk Drill removed, implement a simple maintenance routine to keep drives healthy and reduce the chance of future issues. Schedule periodic disk checks and health monitoring, keep backups up to date, and routinely review startup items to ensure only trusted software runs at startup. Document your cleanup steps so you can reproduce the process quickly if needed in the future. Finally, consider setting up a quarterly software hygiene check that includes uninstall verification, leftover scans, and a quick system performance review to stay ahead of potential problems.
Tools & Materials
- Administrative access(Admin rights needed to uninstall apps and modify system files.)
- Current data backup(Back up important files in case of accidental data loss.)
- Internet connection(Useful for downloading uninstaller or cleanup tools if needed.)
- Disk Drill uninstaller (if available)(Some versions provide a built-in uninstaller; use it if present.)
- Temporary storage device(USB/external drive for moving large recovered data or logs.)
Steps
Estimated time: 45-75 minutes
- 1
Close Disk Drill and stop all processes
Exit the Disk Drill application and ensure no recovery tasks are running in the background. Use Task Manager (Windows) or Activity Monitor (macOS) to end any lingering Disk Drill processes. This prevents files from being locked during uninstall and reduces the risk of errors.
Tip: Verify there are no Disk Drill processes in Task Manager before proceeding. - 2
Back up important data
Create a backup of any files you may have recovered or planned to recover with Disk Drill. Store the backup on a separate drive or cloud storage to avoid data loss during cleanup. Backups provide a safety net if you delete something unintentionally.
Tip: Use a dedicated backup tool or a separate external drive for clarity. - 3
Uninstall on Windows via Settings
Open Settings > Apps, locate Disk Drill, and click Uninstall. If prompted, allow administrative permission and follow the prompts to remove the main application. After the uninstaller finishes, reboot and verify Disk Drill no longer appears in the Apps list.
Tip: If Disk Drill isn’t listed, try Control Panel > Programs and Features. - 4
Clean Windows leftovers
Search for Disk Drill in common locations like Program Files, AppData, and ProgramData. Delete any remaining Disk Drill folders or files you find. This reduces the chance of hidden remnants reactivating or triggering pain points later.
Tip: Back up registry before editing; create a System Restore point first. - 5
Uninstall on macOS via Applications
Open Finder > Applications, drag Disk Drill to the Trash, and empty the Trash. This removes the main app quickly and cleanly. Then proceed to remove related LaunchAgents or LaunchDaemons to prevent startup reanimation.
Tip: If Disk Drill won’t delete, boot into Safe Mode and retry. - 6
Remove LaunchAgents and plist files (macOS)
Check /Library/LaunchAgents, /Library/LaunchDaemons, and ~/Library/LaunchAgents for Disk Drill files and delete them. Also clear related plist files in ~/Library/Preferences. Removing these ensures the app won't auto-start.
Tip: Be careful to delete only Disk Drill-related files to avoid breaking other apps. - 7
Clean caches and support files
Search for Disk Drill-related caches in /Library/Caches and ~/Library/Caches and remove them. Look for any Disk Drill folders in Application Support and delete them. Clearing caches helps ensure a clean slate.
Tip: Restart after deletion to ensure system caches refresh. - 8
Reboot and verify removal
Restart your computer and verify Disk Drill is not listed in Applications (macOS) or Programs and Features (Windows). Run a search for Disk Drill across system directories to confirm no traces remain.
Tip: Run a second search after reboot to catch any delayed traces. - 9
Document and monitor
Document the steps you took for future reference and monitor the system for any signs of Disk Drill reappearing. If you suspect reinstallation, review startup items and network drives for stray installers.
Tip: Keep a simple log of file paths you removed for auditing purposes.
Got Questions?
What is Disk Drill and why remove it?
Disk Drill is a data-recovery tool for Windows and macOS. If you no longer need it, removing it helps free up space and reduce potential privacy concerns.
Disk Drill is a data-recovery tool; removing it frees up space and reduces privacy concerns.
How do I uninstall Disk Drill on Windows?
Go to Settings > Apps, find Disk Drill, and click Uninstall. If it isn’t visible, use Control Panel > Programs and Features and follow the prompts. Reboot and verify the app is gone.
Use Settings or Control Panel to uninstall, then reboot to finish cleanup.
How do I uninstall Disk Drill on macOS?
In Applications, drag Disk Drill to Trash and empty it. Then remove related LaunchAgents and plist files from Library folders and restart.
Drag to Trash, remove startup items, then restart.
Can Disk Drill leave traces after uninstall?
Yes, some registry entries and plist or caches may remain. A thorough cleanup across OS-specific locations helps prevent reappearance.
Leftovers can remain; clean them up to prevent reappearance.
What if Disk Drill reappears after reboot?
Check startup items and scheduled tasks for Disk Drill references, then re-run the uninstall steps or seek help. A persistent reinstall may indicate a leftover item or automatic startup.
If it reappears, check startup items and run cleanup again.
Watch Video
Top Takeaways
- Uninstall Disk Drill completely to reduce clutter.
- Remove all leftovers to prevent reappearance.
- Verify no startup items remain related to Disk Drill.
- Maintain backups and document your cleanup steps.