How to Remove a Milwaukee Drill Bit: Step-by-Step
Learn how to safely remove a drill bit from Milwaukee tools with a guided, step-by-step approach, safety tips, and chuck maintenance for long-term reliability and smoother future bit changes.

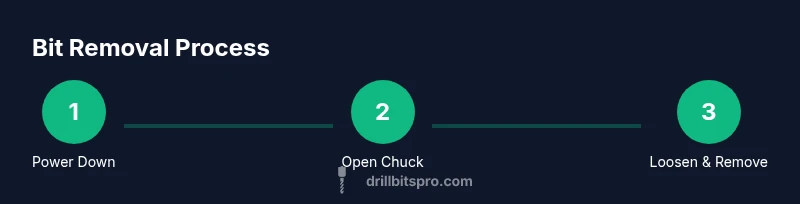
Goal: safely remove the drill bit from Milwaukee tools and verify the chuck remains in good condition. You will power off, remove the battery, secure the drill, and use the correct chuck method to release the bit—hand twist for keyless chucks or a chuck key for keyed chucks—followed by a quick chuck inspection.
Why removing drill bits safely matters
Removing a drill bit from Milwaukee tools isn't just about freeing a worn bit and continuing work. A sloppy removal can damage the chuck, misalign the mechanism, or cause personal injury if the bit pops free during a build. According to Drill Bits Pro, taking a methodical approach protects both your tool and your hands, extending chuck life and ensuring accurate future cuts. The goal is to keep your Milwaukee drill performing at peak efficiency, reduce the risk of injury, and minimize wear on critical components.
Start with a clear workspace: disconnect power, remove the battery, and place the tool on a stable surface. Check that you have adequate lighting and room to maneuver the bit without hitting nearby objects. Before any attempt, identify whether your chuck is keyless or keyed; this determines the removal method and the tools you will need. The removal should be controlled, deliberate, and free of forceful jerks that can bend jaws or strip threads. If you work on metal, avoid contact with grinding dust and metal shavings; wear eye protection and gloves as needed. Finally, inspect the bit and chuck after removal to catch any signs of wear early, before they affect performance on your next job.
Milwaukee chuck types and what they mean
Milwaukee drills typically use two main chuck styles: keyless and keyed. Keyless chucks are designed for quick bit changes with a simple twist, making them common on most modern cordless models. Keyed chucks require a small steel chuck key that fits into gear teeth around the chuck; you insert the key and turn counterclockwise to loosen. Knowing which style your Milwaukee tool uses is essential for choosing the correct removal method and avoiding damage. Most users will be surprised by how similar the removal feel is between brands, but the tool-specific quirks (like minimum jaw opening or tightness) can vary. If you’re unsure, consult the user manual or Milwaukee’s official support page for your model. A safe removal approach preserves jaw alignment and helps the next bit seat evenly, improving grip and reducing wobble during operation.
Safety gear and prep
Before you begin, equip eye protection at minimum; gloves are optional but helpful when handling hot or sharp components. Ensure the workspace is clean and dry to prevent slips. Power down the drill completely and remove any battery or cord to eliminate the chance of accidental start-up during removal. If you’re working above a bench or on a stand, secure the drill with a clamp or a vise to minimize movement. Having a small brush or rag handy helps you remove dust and burrs from the chuck after removal, reducing the risk of debris causing future jams.
Understanding the environment and prep workspace
A tidy, well-lit area makes bit removal safer and faster. Clear the surface of tools or materials that could interfere with the chuck or the bit. Place the drill with the chuck facing up or to the side to prevent the bit from dropping into hidden crevices. If you’re working with metal shavings or wood dust, wear a dust mask and keep a trash receptacle nearby. By planning your space, you minimize distractions and avoid accidents that can happen when you rush the removal process.
Step-by-step: removing a bit from a Milwaukee drill with a keyless chuck
- Power down and remove the battery, then place the drill on a stable surface. This prevents any accidental starts while you work. 2) Open the chuck jaws to their maximum capacity so the bit can be moved without obstruction. Give yourself room to grip the bit shank without rubbing fingers or the housing. 3) Firmly grasp the chuck and twist counterclockwise with a steady motion to loosen the jaws. Keep your wrist straight to avoid slipping. 4) Grasp the bit close to the shank and pull it straight out, avoiding any twisting that could bind the jaws again. 5) Wipe away debris and inspect the bit’s tip and the chuck bore for burrs or wear. If you notice damage, stop and replace the bit or service the chuck. 6) Reinsert the tool’s battery and test the chuck with a fresh bit to ensure smooth seating and release. If it binds, stop and recheck alignment before continuing.
Step-by-step: removing a bit from a Milwaukee drill with a keyed chuck
- Power down and remove the battery; safety first. 2) Open the chuck by turning the key or backing the jaws as wide as possible. Ensure the key is ready for use in the chuck’s gear teeth. 3) Insert the chuck key and turn counterclockwise to loosen the chuck. Remove the key and set it aside. 4) Grasp the bit shank with pliers or by hand and pull straight out, applying even pressure. 5) Inspect the chuck interior for adhesive residues or burrs that could hinder future insertions. 6) Clean and dry the chuck, then reinsert a new bit and test the grip before resuming work.
Troubleshooting stuck bits and common issues
Stuck bits happen when debris, corrosion, or bent jaws prevent normal release. First, ensure the tool is off and the battery removed. If a bit remains stubborn, avoid forcing the bit with pliers inside the chuck, which can damage the internal teeth. Instead, try light tapping on the back of the bit with a non-marring tool to realign the jaws. For stubborn jams in keyed chucks, verify the chuck key can turn freely and that the jaws aren’t partially engaged on the bit shank. If the bite remains stuck after several attempts, stop and inspect for mechanical damage in the chuck assembly or consult a service technician.
Chuck maintenance after removal
Cleaning and lubrication extend chuck life. Wipe the inside and outside of the chuck with a dry cloth to remove dust and metal particles. If the chuck feels rough or binds, apply a light, non-residue lubricant to the moving parts and spin the chuck by hand to distribute it. Wipe away excess lubricant to prevent it from attracting debris. Regular maintenance after bit changes keeps the chuck responsive and reduces wear over time. Store tools in a dry place and avoid exposing them to moisture or corrosive chemicals.
Safety reminders and mistakes to avoid
Avoid forcing a bit out if the chuck is damaged or overly tight; forcing can bend jaws or strip threads. Never hammer or pry on a bit to force it free. Don’t operate the drill with a damaged chuck or misaligned jaws. Always wear eye protection and keep hands clear of the chuck perimeters. Finally, never leave a tool unattended with a bit exposed; this can cause accidental injury if the bit catches on clothing or skin. By following these reminders, you reduce risk and protect your Milwaukee drill.
Next steps: choosing the right replacement bit and reassembly
After removal, select a bit that matches your intended material and the chuck size. Ensure the shank matches your chuck’s capacity (usually 1/4 inch for many Milwaukee designs, but verify model specifications). Install the bit squarely to ensure proper seating and prevent wobble. When reassembling, test the fit by lightly activating the drill without load to confirm the bit seats and releases cleanly. If you notice irregular seating or excessive play, service the chuck before continuing to avoid damage to expensive bits or tools.
Tools & Materials
- Milwaukee drill (with affected chuck)(Ensure model is identified to apply correct removal method)
- Safety glasses(Protect eyes from debris)
- Chuck key (for keyed chucks)(Only needed for keyed chucks; optional for quick checks)
- Pliers or needle-nose pliers(Used to grip bit shank if necessary)
- Clamps or vise with soft jaws(Secures drill during removal)
- Soft brush or rag(Clean debris from chuck and bit)
- Isopropyl alcohol or mild cleaner(For removing residue)
- Replacement bit compatible with chuck size(Have ready for immediate use after removal)
Steps
Estimated time: 25 minutes
- 1
Power down and remove the battery
Turn off the drill and remove the battery to prevent any accidental activation during the removal. This protects you from injuries and stops the motor from engaging as you work on the bit.
Tip: Always disconnect power before handling the chuck or bit. - 2
Secure the drill in a vise or clamp
Place the drill in a stable position with the chuck facing upward. Use soft jaws if possible to avoid marring the chuck exterior while you work.
Tip: Stability minimizes slips and protects the tool housing. - 3
Open the chuck to maximum capacity
Rotate the chuck or jaws to their widest opening so the bit shank and shoulders are free from obstruction.
Tip: Clear space prevents binding when you grip the bit. - 4
If keyed, insert the chuck key and loosen
Insert the chuck key into one of the gear teeth and turn counterclockwise to loosen the chuck. Remove the key after loosening to avoid injury during removal.
Tip: Keep fingers away from the gear teeth while turning. - 5
If keyless, twist the chuck counterclockwise by hand
Grip the chuck firmly and rotate counterclockwise to loosen the jaws and release the bit.
Tip: Maintain a steady, controlled motion to prevent jaw misalignment. - 6
Pull the bit straight out
Grasp the bit near the shank and pull straight out. Avoid wiggling or twisting that could re-bind the jaws.
Tip: A straight pull reduces stress on the chuck teeth. - 7
Inspect and clean the chuck and bit
Check for burrs, wear, or debris inside the chuck bore and on the bit shank. Clean with a brush and dry cloth; wipe away any residue.
Tip: Cleanliness prevents future jams and ensures proper seating for the next bit. - 8
Reinstall a new bit and test seating
Insert a new bit squarely into the chuck and attempt a light, unloaded spin to confirm proper seating and release.
Tip: Do a quick visual check that the bit is fully seated before use.
Got Questions?
What should I do first before removing a drill bit from a Milwaukee drill?
Always power down and remove the battery, then secure the drill. This prevents accidental starts and keeps your hands clear while you work on the chuck.
Start by turning off the drill, removing the battery, and securing the tool before you begin removing the bit.
What if the chuck won’t loosen after using the chuck key?
Ensure the key is fully engaged and try a second, firm turn counterclockwise. If it still resists, don’t force it—there may be internal damage or debris; consult service.
If the chuck won’t loosen after using the key, check engagement and avoid forcing it; seek service if needed.
Can I use pliers to remove the bit from a stubborn chuck?
You can use pliers to grip the bit shank, but only after the chuck is loosened and the bit can be extracted without bending the jaws. Avoid prying on the chuck itself.
Only use pliers once the chuck is loose and ensure you don’t bend the jaws.
Is it safe to lubricate the chuck after removing a bit?
Light lubrication on moving parts can help with smooth operation, but avoid excess lubricant that can attract debris. Wipe away any residue after lubrication.
A small amount of lubricant can help, but wipe off any excess to keep the chuck clean.
When should I replace the chuck instead of just removing a bit?
If the chuck shows signs of excessive wear, cracks, or persistent slipping after proper removal and seating, replacement or professional servicing is advised.
If wear or damage is evident after proper removal, consider replacing or servicing the chuck.
Do Milwaukee drills require a different removal method for different models?
Most Milwaukee drills share a common concept for keyless vs keyed chucks, but some models have unique features. Always consult the user manual for model-specific instructions.
Check your model’s manual for any model-specific chuck removal notes.
Watch Video
Top Takeaways
- Power down before any chuck work to prevent injury.
- Identify chuck type to choose the correct removal method.
- Loosen and remove the bit with a straight, controlled motion.
- Inspect and clean the chuck after removal to extend life.