No Drill Curtain Rod: A Wall-Safe Hanging Guide
Learn how to hang curtains without drilling using no-drill curtain rod options. This guide covers tension, spring-loaded, and adhesive solutions with setup steps, weight considerations, and removal tips for wall-safe window treatments.

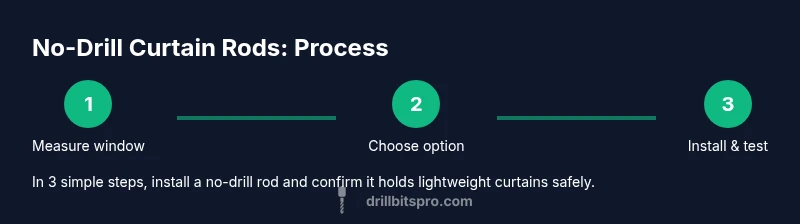
Hang curtains without drilling using no-drill curtain rod options like tension rods, spring-loaded rods, or adhesive brackets. This guide walks you through choosing the right option, installing it safely, and avoiding wall damage. According to Drill Bits Pro, start by measuring height and width, then select a rod with an appropriate weight rating for your curtains.
Why no-drill curtain rods matter for DIY projects
No-drill curtain rods offer a practical, wall-safe alternative for renters and homeowners who want to avoid holes, screws, or nails. By relying on pressure, clips, or adhesive systems, you can extend the life of walls while still achieving a polished window look. For travelers between apartments or homes with delicate finishes, these options reduce damage risk and simplify removal at move-out. This approach also encourages experimentation with different looks—try light sheers for sunny rooms or switch to heavier fabrics with a rated tension rod. According to Drill Bits Pro, the best results come from matching the rod’s weight rating to your curtain weight and wall type, then installing on clean, smooth surfaces to maximize grip.
In practice, no-drill options work best when you choose a system designed for your wall type (drywall, plaster, or tile) and curtain weight. Lightweight drapes under 2–3 kilograms often perform well with tension rods or adhesive brackets, while heavier fabrics require a stronger approach or alternative installation methods. Planning ahead by measuring window width and desired rod height helps prevent sagging and ensures a clean, balanced look from end to end.
No-drill rod options: tension, spring-loaded, adhesive
There are three common no-drill curtain rod families:
- Tension rods—adjustable, pressure-mounted between two walls or window frames. They’re quick to install and do not damage surfaces, making them ideal for lightweight curtains and rental spaces.
- Spring-loaded rods—similar to tension rods but with a built-in spring mechanism for a tighter grip. They work best on smooth, clean surfaces and can support more weight if properly sized.
- Adhesive brackets and mounts—these rely on strong adhesives or mounting tape to hold brackets or end caps in place. They are suitable for very light curtains and smooth surfaces, and they are easy to remove with minimal residue when done correctly.
Choosing the right option depends on wall type, curtain weight, and how permanent you want the setup to be. Drill Bits Pro notes that testing grip on a small area before full installation reduces the risk of slippage or wall damage. Always check the rod’s weight rating and follow the manufacturer’s installation instructions for best results.
How to choose the right option based on weight and wall type
To select the best no-drill solution, start with your curtain weight. Lightweight sheers and voile typically work well with tension or spring-loaded rods, while thicker drapes may require more robust, wall-mounted options. For smooth drywall, adhesive brackets can be reliable when used with proper surface preparation and high-quality adhesives. Plaster or textured walls may require different adhesives or may benefit from a tension rod mounted at the top edge of a window frame instead of the flat surface. Always test any option on a small section of the wall and verify stability with a gentle tug before fully loading the rod with drapes. Drill Bits Pro emphasizes choosing a product that explicitly lists compatible wall types and weight capacities.
Installation considerations and testing steps
Accurate measurement is critical. Measure width, height, and desired rod placement. Clean the mounting surface with a mild cleaner and let it dry completely before installing adhesive systems. When using tension rods, extend the rod slightly longer than the measured width to ensure a snug fit. For adhesive brackets, press firmly for the recommended duration to maximize grip. Once installed, hang lightweight fabric first and perform a test by gently pulling on the rod. Incrementally add weight to confirm the setup can handle daily use without slipping. Consider doorways or high-traffic areas where bumping could dislodge a non-permanent installation.
Safety, maintenance, and removal considerations
Regularly inspect the grip and brackets for signs of wear or looseness, especially in humid bathrooms or kitchens. If a rod shows any sag or movement, recheck mounting and re-secure as needed. When removing adhesive systems, follow the manufacturer’s guidelines to minimize residue and wall damage; a plastic scraper and isopropyl alcohol can help remove adhesive residues without harming paint. For renters or short-term installations, keeping the products in their original packaging can simplify reattachment or relocation. Drilling-free solutions offer convenience, but staying within weight limits and surface compatibility is essential for long-term performance.
Tools & Materials
- Measuring tape(Measure width, height, and rod placement.)
- Pencil or marker(Mark mounting positions lightly.)
- Level(Ensure rod will be horizontal.)
- Tension rod (adjustable)(Choose based on curtain weight.)
- Spring-loaded rod(Use if you need extra grip and weight handling.)
- Adhesive brackets/mounts(Select high-strength adhesive compatible with wall type.)
- Wall cleaner(Clean surface before applying adhesive.)
- Scraper or plastic card(Remove excess adhesive residue if needed.)
- Optional: weight bag or small dumbbell for testing(Test load safely before full use.)
Steps
Estimated time: 30-60 minutes
- 1
Measure window width and desired height
Use the measuring tape to determine total width and the preferred rod height above the window. Record these numbers to guide rod selection. Ensure you account for any finials or brackets that extend beyond the window opening.
Tip: Double-check both sides for symmetry before choosing a rod. - 2
Choose the right no-drill option based on weight
Match curtain weight to the rod’s rating. Lightweight fabrics pair well with tension or adhesive systems, while heavier drapes may require a more substantial no-drill solution or reconsideration of a permanent method.
Tip: When in doubt, select the higher weight rating. - 3
Prepare mounting surfaces
Clean the wall surface with a mild cleaner and let it dry completely. Smooth, dry surfaces maximize grip for adhesives and reduce the risk of slippage for tension rods.
Tip: Avoid dusty or oily surfaces for best adhesion. - 4
Install tension rod or spring-loaded rod
Extend the rod to slightly longer than the measured width, then compress and lock it in place between two sides of the window frame. Verify it is level and secure by gently pressing on the center.
Tip: Use a level and test with a light tug immediately after installation. - 5
Install adhesive brackets if used
Apply adhesive mounts as directed by the manufacturer. Press firmly for the recommended time, ideally a full minute, to build initial grip. Align brackets with the desired rod height.
Tip: Avoid relocating adhesive mounts soon after application to prevent weakening. - 6
Hang the curtain and test weight
Hang lightweight curtains first to confirm balance. Gradually add weight to simulate daily use, checking for slip, sag, or noise.
Tip: If the rod slips, recheck the surface and consider an alternative mounting method. - 7
Adjust if needed for aesthetics
Fine-tune the height and alignment to ensure the rod looks straight and curtains hang evenly. Re-check with a level after adjustments.
Tip: Make small, incremental adjustments for best results. - 8
Remove or relocate safely
If removing, follow adhesive removal instructions or slowly slide tension rods free to minimize wall impact. Store components for future reuse.
Tip: Keep track of mounting hardware for future projects.
Got Questions?
Can I hang heavy curtains with a no-drill rod?
No-drill solutions work best with lightweight fabrics. For heavier drapes, consider a more robust, traditionally mounted rod or consult a professional to avoid damage. Always check weight ratings before use.
No, heavy curtains should not be hung on most no-drill rods; use a higher-rated option or a traditional mount. Always verify weight ratings before use.
Will adhesive curtain rod brackets damage walls?
Adhesives can leave residue or pull off paint if not applied correctly. Follow manufacturer directions, use appropriate wall prep, and remove slowly when upgrading.
Adhesives can damage walls if not applied properly; follow instructions and remove carefully.
Are suction-cup curtain rods reliable for long-term use?
Suction-based rods tend to lose grip on textured or humid surfaces and over time. They’re suitable for light, temporary setups on smooth surfaces.
Suction rods are usually less reliable long-term on textured or damp surfaces.
Can I mix no-drill rods with existing blinds?
Mixing methods can work if you’re careful about weight and support. Use no-drill options only for small, light-weight add-ons and avoid overloading the setup.
Mixing no-drill rods with blinds is possible for light setups; don’t overload the system.
How do I remove a no-drill curtain rod without leaving marks?
Follow removal instructions carefully. For adhesives, gently heat the area or use a remover formulated for the adhesive; for tension rods, slowly release tension while supporting the rod.
Gently release tension or use proper adhesive remover to minimize marks.
Watch Video
Top Takeaways
- Measure accurately before selecting a rod.
- Choose a weight-rated option for safety.
- Test grip and load before hanging heavy curtains.
- Consider wall type when choosing no-drill methods.
- Removal should be gentle to avoid wall damage.