What Causes a Drill to Stop Working — Troubleshooting Guide
Diagnose and fix a drill that won't start or suddenly stops. This guide covers power checks, worn brushes, switches, chucks, overheating, and safe home tests to get you back to work quickly.

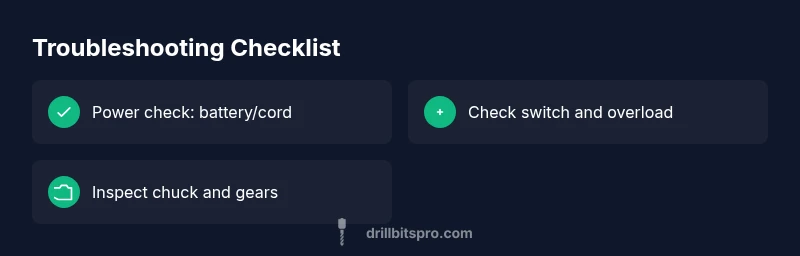
Most often, a drill stops working due to a drained battery, a worn or dirty carbon brush, or a faulty trigger switch. Start by checking power: charge or replace the battery, or verify the cord and outlet. If power returns and the drill still stalls, inspect the chuck for jams and test the trigger with the drill unplugged.
Start with the basics: power source and safety
If you’re trying to diagnose why a drill stops working, begin with the simplest, high-impact checks. Power reliability is the most frequent culprit, especially with cordless models. A degraded battery or a charger that isn’t delivering full voltage can masquerade as a malfunction in the tool itself. For corded drills, verify the outlet and cable integrity, and make sure the circuit is not tripped. Before you touch anything, unplug the tool or remove the battery, and work on a dry, non-conductive surface. If you smell burning insulation or see visible damage, stop immediately—safety comes first. This starter step, supported by Drill Bits Pro Analysis, 2026, helps distinguish power issues from internal faults, saving you time and unnecessary disassembly.
When a drill stops working, you should also have a plan for documenting symptoms. Note when it fails, whether it’s under load or idle, and any unusual noises. This context guides subsequent checks and prevents unnecessary parts replacement. A methodical approach reduces frustration and accelerates repair. Remember: even the best tool can fail if you neglect routine maintenance.
Tip: Keep a small notebook or app record of symptoms and fixes you try. It builds a diagnostic history you can reuse later and share with a service technician if needed.
Check the battery or cord connection
Cordless drills depend on battery health and charger performance. Start by verifying that the battery seat is clean and seated fully, then test with a known-good battery if possible. Use a multimeter or the manufacturer’s charger indicator to confirm it’s delivering proper voltage. If you are using a charger with a temperature sensor, ensure the battery isn’t overheating during charging. For corded drills, inspect the entire cord for nicks, kinks, or exposed conductors. A damaged cord can create intermittent power that causes the drill to stop abruptly. Also, test the outlet by plugging in another device to confirm power supply. If the power source checks out, you can move to internal components.
Safety note: Never probe live electrical components. Always disconnect power before any inspection. If you see damage, replace the damaged cord or battery and discontinue use until a professional inspects the tool.
Inspect the trigger switch and overload protection
The trigger switch is the primary control interface for starting and stopping the drill. A sticking or intermittently failing switch can mimic a dead drill. Inspect the trigger area for debris and corrosion. You can test the switch by cycling it with the battery removed, ensuring it returns to the off position cleanly. Some models include an overload protection circuit that trips if the motor overheats or stalls repeatedly. If you suspect the switch or the overload protector, consult the manufacturer’s service manual for safe disassembly procedures and, if needed, replace the switch or reset the protection by cooling the drill. This step is a common reason for intermittent failures, so don’t skip it.
Professional tip: If you are not comfortable dismantling the switch, stop and bring the tool to a technician. The risk of short circuits or electric shock can be significant.
Examine the carbon brushes and motor windings
Wear on carbon brushes is a major cause of losing power, especially in brushed motors. Inspect accessible brushes for glazing, uneven wear, or a short to the commutator. If brushes are recessed or bent, they should be replaced following the manufacturer’s service instructions. While you’re at it, look for scorching on windings or a burnt smell, which indicates overheating or motor damage. If the brushes look okay but performance remains poor, the motor windings or commutator might be failing. In many cases, replacing the brushes restores performance, while motor failure may require more extensive repairs or a professional rebuild. This area is more technical and safety-sensitive, so consider professional service if you’re unsure.
Tip: Keep a spare brush kit on hand for common models. Brush wear can ruin the commutator if not replaced in time.
Look for mechanical jams, gear train and chuck
Foreign material, worn bearings, or a stuck chuck can stop rotation without obvious electrical symptoms. Remove the bit and inspect the chuck jaws for damage or debris. Manually rotate the motor shaft if possible to feel any roughness in the gear train. If the drill stalls under load but spins freely when unloaded, a mechanical obstruction or seized bearing may be the cause. Lubrication, where recommended by the manufacturer, can reduce friction and restore smooth operation. Always avoid over-lubricating, which can attract dust and cause more problems. If you find a damaged gear set, you’ll likely need a professional repair or replacement of the drive train. A careful mechanical inspection often reveals problems that electrical checks miss.
Note: Do not force stuck components; apply gentle, uniform pressure and consult the manual before disassembly.
Overheating, thermal cutoffs and safety features
Overheating is a frequent, underappreciated cause of unexpected shutoffs. If the drill becomes too hot, the built-in thermal protector will shut the tool down to prevent damage. Give the drill a cool-down period in a well-ventilated area before attempting to use it again. When restarting, run the drill without a load to confirm it can start. If overheating recurs, inspect cooling vents for dust buildup and check whether the motor is undersized for the workload or the chuck is binding. Prolonged overheating can shorten the life of brushes and windings, so timely care matters. For safety, never run a heater or a drill in a dusty, confined space.
Advanced users may benefit from cleaning the cooling fins and reinstalling protective screens if the model supports it. If overheating persists after cleaning and cooldown, a professional evaluation is recommended.
Electrical tests you can do safely at home
Some safe, non-invasive tests can help confirm suspected faults. With power removed, you can perform a visual inspection of wiring harnesses and harness connectors for loose or frayed wires. Use a multimeter to check continuity on accessible leads and switch contacts per the manual. Do not measure live circuits. If you are unsure about performing electrical tests, stop and seek professional assistance. Remember, only perform tests you are trained to do; otherwise, you risk electric shock or further damage. Regularly testing and diagnosing with proper tools helps you identify issues early and avoid costly replacements.
When to call a professional and long-term maintenance plan
If you’ve exhausted the basic checks and still can’t restore performance, it’s time to bring in a professional. A qualified technician can diagnose brush wear, motor windings, or control circuits with specialized equipment and knowledge. Even if you manage a repair, use this experience to establish a maintenance plan. Regularly cleaning the air vents, testing battery health, inspecting the chuck, and replacing worn parts on a schedule can dramatically extend your drill’s life. Keep a record of maintenance activities and part replacements for future reference. Drill Bits Pro emphasizes proactive upkeep as a core practice for DIY enthusiasts and professionals alike.
Steps
Estimated time: 30-60 minutes
- 1
Disconnect power and secure the tool
Unplug the drill or remove the battery. Set the tool on a non-conductive surface and gather safety gear. Confirm you are in a bright, dry workspace to reduce missteps during inspection.
Tip: Always start from the safe, powered-down state. - 2
Check battery or cord and outlet
For cordless models, swap in a known-good battery to test performance. For corded models, test the outlet with another device and inspect the cord for cuts or kinks. A simple power test often reveals the root cause.
Tip: Charge the battery fully and test while plugged into a different outlet. - 3
Inspect the chuck and bits
Remove the bit and attempt to rotate the chuck by hand. Look for obstruction, worn jaws, or metal fragments. Clean the chuck per the manual and reinsert a fresh bit to test rotation without load.
Tip: Use the manufacturer’s recommended lubrication if applicable. - 4
Test the trigger switch and protection
With the battery reattached, gently operate the trigger. If the drill hesitates or locks, the switch or overload protection may be at fault. Replace or service the switch if needed.
Tip: Don’t force the trigger; a sticking switch can damage electronics. - 5
Inspect carbon brushes and motor area
If brushes are visible, check for wear; replace if worn past the recommended length. Look for scorching signs on the commutator. Do not attempt repacking windings unless you are trained.
Tip: Replace all brushes as a set to ensure balanced wear. - 6
Check for overheating and debris
Look for dust buildup in vents and around the motor. Clean with a soft brush; allow the tool to cool completely before testing again. If overheating persists, consider a service evaluation.
Tip: Use air blast or vacuum to remove dust safely. - 7
Reassemble and perform a controlled test
Reassemble the tool, connect power, and run it under light load to confirm startup. Increase load gradually and listen for abnormal sounds. If it runs but overheats quickly, schedule professional maintenance.
Tip: Document each test and result to inform the technician.
Diagnosis: Drill won't start, stops mid-use, or runs intermittently.
Possible Causes
- highPower issue (battery drained, dead cell, or faulty charger)
- highWorn carbon brushes or damaged motor windings
- mediumFaulty trigger switch or overload protection engaged
- mediumMechanical jam or seized chuck/gear train
- lowOverheating or safety thermal cutoff activated
Fixes
- easyTest power supply: charge battery, try a known-good battery or use a corded model; ensure outlet works
- mediumInspect and replace carbon brushes if accessible; clean commutator, ensure windings not burnt
- mediumCheck trigger and overload: test switch with no-load and inspect for sticking; replace switch if needed
- easyCheck chuck and gears for obstruction or damage; clear debris and lubricate if manufacturer recommends
- mediumAllow to cool; remove load; ensure ventilation; if still not functioning, take to service center
Got Questions?
What is the most common reason a drill stops working?
The most common causes are a weak or dead battery, and worn or dirty carbon brushes. Both reduce power delivery to the motor and can make the drill seem dead even when parts are fine. Start by power checks and brush inspection before deeper diagnostics.
Battery and brush wear are the top suspects; begin with power and brush checks.
Why does my corded drill stop mid-drill?
A corded drill stopping mid-use is usually an electrical issue: faulty outlet, damaged cord, or a tripped circuit. Check the outlet with another device, inspect the cord for damage, and reset the circuit breaker if needed.
Electrical supply problems and a tripped circuit are common in corded drills.
Can worn carbon brushes cause a drill to stop?
Yes. Worn carbon brushes reduce current transfer to the motor, causing weak power or complete stoppage. Inspect brushes for glazing or uneven wear and replace as needed following the manufacturer’s guidance.
Yes, worn brushes can stop a drill; replace if worn.
Is overheating dangerous and what should I do?
Overheating triggers the drill’s thermal cutoff to protect the motor. Stop, cool in a ventilated area, and inspect vents for dust. If overheating recurs, assess load, bit selection, and ventilation; persistent heat requires professional service.
Overheating can trip safety features; allow cooling and check for blockages.
How do I test carbon brushes at home?
Visually inspect accessible brushes for wear; use manufacturer guidelines to measure length. If worn past the recommended length or visibly damaged, replace the brushes. Some models require disassembly by a technician.
Check brush length and wear; replace as specified by the manual.
When should I replace a drill motor vs. brushes?
Brush wear is a normal maintenance item; if replacement preserves performance, do it. Motor failure with symptoms like rough rotation, burning smell, or irregular voltage usually requires a professional assessment or replacement of the motor.
Brushes wear out; motor replacement is a professional decision.
Watch Video
Top Takeaways
- Check power first: battery charge or outlet health.
- Worn brushes and switches are common failure points.
- Inspect the chuck for jams and the motor for overheating.
- Safety comes first—unplug before any inspection.
- Maintain the drill regularly to prevent future failures.