Drilling Stainless Steel: A Practical How-To Guide
Learn practical, step-by-step methods to drill stainless steel safely and efficiently, including bit choices, speeds, lubrication, deburring, and common pitfalls.

By the end of this guide you will be able to drill stainless steel with accuracy and safety. Learn to select carbide or cobalt bits, securely clamp the workpiece, create a pilot hole, apply cutting fluid, and follow a clean, step‑by‑step process whether you’re using a drill press or a handheld drill.
Why Stainless Steel Demands Precision
Stainless steel is a prized material for its corrosion resistance and strength, but it also presents unique drilling challenges. It conducts heat efficiently and tends to work harden when overheated or driven aggressively. The Drill Bits Pro team finds that success hinges on understanding material behavior, choosing the right bit geometry, and maintaining a controlled drilling environment. With a steady hand and the right setup, you can avoid bit dulling, wandering holes, and unexpected snags that frustrate DIY projects and professional jobs alike. This section explores the why behind the process and lays the groundwork for reliable results.
Choosing the Right Drill Bit for Stainless Steel
For stainless steel, carbide tipped and cobalt alloy bits are widely regarded as the best options due to heat resistance and edge retention. High speed steel bits with a titanium coating can work for lighter tasks, but they wear quickly under heat and pressure. Drill Bits Pro emphasizes selecting a bit with a sharp, robust cutting edge and a geometry that favors shearing rather than rubbing. A split point or improved rake helps reduce wandering, while multiple flutes aid chip evacuation and reduce heat buildup during deeper holes. Always match bit size to the hole diameter you need and keep a spare sharpener on hand.
Preparing the Workpiece and Setup
Secure the workpiece firmly using clamps or a vise with soft jaws to prevent marring. A flat, stable work surface keeps the drill bit aligned and minimizes chatter. Mark the drilling point with a center punch to create a small indentation that guides the bit, especially on stainless where the surface can be slippery. Use a spill tray or shop mat to catch chips and keep the area clean. Confirm your drill bit is tight in the chuck and that the drill press or handheld device is perpendicular to the work surface for clean, straight holes.
Pilot Holes and Drilling Speed
Starting with a pilot hole improves guidance and reduces stress on the main drill bit. The pilot hole should be noticeably smaller than the final hole to preserve strength while guiding the larger bit. When drilling stainless steel, apply steady, moderate pressure and let the bit do the work rather than forcing it. If the bit slows or binds, back off, clear chips, and reestablish contact with a lighter touch. Lubrication helps control heat, which is critical in this phase to prevent work hardening.
Lubrication and Cutting Fluids
Use a compatible cutting fluid or light oil to reduce friction, carry away heat, and extend tool life. Apply a thin, even film along the cutting edge and the surface ahead of the drill tip. Reapply as chips accumulate or when you pause the process. Avoid water based coolants that can promote rust on tools and work surfaces. In some cases, a light mineral oil or commercially available cutting fluid yields the best balance between cooling and lubrication for stainless steel.
Step-By-Step Approach to Entry and Progress
To drill stainless steel with confidence, start by clamping the workpiece, select the correct bit, and prepare your center point marking. Begin with a smaller pilot hole, then switch to the final bit size while maintaining consistent speed and pressure. Use cutting fluid liberally during the transition to manage heat, and periodically withdraw the bit to clear chips and inspect the hole. When the hole is complete, back the bit out slowly to prevent grabbing and deburring the entry.
Deburring and Finishing
Deburr both sides of the hole to remove sharp edges that could harbor burrs or cause injury. A fine deburring tool or a round-nose file works well once the hole is completed. Wipe away chips and inspect the surface for smoothness and alignment. A quick cycle with a polishing rag can help remove any minor burrs. Proper deburring also ensures the mating components fit cleanly and reduces the risk of stress concentrations around the hole.
Common Mistakes and How to Avoid Them
Common issues include wandering entry, overheating the workpiece, and using dull bits. Prevent wandering with a center punch and a precise, perpendicular setup. Reduce heat by using cutting fluid, moderate feed rates, and retracting the bit to clear chips. Avoid forcing the bit through stainless and replacing dull bits early. Regularly check your chuck, jig, and clamps for security before resuming work.
Safety Considerations for Stainless Drilling
Always wear eye protection and consider gloves when handling sharp chips. Stainless steel produces hot chips that can cause burns; use a chip shield or a rotating guard if available. Ensure the work area is well ventilated and clean up chips promptly to prevent slips. Disconnect power before changing bits and never use damaged tools. A calm, methodical approach reduces risk and increases the likelihood of a successful finish.
Real-World Project Example
Imagine drilling a 1/4 inch hole in a 1/2 inch thick stainless steel bracket. After selecting a carbide tipped bit and applying cutting fluid, you clamp the bracket securely. You start with a pilot hole of about 1/8 inch, then slowly advance to the final size with steady pressure. Heat stays controlled, chips evacuate smoothly, and the hole finishes cleanly without tearing or burrs. This kind of methodical approach translates to projects ranging from automotive brackets to kitchen hardware.
Tool Maintenance and Long-Term Care
Keep drills sharp and clean by wiping off metal shavings promptly. Store bits dry to protect against rust, and periodically inspect cutting edges for nicks or chips. A simple sharpening routine keeps carbide and cobalt bits in top condition longer. Lubricants should be refreshed during extended work sessions to maintain heat control. Proper storage and handling extend tool life and ensure consistent performance on stainless steel projects.
Authority Sources
- https://www.osha.gov
- https://www.nist.gov
- https://ocw.mit.edu
Tools & Materials
- Carbide tipped drill bits(Best for heat resistance when drilling stainless steel; choose appropriate size for final hole)
- Cobalt alloy drill bits(Good wear resistance for harder stainless grades; consider slightly larger clearance for entry)
- High speed steel (HSS) bits with titanium coating(Can be used for lighter tasks but wear quickly under heat)
- Center punch(Mark initial point to prevent wandering on stainless)
- Clamp or vise with soft jaws(Secure workpiece without marring surface)
- Cutting fluid or light oil(Reduces heat and prolongs bit life)
- Drill press or stable handheld drill(Maintain perpendicular alignment and steady feed)
- Pilot bit (smaller diameter)(Creates guide for the final hole; helps prevent wandering)
- Deburring tool(Finish hole edges after drilling)
- Safety gear (goggles, gloves)(Protect eyes from chips; gloves for handling hot metal)
- Rags or lint-free wipe(Clean chips and oil from work area)
Steps
Estimated time: 30-60 minutes
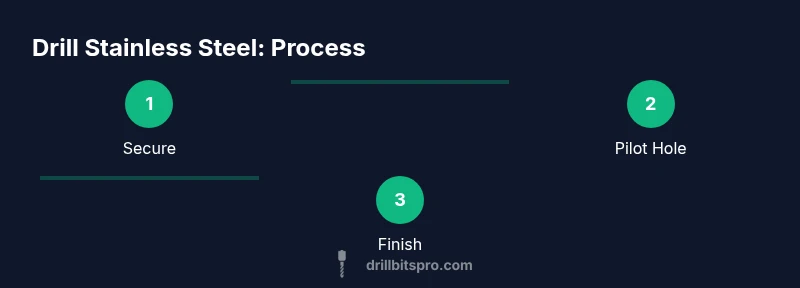
- 1
Secure the workpiece
Place the stainless steel piece on a stable, flat surface. Use clamps or a vise with soft jaws to prevent scratches. Ensure the piece cannot move during drilling to avoid misalignment.
Tip: Use a secondary support under the workpiece to reduce vibration. - 2
Mark the drilling point
Center punch the exact hole location to create a small dimple. This guides the bit and reduces wandering as you start the drill.
Tip: Hit the center punch firmly but avoid denting the metal. - 3
Choose and install the bit
Select a carbide tipped or cobalt bit in the final hole size. Tighten the chuck securely and check runout before starting.
Tip: Run the chuck slowly by hand to ensure the bit seats true. - 4
Create a pilot hole
Drill a smaller pilot hole at the marked point. This reduces stress on the final bit and improves accuracy.
Tip: Keep the drill steady and start with light pressure. - 5
Drill the final hole
Switch to the final bit size and continue drilling with controlled, steady pressure. Apply cutting fluid to manage heat and improve chip evacuation.
Tip: Pause briefly to clear chips if resistance increases. - 6
Withdraw and deburr
Slowly retract the bit to avoid jamming. Deburr both sides of the hole to remove sharp edges.
Tip: Use a deburring tool or a mill file for a smooth finish. - 7
Inspect and measure
Check hole diameter and alignment with a caliper or go/no-go gauge. Ensure the hole is perpendicular and clean.
Tip: If misalignment occurs, rework from the pilot stage on scrap material. - 8
Clean and store
Wipe away oil and chips, then store tools properly to prevent corrosion and ensure readiness for next task.
Tip: Label bits by size for quick selection next time.
Got Questions?
What drill bit types work best for stainless steel?
Carbide tipped and cobalt alloy bits perform best due to heat resistance and edge retention. HSS bits can work for light tasks but wear quickly under heat.
Carbide or cobalt bits are recommended for stainless steel to maintain sharpness and reduce wear.
Can I drill stainless steel with a standard HSS bit?
Yes for light tasks or thin sheets, but expect faster wear and less clean edges. For durability and precision, carbide or cobalt is preferred.
You can, but carbide or cobalt is better for stainless steel.
Why does stainless steel tend to work harden, and how can I prevent it?
Work hardening happens when heat is excessive or cutting edges dull. Prevent it by using sharp bits, lubrication, and moderate speeds with steady feed.
It can harden if you overheat. Keep the bit sharp, use cutting fluid, and avoid pushing hard.
Is lubrication always necessary when drilling stainless steel?
Lubrication is highly recommended to reduce heat, improve chip removal, and extend bit life. Dry drilling increases wear and rough edges.
Yes, use a cutting fluid or light oil to keep heat down and bits sharp.
What speed should I use when drilling stainless steel?
Start with slow, steady feed and adjust based on how the bit cuts. Increase only if the bit remains cool and chips evacuate efficiently.
Start slow and steady, then adjust based on heat and chip flow.
How do I deburr and finish the hole?
Remove burrs with a deburring tool or file, then inspect for smooth edges. A clean finish ensures proper fit and reduces injury risk.
Deburr both sides for a safe, clean finish.
Watch Video
Top Takeaways
- Secure the workpiece firmly before drilling
- Use carbide or cobalt bits for stainless steel
- Always pilot drill and lubricate to reduce heat
- Deburr thoroughly for a clean finish
- Maintain perpendicular alignment for accuracy