Drill Press for Metal: A Practical How-To Guide
Learn to choose, set up, and use a drill press for metal with confidence. This guide covers tooling, speeds, feeds, clamping, safety, maintenance, and troubleshooting for precise, repeatable holes.

You will learn how to safely set up and use a drill press for metal, select the correct bits and speeds for steel, aluminum, and other alloys, and produce clean, accurate holes with minimal drift. This guide covers setup, tooling, clamping, feeds, maintenance, and step-by-step operation.
Why a drill press for metal is essential
For metalworking, a drill press offers stability, perpendicularity, and repeatable depth control that handheld drills struggle to provide. A properly configured drill press for metal minimizes wandering and ensures consistent hole quality across multiple workpieces. According to Drill Bits Pro, choosing a rigid machine with adequate spindle power and a solid workholding setup is foundational for safe, accurate metal drilling. In practice, this means matching the machine to your material, using the right bits, and implementing proper clamping and lubrication to manage heat and wear. When you start with high-quality tooling and a solid setup, you’ll notice sharper drill edges, cleaner holes, and less chatter. In this article we’ll walk through selection, setup, and operation with a focus on practical, field-ready guidance.
Key benefits you’ll gain from using a drill press for metal
- Precision: Rigid alignment and consistent feed rates produce accurate holes.
- Repeatability: Multiple holes in the same workpiece or batch stay uniform.
- Safety: Proper guarding, clamping, and safe speeds reduce kickback and accidents.
- Surface finish: Controlled feeds and coolant options minimize burring and heat damage.
- Efficiency: Faster setup and batch drilling save time on projects.
Common metals and their drilling considerations
Different metals respond to drilling in distinct ways. Steel and stainless steel demand sharp cobalt or carbide-tipped bits, with lubrication to reduce heat. Aluminum cuts more easily but can grab if feeds are too fast or misaligned. Brass and bronze require softer bit materials but still benefit from proper clamping and lubrication to avoid work-hardening and smearing. Knowing your material helps you select the correct drill bit material, coating, and speeds, which improves tool life and hole quality. Drilling speeds are not universal; always consult the bit manufacturer recommendations and adjust to maintain a steady, controlled feed.
Tools & Materials
- Drill press with variable speeds(Must offer smooth speed control and ample quill travel for metal drilling)
- Center punch(Marks starting point to prevent bit wandering)
- Clamps or a workholding vise(Essential to secure the workpiece firmly)
- Drill bits for metal (high-speed steel, cobalt, or carbide-tipped)(Choose sizes matching your hole spec; carbide tips for hard steels)
- Cutting oil or coolant(Useful for steel, helps extend tool life and reduce heat)
- Calipers or micrometer(For precise hole diameter and depth checks)
- Safety glasses or face shield(Protects eyes from chips and coolant spray)
- Dust collection or shop vacuum(Keeps workspace clean and reduces airborne particles)
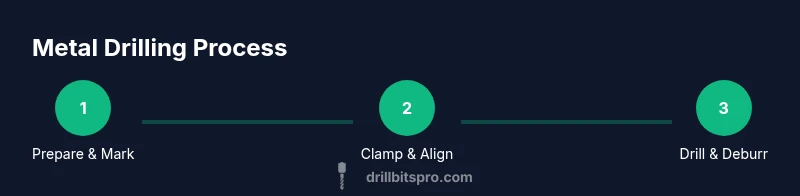
Steps
Estimated time: 60-90 minutes
- 1
Prepare the workspace
Clear the bench, install the drill press in a stable location, and verify electrical connections. Check the chuck for proper grip and ensure guards are in place. Confirm that the workpiece will be clamped securely before starting to drill.
Tip: Position a ruler or caliper nearby to verify hole depth as you go. - 2
Mark and center the hole
Use a center punch to mark the drill start point on the metal surface. Align your workpiece so the mark is directly under the chuck. This prevents bit wandering once you begin drilling.
Tip: Practice on scrap metal to perfect your starting alignment before touching the final piece. - 3
Choose and insert the bit
Select a bit appropriate for the metal type and hole size. Install it firmly in the chuck, then tighten with the chuck key in a safe position to avoid accidental contact.
Tip: For hard metals, consider using a pilot bit or stepping up in sizes to reduce work-hardening. - 4
Set speed and feed
Consult bit guidelines for metal to pick a safe spindle speed. Apply a light, steady feed pressure—do not force the bit. If the bit binds, back it out gently and reassess.
Tip: Start at a lower speed and increase gradually as you confirm hole quality. - 5
Clamp the workpiece
Secure the material with a reliable clamp or vise to prevent movement. Double-check alignment with the pilot mark and ensure the clamp does not interfere with the chuck’s travel.
Tip: Use a sacrificial backing piece to prevent burrs on the underside. - 6
Begin drilling and monitor
Lower the bit slowly to begin cutting, keeping steady pressure. Use cutting oil or coolant if drilling steel to reduce heat. Pause if you notice excessive smoke or unusual vibration.
Tip: If the drill stalls, pause, retract, and clear chips before re-entering. - 7
Finish and deburr
Once the hole reaches the desired depth, lift the bit, unclamp, and inspect the hole for burrs. Use a deburring knife or file to remove sharp edges and ensure a clean finish.
Tip: Run a small countersink lightly to deburr the entrance and improve appearance. - 8
Inspect and document
Measure hole diameter and depth with calipers. Record tool wear and material behavior to plan future drilling. Clean up, verify safety guards, and return tools to their proper places.
Tip: Keep a simple log of bit sizes, speeds used, and results for future projects.
Got Questions?
What types of drill presses are best for metal?
A benchtop or floor-standing drill press with variable speed, rigid frame, and a quality chuck is ideal for metal. Look for models with sufficient spindle power and generous quill travel to handle holes in thicker materials. Prioritize stability and precision over cheapest price.
For metal, pick a drill press with variable speeds, a sturdy frame, and a good chuck. Stability and travel matter most for precision.
Should I use cutting oil when drilling metal?
Yes, cutting oil or coolant helps reduce heat, extends bit life, and can improve surface finish, especially with steel and stainless steel. Apply a thin, even film as you drill and wipe away chips regularly.
Cutting oil helps manage heat and extend bit life, especially on steel.
What speed range is appropriate for metal drilling?
Speeds vary by bit type and metal. Start with the manufacturer’s guidance, often in the mid to low RPM range for larger bits, and adjust as needed to maintain a steady feed without overheating.
Follow the bit maker’s guidance and start slow, increasing only as you confirm performance.
How do I prevent drill bit binding or wandering?
Punch a starting mark, clamp securely, and start at a reduced speed with light feed. Use center punches and pilot holes for larger diameters to guide the bit.
Mark, clamp, and start slow to prevent wandering.
Is a benchtop drill press sufficient for metal projects?
For small to medium projects, a sturdy benchtop drill press with adequate travel and power works well. For heavy, thick metals or frequent production, consider a floor-standing unit with greater rigidity.
Benchtop works for many metal tasks, but big jobs may need a floor model.
How can I deburr holes safely?
Use a deburring tool or file to remove sharp edges after drilling. Fit a backing piece to protect the backside and avoid deforming the material.
Deburr with a proper tool and back up the workpiece.
Watch Video
Top Takeaways
- Secure and align workpieces before drilling.
- Choose the right bit material for the metal and hole size.
- Maintain steady, controlled feeds to avoid wandering.
- Use lubrication to manage heat and extend tool life.
- Deburr and inspect holes for a professional finish.