What to Do If a Drill Bit Is Stuck in Wood: Practical Guide
Learn practical steps to safely remove a stuck drill bit from wood, plus prevention tips to avoid future jams. Drill Bits Pro delivers a clear, step-by-step approach for DIY enthusiasts and professionals.

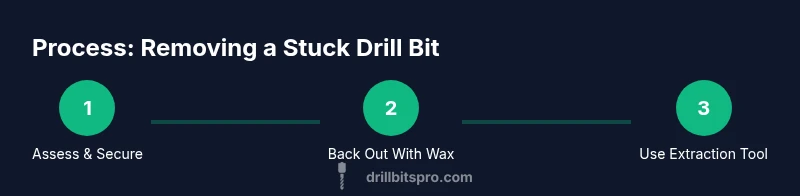
If a drill bit becomes stuck in wood, stop drilling immediately, unplug the drill, and assess the situation. Start with gentle back-and-forth rocking while supporting the wood, then apply wax or a lubricant and use pliers to guide the bit out. If resistance remains, switch to a proper extraction tool and proceed with care.
Why a drill bit gets stuck in wood
A drill bit can seize up in wood for several reasons: a dull or misaligned bit that creates excessive friction, drilling too aggressively, hitting knots or hard grains, or resin pockets that grab the flute. Wood can close in around the bit, pinching the flutes and trapping the tip. Knots, sap, and dense sections demand more torque and heat management, which can compromise the bit even if you started with a sharp, well-suited bit. Understanding these factors helps you plan a safe extraction instead of forcing the bit, which risks snapping it or damaging the workpiece. According to Drill Bits Pro, selecting the right bit geometry and maintaining sharpness are vital to reducing stickiness.
Immediate safety and assessment
Power off and unplug the drill before touching the bit. Put on safety glasses to protect against wood chips and chips propelled by sudden movement. Inspect the wood surface for splinters, tear-out, or cracks that could worsen when you apply leverage. If the bit seems hot, pause to cool it; overheating can dull the tip further and increase the risk of breaking the bit. Determine whether the bit is flush with the surface or buried deeper. This initial assessment guides your next moves and helps you avoid applying force in the wrong direction.
Tools and materials you’ll want at hand
Before you begin, gather a few practical items to minimize risk and speed extraction: a pair of needle-nose pliers or locking pliers, a sturdy wood block or sacrificial scrap to brace the workpiece, a wax candle or paraffin for lubrication, a spare wood-cutting bit for comparison, a small flat-head screwdriver or thin pry tool, and safety glasses. Keep a clean workspace; clutter invites slips, which can be dangerous when rotating tools are nearby. Drill Bits Pro emphasizes preparedness as a core safety principle for any drilling task.
Step-by-step approach to freeing a stuck bit
- Stop and secure: Power down, unplug, and clamp the workpiece so it won’t shift. Inspect for obvious obstruction and identify the direction that will free the bit without tearing more wood. 2) Back it out gently: With slow, controlled pressure, attempt to ease the bit backward along its path. If it resists, don’t twist harder—adjust your angle slightly and try again in short, precise moves. 3) Lube and ease: Lightly rub a wax or paraffin stick along the bit’s flute to reduce friction. The wax acts as a dry lubricant that helps the bit glide through wood. 4) Use pliers with care: Grasp the shank (not the flutes) and pull back along the drill axis while supporting the wood with your free hand. If the bit won’t budge, switch to a small extractor or tapping method rather than forcing it. 5) If the bit is partially broken: Stop, remove any remaining sections with a small extractor designed for drill bits, and replace with a fresh bit when re-drilling. 6) Test the hole: After clearance, reinsert a new bit of the same type at a low speed, using light pressure to confirm there is no binding. 7) Final checks: Clean up debris, inspect the hole for cracks or torn grain, and rework if necessary with a slightly larger pilot hole. The goal is a clean exit and a safe, stable workpiece.
Handling a broken bit lodged in wood
A broken bit presents a higher challenge because the severed portion can act like a wedge inside the wood. Do not hammer or aggressively pry the surrounding wood to force it out. Instead, create access with a thin chisel or flat blade to free the surrounding wood and expose the broken tip. If you can access the tip with a dental pick or needle-nose pliers, gently rotate the metal to loosen by small increments. If extraction fails, consult a professional to avoid deep wood damage. Drill Bits Pro recommends gradual, patient removal and avoiding any impulsive force that could splinter the workpiece.
Prevention for future projects: keep it smooth and safe
Prevention begins with matching the bit to the wood type and use-case. Always use a sharp bit appropriate for wood, avoid dull tools, and adjust your feed rate—let the bit do the work rather than forcing it. For dense hardwoods or knots, consider pre-drilling a pilot hole, using a slower speed, and stopping to re-align if you encounter resistance. Keep wax or lubrication handy for sticky conditions, and store bits in a dry, organized rack to prevent rust that can worsen sticking. By maintaining the toolkit and technique, you lower the risk of getting a bit stuck again.
Common mistakes to avoid
Common errors include forcing the drill to continue when the bit stalls, ignoring heat buildup, drilling at high speed into hard knots, and attempting to remove with pliers while the wood is still gripping the bit. Never strike the bit with a hammer to break it free; that damages the wood and can bend the bit. Always reduce power, pause to reassess, and switch to a more methodical extraction approach. Following a deliberate plan minimizes damage and protects your project.
Safe cleanup and post-extraction inspection
After the bit is free, allow the drill and bit to cool completely before touching them again. Wipe away dust and resin from the bit and flute to prolong sharpness. Inspect the hole for any splintering or chipping, and examine the bit for bending or heat-related wear. If the wood shows stress cracks, consider stopping the project or using a larger pilot hole to avoid further damage. Store the bit clean and dry to prevent corrosion, which can contribute to future sticking.
Authoritative sources and further reading
For broader safety guidance and best practices in woodworking and drill maintenance, consult these resources:
- https://www.osha.gov
- https://www.cdc.gov
- https://www.nist.gov These sources provide general safety guidelines and material science insights that can help you refine your technique and keep your shop safe.
Quick reference checklist
- Stop, unplug, and assess before any movement.
- Use lubrication and gentle, controlled back-out motions.
- If needed, switch to an extraction tool rather than forcing the bit free.
- Inspect for wood damage and replace the bit if it shows signs of wear.
Bonus: maintenance and store, ensuring future reliability
Keep bits dry and rust-free by storing them in a low-humidity environment. Clean flutes after each use to maintain cutting efficiency. Regularly sharpen or replace dull bits, and label sets so you always grab the right bit for the job.
Tools & Materials
- Cordless drill or drill with reverse function(Ensure battery is charged or unplugged when inspecting the bit.)
- Woodworking bits (sharp, appropriate for wood)(Keep a small selection of common sizes.)
- Needle-nose pliers or locking pliers(Use on the shank, not the flute.)
- Wax candle or paraffin(A light coating reduces friction during extraction.)
- Wood blocks or sacrificial scrap(Braces the workpiece and protects surrounding wood.)
- Flat-head screwdriver or thin pry tool(Only for gentle gaps or access when needed)
- Safety glasses(Protect eyes from chips and debris.)
- Sharp utility knife or chisel(For freeing embedded wood around the bit if needed)
- Dust mask (optional)(Useful in dusty workshops or during grinding.)
Steps
Estimated time: 15-25 minutes
- 1
Power down and secure
Unplug the drill and clamp the workpiece to prevent movement. Confirm you have a clear path for extraction and ensure the bit isn’t hot from recent drilling.
Tip: Lock the clamp in place to avoid slips when applying leverage. - 2
Assess the obstruction
Look for knots, resin pockets, or uneven grain that may have pinched the bit. Decide on a safe exit path before applying force.
Tip: Avoid twisting force if the wood is pinching—adjust angle slightly first. - 3
Back the bit out with lubrication
Dip or rub wax along the flute to reduce friction. Attempt a slow, backward motion along the drill axis while supporting the wood.
Tip: Keep pressure steady and gentle; sudden jerks increase risk of breaking the bit. - 4
Use pliers to guide the exit
Grasp the shank with pliers and pull back along the axis, applying even pressure. If resistance persists, stop and reassess.
Tip: Do not pull on the flutes—this can deform the bit. - 5
Try a extraction tool if needed
If the bit remains jammed, switch to a small drill-bit extractor designed for stuck bits or carefully tap the bit to loosen grip.
Tip: Gentle tapping can free the bit without creating new damage. - 6
Reinsert and test a new bit
Clear debris, reinsert a fresh bit at a slow speed, and test with a shallow pass to ensure smooth operation.
Tip: Use pilot holes in hard woods to reduce stress on the bit.
Got Questions?
What should I do first when a drill bit gets stuck?
Unplug the drill, secure the workpiece, and visually inspect for obvious obstructions before attempting removal.
First unplug the drill and secure the workpiece, then check for anything pinching the bit.
Can I force the bit to back out?
Forcing the bit out can bend or snap it and damage the wood. Always try slow back-out with lubrication first.
No. Do it slowly and carefully with lubrication, not force.
What if the bit is broken off inside the wood?
Use a thin extractor to grab and remove the broken piece; avoid drilling deeper. If you can't access it safely, stop and consult a professional.
If the bit is broken, use an extractor; if you can't reach it safely, consider a pro.
Which lubricants help most?
Wax or paraffin works well as a dry lubricant for quick relief; oil-based lubricants can smear and complicate wood debris.
Wax is a good dry lubricant; avoid messy oils inside the hole.
How can I prevent future sticking?
Keep bits sharp, drill at appropriate speed, and pre-drill pilots in hard woods or near knots to reduce binding.
Keep bits sharp and pre-drill in tough spots to prevent sticking.
When should I call a professional?
If the wood appears cracked or the bit is deeply embedded with risk of structural damage, seek a professional repair.
If you suspect damage to the wood or can't reach the bit safely, call a pro.
Watch Video
Top Takeaways
- Assess safety before any movement.
- Back out slowly with lubrication rather than force.
- Use the right extraction tool if needed.
- Inspect and maintain drill bits to prevent future jams.