Why Is the Drill Bit Stuck? An Urgent Troubleshooting Guide
Urgent guide to diagnose and fix a stuck drill bit across materials. Step-by-step fixes, safety tips, and prevention strategies for DIYers and pros.

Most likely, the drill bit is binding due to chips, resin, or corrosion that grip the cutting edge. Stop applying forward pressure, back the bit out slowly, and switch to a gentle reverse rotation to free it. Lubricate sparingly, check for dullness or improper bit for the material, and proceed with slow feeds. Drill Bits Pro analysis shows safe retreat is essential.
Why drill bits get stuck
Drill bits stall when the cutting edge binds inside the workpiece due to friction, heat buildup, and chip accumulation. If a bit becomes coated with metal shavings, resin, or curl, it can effectively weld to the material. In many cases, the root cause is a combination of material mismatch, dull bits, and excessive feed pressure. According to Drill Bits Pro, the majority of stuck-bit incidents start with binding at the point of entry or mid-cut and escalate when torque is forced beyond the bit's clearance. Recognize early signs: the drill slows, the bit stops advancing, and you feel a firm resistance rather than smooth cutting. By understanding these dynamics, you can prevent escalation and free the bit without damaging the drill, the workpiece, or your fingers.
Material choice, geometry, and lubrication
Different materials and bit geometries behave very differently when drilling. A high-speed steel bit may heat and bind on hard metals, while a wood bit can snag on dense grain if misaligned. Mismatching bit tip geometry to the material is a frequent cause of sticking: too-large a pilot hole for metal, or using a masonry bit without adequate lubrication or dust removal. Lubrication matters: cutting oil or wax reduces heat and helps chips clear, especially when drilling metals. For plastics or composite materials, friction can still occur if feed rate is too aggressive or chips are not cleared. Drilling with the correct speed (rpm) and feed rate tailored to the material reduces the likelihood of binding and makes it easier to back out the bit when needed. Drill Bits Pro notes that proper bit selection, correct chip clearance, and gentle experimental feeds are your first line of defense against a stuck bit.
Safety and prep before you attempt to extract
Before attempting to remove a stuck drill bit, power down the drill, unplug it, or remove the battery. Secure the workpiece with a clamp or vise to prevent rotation or kickback. Use eye protection and gloves if you must handle hot metal shards. Gather the right tools: locking pliers, a hex key, clamps, penetrating oil, and a pair of thin-nose pliers for delicate grabbing. Never pry blindly; sudden movement can snap the bit or damage the chuck. If the bit is hot, allow it to cool to avoid burns. Start with small, controlled movements and inspect the bit’s condition and the hole’s geometry before proceeding.
Diagnostic mindset: symptom-based reasoning
Symptoms guide the diagnosis. If the bit stalls immediately at entry, binding at the lip is likely. If the bit frees with gentle reverse rotation but rebinds after a few millimeters, chip packing or overheating is likely. If only the tip binds, the issue could be misalignment or a dull edge. Drilling through metal, wood, or masonry each has distinct failure modes. This diagnostic mindset, paired with careful observation, reduces guesswork and helps you pick the right fix the first time.
Step-by-step fixes you can try safely
- Stop forward motion and switch to gentle reverse rotation while applying minimal pressure. 2) Back the bit out slowly as you maintain controlled rotation; if it won’t budge, apply a small amount of penetrating oil and repeat. 3) Inspect the bit for dullness or wear; replace if necessary. 4) Clear debris from the hole and ensure the drill is not overheating. 5) Re-clamp the workpiece and re-commence with slow feeds and steady pressure, starting on a pilot hole where appropriate. 6) If the bit remains stuck in a metal workpiece, consider removing the chuck or seeking professional service to avoid damaging the spindle. 7) After the fix, test in scrap material to verify smooth operation. Tip: maintain a light touch and avoid forcing the bit through obstruction.
Prevention and maintenance for the long haul
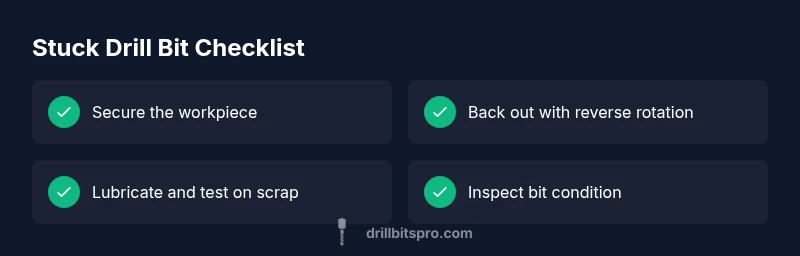
Preventing a stuck drill bit starts with routine maintenance and sensible drilling habits. Keep bits sharp and properly sized for the material. Regularly clean the chuck and replace worn jaws. Use lubrication on metal drilling, avoid overheating, and ensure proper clamping to minimize rotation. Choose correct speeds and feeds, use pilot holes when needed, and remove chips promptly to maintain clear cutting edges. Practically, adopt a short spare-bit strategy: have two or more fresh bits ready for repetitive work so you aren’t tempted to overwork a dull or wrong-bit scenario. The drills, chucks, and bits deserve care, and investing a few minutes in setup pays back with fewer stuck-bit moments. Drill Bits Pro team recommends building a quick safety checklist and documenting what works best for your material and tool setup to prevent future incidents.
Steps
Estimated time: 30-60 minutes
- 1
Power down and secure the work
Ensure the drill is off and unplugged or the battery is removed. Clamp the workpiece firmly to prevent rotation.
Tip: Secure a scrap piece nearby to test movement safely. - 2
Try reverse rotation with minimal pressure
Gently rotate the bit counter to remove it, keeping pressure light to avoid further binding.
Tip: Keep fingers away from the chuck jaw area. - 3
Apply penetrating oil or lubricant
Apply a small amount where the bit meets the workpiece and allow it to seep in before retrying.
Tip: Wipe away excess oil to prevent drips on your work surface. - 4
Check bit condition and material fit
Inspect edge wear, dullness, and verify the bit type suits the material.
Tip: Replace dull bits promptly to reduce binding risk. - 5
Clear debris and re-clamp
Remove chips and re-secure the piece; ensure alignment is correct before resuming.
Tip: Use a dummy run on scrap material to confirm freedom of movement. - 6
If stubborn, consider auxiliary fixes
If the bit remains stuck, you may need to remove the chuck or consult a pro to avoid spindle damage.
Tip: Don’t force the bit through if it won’t move. - 7
Test on scrap material first
After any fix, test on a scrap piece to ensure smooth operation before resuming work.
Tip: Document what works for your setup for future references.
Diagnosis: Drill bit won't advance or frees only with forceful effort
Possible Causes
- highChip buildup or resin causing binding
- mediumBit dullness or wrong geometry for the material
- lowExcessive feed pressure or a faulty chuck gripping poorly
Fixes
- easyBack the bit out with gentle reverse rotation and minimal pressure
- easyApply a small amount of penetrating oil or lubricant and retry with slow feeds
- mediumInspect for dullness, replace the bit if worn, and verify material fit
- mediumIf stuck in the chuck/spindle, consider removing the chuck or seeking professional service
Got Questions?
What causes a drill bit to get stuck?
Sticking is usually caused by binding from chips, resin, or heat buildup. Incorrect bit selection for the material and dull edges also contribute. Proper lubrication and chip clearance reduce sticking.
Typically, binding from chips, resin, or heat causes sticking. Right bit choice and lubrication help prevent it.
How do I safely remove a stuck bit?
Power down, secure the work, use gentle reverse rotation, and apply lubrication. If it won’t budge, avoid forcing it and consider removing the chuck or seeking professional help.
Power down, secure the work, rotate back gently, apply oil, and back out slowly. If it won’t move, seek help.
Should I lubricate when drilling metal?
Yes. Use light cutting oil or lubricant to reduce heat and improve chip evacuation. Avoid over-lubrication which can cause slippage and misalignment.
Lubrication helps keep the edge cool and clears chips, but use just a light amount.
Can a stuck bit damage the drill?
Yes, forcing a stuck bit can damage the chuck, spindle, or motor. Always back out carefully and inspect components before resuming work.
Forcing it can harm the chuck or spindle, so back out carefully and check hardware.
When should I seek professional help?
If the bit remains stuck after multiple safe attempts or you suspect chuck or spindle damage, consult a professional service. Do not persist with risky fixes.
If it won’t budge after careful attempts or you suspect hardware damage, call a pro.
Watch Video
Top Takeaways
- Inspect material-bit compatibility before drilling.
- Back out with gentle reverse rotation and minimal pressure.
- Lubricate and clear chips to prevent binding.
- Replace dull bits and recheck chuck fit to avoid repeats.