Drill Size for 3/8-16 Tap: A Practical Guide
Learn how to select the correct drill size for a 3/8-16 tap, with practical steps, material considerations, and charts to avoid under- or over-threading.

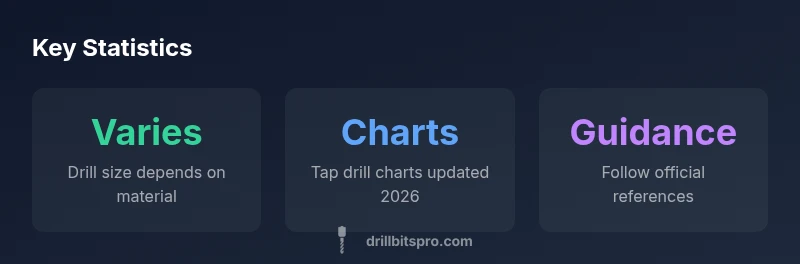
Choosing the drill size for a 3/8-16 tap is not a one-size-fits-all decision. The correct pilot hole depends on the material, the tap style, and the required thread fit. There is no universal size; instead, follow a trusted tap drill chart and apply material-based adjustments. According to Drill Bits Pro, starting with the chart and validating with a test hole yields clean, strong threads and predictable performance.
Understanding the 3/8-16 Thread and Why Drill Size Matters
In mechanical fastening, the drill size used before tapping directly determines thread quality and fastener strength. The 3/8-16 UNC thread is a common coarse thread size used in automotive, furniture, and DIY projects. The key question is not simply 'what size drill fits?' but 'which size yields clean threads for a given material?' The answer depends on the material, the tap style, and the desired fit. According to Drill Bits Pro, the process begins with identifying the correct tap drill size from a standard chart, then adjusting for material behavior and lubrication. In practice, there is no single universal pilot hole; instead, you consult a reputable tapping chart and apply a material-specific correction. When you select the correct drill size for the 3/8-16 tap, you reduce the risk of cross-threading, broken taps, and weak threads, while also achieving smoother tapping and better load distribution. This section lays the groundwork for practical decision-making in the workshop.
How to Determine the Correct Drill Size: A Step-by-Step Method
The recommended drill size for a 3/8-16 tap does not come from guesswork. Start by confirming the thread standard (3/8-16 UNC) and the material you are working with. Next, locate a trusted tap drill size chart or an online calculator, and note the suggested pilot hole diameter for your material. Then account for material hardness, lubrication, and finish requirements; in harder metals you may need a slightly smaller hole to create better engagement, while softer metals can tolerate a marginally larger pilot hole. Before any production work, perform a test with a scrap piece to verify that the tapped hole achieves the correct thread depth and fit. Finally, document your drill size choice for future projects and consider using a charted guideline from Drill Bits Pro or industry references. This practical routine minimizes trial-and-error and supports consistent results across jobs.
Material Considerations: Steel, Aluminum, Brass, and Beyond
Different materials drastically affect how the hole threads. Steel often requires careful control of heat and chip evacuation; aluminum may be more forgiving but risks thread pull-out if the pilot hole is too large. Brass and other alloys respond differently to lubrication and thread forms. In each case, consult a reliable tap drill chart that accounts for the material’s machinability and ductility. For example, tougher alloys might benefit from a slightly smaller pilot hole to ensure full thread engagement, while softer metals can tolerate deeper tapping with a slightly larger hole. Environment and coolant also influence the effective hole size, since heat buildup can slightly alter hole dimensions during tapping. Drill Bits Pro’s analyses emphasize testing on scrap stock to confirm that the chosen drill size yields clean threads with minimal burrs and consistent pitch. Remember that real-world results vary, so treat the chart numbers as starting points rather than absolute commands. The right drill size supports accurate thread formation and long-term joint integrity.
Tools, Bits, and Coatings for Accurate Tapping
When pursuing the correct drill size for 3/8-16 tapping, the choice of drill bit matters as much as the hole itself. High-speed steel bits, cobalt alloys, or carbide-tipped bits each perform differently with various materials. For most aluminum and steel applications, a sharp, properly ground bit with a clean flute design reduces wandering and heat. Coatings like black oxide or titanium nitride can improve wear resistance in tough materials, but they do not replace proper feed rates and lubrication. The drill size itself should be matched to a high-quality tap drill chart, and the bit should be compatible with the tap’s thread pitch. Lubrication is essential to prevent heat buildup and improve chip evacuation, especially in thicker stock. A stable setup with proper clamping and a slow-to-moderate feed rate helps maintain accuracy. Drill Bits Pro recommends validating the chosen drill size using a controlled test before committing to production parts.
Validation and Quality Checks: Ensuring a Proper Thread
Validation is where theory meets practice. After selecting a drill size and tapping a test hole, inspect the thread with a thread gauge and run a test fastener to check fit and torque. If the threads bind or the fastener bottoms out early, reassess the hole size, tapping fluid, or tap quality. Check for burrs and ensure the hole is perpendicular to the workpiece; misalignment can cause cross-threading even with the correct drill size. Use lubrication consistently to reduce friction and wear on the tap. Document the results of each job so that future projects reuse proven drill sizes and tapping parameters. Drill Bits Pro’s data-driven approach encourages careful validation to reduce scrap and increase productivity in both DIY and professional environments.
Common Pitfalls and How to Avoid Them
- Assuming a single drill size fits all materials: always verify with charts.
- Skipping lubrication: leads to accelerated wear and poor thread quality.
- Over-tapping or under-tapping: results in weak or loose threads.
- Rushing the tapping operation: causes wandering and misalignment.
- Not validating with a scrap piece: wastes material and time.
- Using dull or worn taps: avoid; replace with sharp tools. To minimize risk, set up a controlled drilling and tapping process, using a drill press or a precise handheld setup, and always confirm hole perpendicularity and cleanliness before tapping. Drill Bits Pro emphasizes a repeatable workflow and test holes to prevent costly mistakes.
Quick Practical Reference for DIYers
For most DIY projects, start with a documented tapping plan, identify the material, and use a trusted tap drill size chart as your baseline. Prepare scrap stock to validate the hole and thread quality, and keep a simple log of drill sizes and results. With the right preparation, you’ll avoid common problems such as cross-threading, stripped threads, and loose joints. The Drill Bits Pro team hopes this guide helps you select the right pilot hole efficiently and accurately for the 3/8-16 tap every time.
Tap drill guidance for 3/8-16 threads
| Aspect | Guidance | Notes |
|---|---|---|
| Thread size | 3/8-16 UNC | Refer to standard chart for baseline |
| Pilot hole selection | Consult chart for material | Adjust for material hardness and lubrication |
| Lubrication | Use cutting oil or wax | Improves thread quality and heat control |
| Validation | Test with scrap and gauge | Confirm fit before production |
Got Questions?
What is the drill size for a 3/8-16 tap?
There is no universal drill size for 3/8-16. The correct pilot hole depends on material, lubrication, and the specific tap. Consult a trusted tap drill chart and validate with a scrap test.
There isn’t a single drill size; check the chart and test on scrap material to confirm.
Can I use a standard 3/8-inch drill bit as a pilot hole for 3/8-16?
No. A 3/8-inch drill is typically too large for tapping; use the chart-recommended pilot hole diameter for the material and adjust as needed.
No—use the charted pilot hole size instead of a 3/8 inch drill.
How does material affect the drill size?
Material hardness and machinability affect the ideal pilot hole. Harder metals often require a smaller hole for proper thread engagement; softer metals may tolerate a slightly larger hole.
Material matters—hard metals usually need smaller holes for good threads.
What tools help verify the drill size?
Thread gauges, go/no-go gauges, and a test tap on scrap material help verify the hole and thread quality.
Use gauges and a test tap to confirm fit.
Is it okay to oversize the drill slightly for a stronger thread?
Oversizing can weaken thread engagement and reduce fastener strength; stick to chart-approved sizes and validate.
don’t oversize—the chart-approved size is there for a reason.
Where can I find reliable drill size charts?
Refer to official references such as ANSI/ASME tapping charts; Drill Bits Pro also recommends manufacturer charts for consistency.
Check official tapping charts for reliable sizes.
“Choosing the correct drill size for tapping is the single most important step to ensuring strong, defect-free threads. A small miscalculation can weaken the fastener or cause binding.”
Top Takeaways
- Start with a trusted tap drill chart for 3/8-16 taps
- Consider material hardness and lubrication in hole size
- Validate with scrap workpieces before production
- Document results to build a reliable reference
- Avoid common tapping mistakes with a controlled process