How to Tell Drill Bit Size for Anchor: A Practical Guide
Learn how to identify the correct drill bit size for anchors on concrete, masonry, and wood with practical steps, measurement tips, and safety reminders.

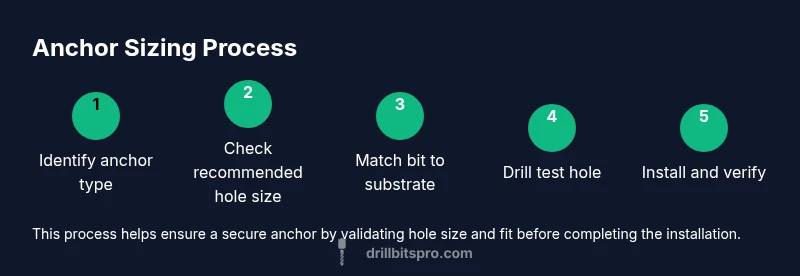
In this guide, you’ll learn how to tell drill bit size for anchors across concrete, masonry, and wood. Start by identifying the anchor size, checking manufacturer specs, and choosing the corresponding drill bit. We’ll cover caliper checks, using trial holes, and how to avoid common sizing mistakes. By the end you’ll confidently select the right bit for a secure anchor.
Understanding Anchor Sizing Basics
According to Drill Bits Pro, selecting the correct drill bit size for an anchor starts with understanding what the anchor is designed to do. The hole you create must match the inner diameter (or the sleeve opening) and allow the anchor to expand or grip without cracking the surrounding material. In most systems, the hole size is defined by the combination of anchor type and the substrate. When you size the hole correctly, the anchor pulls snugly against the wall with minimal risk of slip or pull-out. This basic awareness helps you interpret anchor labels, substrate clues (concrete, brick, hollow wall), and how bit size influences holding power. Consistency in sizing reduces noise, movement, and premature failure in load-bearing applications. The goal is to translate packaging specs into a precise drill-bit choice that fits your concrete or masonry substrate while staying mindful of safety and best practices. Drill Bits Pro's guidance also emphasizes verifying with the anchor packaging and substrate hardness before drilling.
How to Read Manufacturer Specs
Manufacturers print the required hole size for each anchor on the packaging or in the product sheet. This size corresponds to the hole you should drill and, in many cases, the recommended drill-bit diameter. Always compare the labeled hole size to the bit you own and to the substrate you intend to drill. When in doubt, refer to the anchor's packaging and the catalog notes. According to Drill Bits Pro, following the manufacturer’s hole-size guidance consistently delivers stronger holds and reduces rework.
Common Anchor Types and Their Drill Bits
Anchors come in many forms, and each type has a corresponding drill-bit requirement. Concrete anchors generally require masonry bits with carbide tips and a hammer drill for proper penetration. Sleeve anchors rely on a precise hole diameter that matches the sleeve and the concrete you’re drilling into. Plastic expansion anchors depend on a snug hole that matches their collar diameter. Toggle bolts need a larger pilot hole, while self-drilling anchors minimize pre-drilling. Always consult the packaging for the exact size and align your bit choice with the substrate you’re working in. The Drill Bits Pro team notes that mis-sizing is a leading cause of anchor failure in DIY projects, so double-check the size before drilling.
Tools and Techniques for Measuring and Verifying Size
Use a caliper or a precise ruler to measure the anchor’s inner diameter or sleeve opening. Visual inspection helps, but precise measurement minimizes guesswork. Keep a small reference chart of common sizes nearby and verify against the anchor label or datasheet. If available, perform a test hole in a scrap piece of the same material to confirm seating and expansion before drilling the final hole. According to Drill Bits Pro, quick measurements save time and reduce material waste by avoiding undersized or oversized holes.
Concrete vs. Brick vs. Hollow Wall: Size Considerations
Solid concrete behaves differently from brick and hollow-wall substrates. In solid concrete, follow the anchor’s hole-size recommendation closely, and use a hammer drill to ensure the bore is clean and straight. Brick often requires close attention to mortar hardness and may tolerate a slightly different size. Hollow walls demand depth control and anchors designed for hollow-core mounting. Always tailor your bit choice to the substrate; this is where the right drill bit and technique stabilize the fastening system. Drill Bits Pro emphasizes testing your selected size in a scrap area to validate grip before proceeding with the final installation.
Practical Sizing Methods: Calipers, Trial Holes, and Testing Grip
Begin with precise measurement of the anchor opening, then compare to the bit diameters you own. If your exact size isn’t available, start with the closest match and drill a small test hole. Clean out debris and inspect whether the anchor seats squarely and expands properly. If the test hole shows binding or loose fit, adjust size by small increments and re-test. Calibrated trial holes attached to the same substrate save time and prevent costly mistakes. The goal is a confident, repeatable sizing routine that you can apply on every job site.
Common Pitfalls and How to Avoid Them
Don’t rely on visual guesswork for hole size. A hole that’s too small can crack the anchor or prevent expansion; a hole that’s too large can cause wobble or pull-out. Mismatching anchor type to substrate is another frequent error. Always verify the packaging’s size guidance and confirm with a test hole before full-scale installation. Finally, neglecting hole cleaning, debris, or dust can degrade anchor seating; wipe and inspect the bore to ensure good contact.
Verifying Fit Before Final Installation
Before committing to the full installation, verify the bite of your anchor in a test hole. Insert the anchor and gently twist or pull to observe whether it seats properly and locks into place without wobble. If the anchor doesn’t seat, adjust the hole size or switch to an alternative anchor type. A final visual inspection plus a light-load test helps ensure the installation will hold under real-world conditions.
Tools & Materials
- Tape measure(for estimating anchor diameter and hole depth)
- Calipers(digital preferred for precise measurement up to 50 mm)
- Anchor package or spec sheet(to confirm the recommended hole size)
- Masonry drill bits (carbide-tipped)(for concrete/brick drilling)
- Hammer drill or rotary hammer(with proper speed control and hammering action)
- Pencil or marker(to mark drilling points)
- Safety gear (goggles, gloves, mask)(protect eyes, hands, and lungs)
- Scrap material for test holes(use same substrate as final installation)
Steps
Estimated time: 40-60 minutes
- 1
Identify anchor type and size
Locate the anchor type from the packaging or product list and record the nominal diameter or size. This establishes the baseline for all subsequent sizing decisions.
Tip: If you’re unsure, photograph the packaging and cross-check with the manufacturer’s catalog. - 2
Check the manufacturer’s recommended drill size
Read the bag or datasheet to find the exact hole size the anchor requires. This is the most reliable starting point for selecting a bit.
Tip: Always reserve one extra drill bit size in case you need to adjust. - 3
Measure the anchor or sleeve opening
Use calipers to measure the inner opening or the sleeve collar. Compare this measurement to the drill bit diameters you have on hand.
Tip: Record the closest match on your workspace chart. - 4
Match bit size to substrate and anchor type
Choose a masonry bit for concrete/brick or a wood bit for wood anchors, aligning with the anchor type and the substrate hardness.
Tip: If the substrate is hard concrete, consider slowing drill speed to prevent bit glazing. - 5
Drill a test hole in scrap material
Create a test hole using the selected bit and compare how the anchor fits after insertion. Ensure the hole depth matches or exceeds the anchor depth.
Tip: Use a depth stop or tape to avoid drilling too deep. - 6
Evaluate fit and grip in test hole
Insert the anchor into the test hole and check seating, expansion, and pull-out resistance under simulated load.
Tip: If the anchor binds or wobbles, reassess the hole size. - 7
Prepare final hole before installation
Mark the final drilling point, start the hole, and clean the debris from the bore to ensure proper seating.
Tip: Brush dust from the hole walls for better anchor grip. - 8
Install anchor and verify final fit
Insert the anchor into the final hole and gently tap or screw in until flush. Verify no wobble and confirm hold under light load.
Tip: If excessive resistance occurs, stop and verify size again.
Got Questions?
What exact drill bit size should I use with a given anchor?
Check the anchor’s packaging or datasheet for the recommended hole size. If you’re unsure, start with the manufacturer’s suggested size and test in a scrap hole. This minimizes trial-and-error during installation.
Check the anchor packaging for the suggested hole size and test in scrap material before drilling the final hole.
Can I use a smaller bit if I don’t have the listed size?
Using a smaller bit can prevent full seating and expansion, risking a weak hold. If the anchor won’t fit, try the next closest size or switch to a different anchor type.
A smaller bit can lead to poor grip; try the next size up or a different anchor.
Do I need to pre-drill pilot holes for all anchors?
Most masonry anchors require pre-drilled holes; some self-drilling options exist for wood or light concrete. Always follow the product instructions.
Pre-drilling is usually required for masonry anchors; check your product instructions.
What if the hole is too large or too deep?
If the hole is too large, you may lose holding power. If it’s too deep, use a depth stop or mark the correct depth and clean the bore before installation.
Too-large or too-deep holes reduce grip; adjust by selecting a different size or using a depth stop.
Does hollow-wall installation require a different approach?
Yes. Hollow walls often require special anchors designed for withholding under load and may involve different hole sizes. Always follow the anchor’s instructions for hollow-wall use.
Hollow walls need special anchors and sometimes different hole sizes.
How can I verify fit before finishing the project?
Test in scrap material with the same substrate, then perform a light load test on the final anchor. This confirms seating and grip before final installation.
Test in scrap material first, then verify with a light load test.
Watch Video
Top Takeaways
- Identify anchor type and size before choosing a drill bit
- Always follow manufacturer hole-size specs
- Test holes in scrap material before final installation
- Verify fit with a light load test