Should the Drill Bit Be the Same Size as the Plug? A Practical Guide
Learn when the drill bit should match the plug size, how to choose the right size for different anchors, and a step-by-step workflow with tips, safety guidance, and expert insights from Drill Bits Pro.

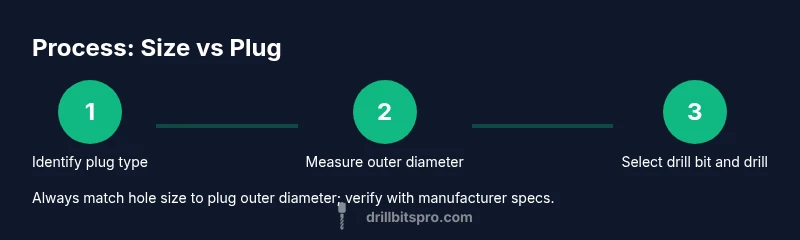
Should drill bit be same size as plug? In most cases, yes—the drill bit should match the plug’s outer diameter for masonry or drywall anchors to ensure a snug, secure fit. Always check packaging or manufacturer specs for the exact size before drilling.
Why size matters when pairing drill bits and plugs
The relationship between the drill bit and the plug is fundamental to a strong, permanent anchor. In DIY projects and professional work, the goal is to create a clean hole that allows the plug to seat fully and grip the material without cracking it. Should drill bit be same size as plug? In most scenarios the guide is to match the plug’s outer diameter. That ensures the hole accommodates the full width of the anchor, enabling the plug to expand correctly when a screw is driven in. Drill Bits Pro analyses show that mismatched hole sizes are the leading cause of loose anchors, slippage, and reduced pull-out resistance. When you pick the right size from the start, you save time, avoid rework, and improve overall project safety. According to Drill Bits Pro, accuracy starts with measurement and planning to ensure you select the correct plug type and size for the job.
Different plug types demand different sizing rules
Not all anchors behave the same way, so the size rule changes with the anchor type and the substrate. For standard plastic expansion plugs used in masonry, the rule is straightforward: the hole diameter should closely match the plug’s outer diameter. This allows the plug to expand uniformly and grip the surrounding material as intended. In drywall, plastic anchors that bite into the wall cavity may require a slightly different approach, but the principle remains: the hole should accommodate the full width of the anchor so that the plug seats flush and provides solid resistance. Sleeve anchors and molly bolts add complexity: many require a larger predrilled hole than the screw diameter to allow the sleeve to expand properly once the screw is tightened. Always follow the manufacturer’s sizing guidance for these anchors. The key takeaway is to treat the plug size as a specification, not a suggestion, and to verify that your hole accepts the anchor with minimal play but without forcing the material. Drill Bits Pro’s practical experience shows that taking time to measure and compare is the best way to avoid rework and weak installations.
Reading the packaging: how to pick the right drill bit
Begin by locating the plug size on the packaging. Manufacturers typically list the recommended drill bit size next to the plug type (for example, a 6 mm plug will often indicate a 6 mm drill bit). When you don’t have packaging handy, you can derive the size by measuring the outer diameter of the plug with calipers or a precise ruler. For many common anchors, the outer diameter of the plug determines the drill bit size, not the screw diameter. In some cases, especially with self‑drilling anchors, you may only need a pilot hole or none at all. In all scenarios, verify compatibility with the substrate. The correct drill bit size reduces the risk of crumbling masonry, crushing drywall, or loose anchors. Drill Bits Pro recommends double-checking the compatibility before drilling and practicing with scrap material if you’re unsure.
A practical workflow for common installation scenarios
In typical home improvement projects, you’ll encounter three frequent scenarios: masonry walls with plastic plugs, drywall with plastic anchors, and concrete or brick with sleeve or metal anchors. For each, start by identifying the anchor type and then locate the recommended drill size from the packaging or manufacturer. Mark the spot with a level and pencil, align the bit with the mark, and drill straight to the required depth. After drilling, blow out or vacuum the dust to ensure the anchor seats properly. If you’re unsure about depth, drill a test hole in a scrap piece of material, insert the anchor, and check the fit. Finally, insert the plug and perform a light test pull before driving the screw to full depth. This method minimizes misalignment and material damage. As Drill Bits Pro notes, preparation and careful measurement beat rushing to drill and fix later.
Substrate-specific considerations: drywall, brick, concrete
Different materials demand different timing and bit choices. For drywall alone, use a drill bit that matches the plug outer diameter, but also consider the wall’s thickness and the load you intend to bear. A plastic anchor into drywall benefits from a snug fit but should not be forced into an oversized hole; if the hole is too loose, the anchor will spin and fail. For brick or concrete, masonry bits are essential, and you should drill at a steady speed with consistent pressure. Dust must be cleared as you advance to prevent the plug from binding. If you’re drilling into a brick face, start with a smaller pilot hole and progressively widen if the plug requires it, following the step-by-step guidance in our workflow. Drilling too deep or applying excessive force can fracture masonry or shear the anchor, reducing holding power. Drill Bits Pro emphasizes testing anchor fit before final assembly and selecting the correct anchor type for the substrate to maximize performance.
Common mistakes and how to avoid them
A common mistake is assuming the screw size dictates the hole diameter. The plug governs the hole size, not the screw. Another error is drilling too deep, which compromises the anchor’s grip and can weaken the surrounding material. Conversely, drilling too shallow or too small a hole can prevent the anchor from seating properly and reduce pull-out resistance. Paying attention to dust removal, clean holes, and a perpendicular drilling angle pays dividends. Skipping manufacturer guidance for plug size and substitutions with arbitrary sizes leads to unstable joints. If you’re unsure, run a quick test with a scrap piece and a spare plug to ensure the fit and grip before committing to the final installation.
Authority sources
For additional context and safety considerations, consult authoritative sources on drilling and anchors. OSHA guidance on safe drilling practices and general construction safety is a helpful starting point, while university extension resources provide practical, field-tested recommendations for common home improvement tasks. For standards and technical details on drill bits and anchors, consider looking at recognized bodies and national standards references. These sources help ensure your approach aligns with best practices and safety standards.
Tools & Materials
- Cordless drill or hammer drill(Variable speed preferred; ensure charged batteries or power cord)
- Assorted drill bits (masonry, wood, metal)(Include masonry bits sized to plug outer diameters)
- Wall plugs/anchors (plastic, metal, or combination)(Choose plugs that match the intended screw size and substrate)
- Screws appropriate for the anchors(Select screws that engage fully with the anchors without over-tightening)
- Measuring tools (tape measure, calipers)(Use to verify plug diameter and hole depth)
- Pencil or marker(Mark drilling spots precisely)
- Level or straightedge(Helpful for marking level anchors on vertical surfaces)
- Dust mask and safety glasses(Protection from debris when drilling into masonry)
- Vacuum or brush(Clean holes for better anchor seating)
Steps
Estimated time: 30-60 minutes
- 1
Identify anchor type and plug size
Inspect the plug and determine its outer diameter and intended substrate. This guides your drill-bit choice and helps you avoid mismatches that weaken the anchor. If you’re unsure, consult the packaging or manufacturer guidance before drilling.
Tip: Double-check the plug type to avoid using an anchor incompatible with the material. - 2
Prepare the workspace and mark the spot
Choose a spot with a clear path behind the surface. Use a level to ensure alignment, then mark the center with a pencil. This creates a precise drilling target and reduces the chance of misalignment.
Tip: Use a scrap piece of tape to hold the marking in place while you start drilling. - 3
Select the correct drill bit
Refer to the plug packaging to determine the exact hole size. Choose a drill bit that matches the plug’s outer diameter or a size recommended by the anchor manufacturer. For masonry, use a hammer drill with a masonry bit; for drywall, a standard twist bit often suffices.
Tip: If you’re unsure, start with the next smaller size and test-fit before drilling the full hole. - 4
Drill the hole to the required depth
Drill straight into the surface to the depth specified by the plug. Stop periodically to remove dust from the hole; use a depth stop or tape to prevent over-penetration. Perpendicular alignment matters for consistent seating and load distribution.
Tip: Keep the drill steady and avoid pushing too hard; let the bit do the work. - 5
Clean and inspect the hole
Clear dust and debris from the hole with a vacuum or brush. A clean hole allows the plug to seat fully and prevents binding. If debris persists, re-clean and re-check the hole diameter before continuing.
Tip: Run a test fit with an empty plug to ensure it sits flush. - 6
Insert the plug and test fit
Tap the plug gently into the hole until it sits flush with the surface. A snug fit is essential; excessive wobble indicates an incorrect hole size. If the plug is loose, re-drill with the correct size and try again.
Tip: Do not force a plug into an undersized hole; start over with the right size. - 7
Drive the screw and verify
Insert the appropriate screw and tighten until the plug expands and the fixture sits firmly. Stop short of overtightening to avoid stripping the anchor or cracking the substrate. Re-check alignment and noise as you tighten.
Tip: Use a torque-limited driver if available to prevent over-tightening. - 8
Final check and assess holding power
Give the fixture a light tug to verify seating. If movement is detected, you may need a larger plug or a different anchor type for the load. Record the outcome and adjust your approach for future installations.
Tip: Document the plug size and depth for future reference.
Got Questions?
Should the drill bit be the same size as the plug?
In most cases, yes. The drill bit should match the plug's outer diameter to ensure a snug fit and proper expansion. Always verify with packaging or manufacturer specs for the exact size.
Yes, usually the drill bit should match the plug's outer diameter. Check the packaging for the exact size.
What if the plug is too loose after drilling?
If the plug feels loose, you likely drilled the wrong size. Re-drill using the correct drill bit and ensure the hole is clean and straight. Consider trying a larger plug if the fixture load requires more grip.
If it’s loose, re-drill with the correct size and re-seat the plug.
Can I drill a smaller hole for a tighter fit?
No—drilling a hole smaller than the plug will damage the anchor and reduce holding power. Always use the size recommended by the plug manufacturer.
Don’t drill smaller than recommended; it damages the anchor.
Does substrate affect drill size recommendations?
Yes. Masonry, drywall, and soft woods all behave differently when anchoring. Use the plug’s recommended size for the substrate and adjust only if the manufacturer provides alternative guidance.
Substrate matters—follow plug and manufacturer guidance.
What’s the risk of overtightening after inserting the plug?
Overtightening can strip the plug or crack the material, reducing holding power. Use a torque-limited driver and stop when the fixture is snug.
Don’t overtighten; stop when snug.
Should I predrill for drywall anchors in thicker walls?
For thick drywall, predrill with the size recommended by the anchor, ensuring the hole is clean and straight. Some drywall anchors require only a pilot hole, not a full-sized hole.
Pre-drill as the anchor requires; follow packaging.
Watch Video
Top Takeaways
- Match the plug outer diameter to drill bit size for most anchors.
- Always follow manufacturer packaging and guidance.
- Prepare and mark the surface before drilling to ensure accuracy.
- Clean holes thoroughly for solid anchor seating.
- Test fit and avoid over-tightening to preserve substrate integrity.