Should Drill Bit Be Smaller Than Screw? A Practical Guide
Learn how to size drill bits for screws with practical, material-specific guidance. Discover pilot hole sizing, avoid common mistakes, and follow step-by-step procedures for wood and metal projects.

Should drill bit be smaller than screw? In most practical projects, yes. A smaller bit creates a pilot hole that lets the screw bite cleanly without splitting the material. The general rule is to size the pilot to the screw’s core diameter rather than the thread diameter, and to adjust for material and screw type. This approach reduces stripping, improves grip, and yields a professional finish, especially for DIY or professional drilling tasks.
Why the drill bit size matters for screw insertion
The question "should drill bit be smaller than screw" is foundational to successful drilling and fastening. When you drill a pilot hole with a bit smaller than the screw’s outer threads, you give the screw a guided path to bite into the material. This helps the threads engage cleanly, reduces resistance during driving, and minimizes the risk of splitting softwood or cracking hardwood. According to Drill Bits Pro, pilot hole sizing must consider the material being worked with, the screw type (wood screw, metal screw, drywall screw), and the final fit you want. A well-sized pilot hole improves alignment, reduces the chance of thread stripping, and yields a neater finished look. Always test on a scrap piece when possible to validate bite and seating.
Pilot holes for different materials: wood vs metal
Pilot holes behave differently in wood and in metal. In wood, a pilot hole helps the threads cut without tearing grain fibers, particularly in hardwoods where fibers resist penetration. In metal, a pilot hole guides the screw threads and prevents work hardening or binding. The key is to match the bit size to the screw’s core diameter rather than its outer thread diameter. When in doubt, start with a smaller bit on a scrap piece and incrementally test screws to verify that they seat evenly without wobble. Drill Bits Pro emphasizes the value of material-aware sizing and scrap testing as part of a reliable workflow.
How to choose the right bit for wood and metal projects
Selecting the right bit means considering the screw type and the material. For wood, a sharp wood bit is essential; metal screws require drills that resist heat build-up and a bit sized to the core diameter. You'll often see two sizes needed for a single project: a pilot hole for the screw shaft and, if needed, a clearance hole where the screw head sits flush. The drill bit should be sized smaller than the screw so that threads can grip after driving. Consult fastener charts or the Screw Size guide in Drill Bits Pro resources when planning a project to ensure compatibility and clean performance.
Common mistakes and how to avoid them
Avoid assuming one size fits all. A hole that is too large invites loose threads and weak holding power; a hole that’s too small leads to binding, cam-out, or wood failure. Always confirm screw length relative to material thickness, and avoid over-penetration. Use a pilot hole to reduce the risk of material failure, especially near edges or in delicate materials. For metal, consider lubrication and slower feed rates to manage heat and improve thread formation. Testing on scrap pieces helps catch issues before damaging a finished project.
Quick-start sizing checklist for beginners
- Identify the screw type and material you’ll fasten to or through.
- Select a pilot hole size smaller than the screw’s outer threads (focus on the core diameter).
- Mark the hole location securely and clamp the workpiece.
- Drill the pilot hole, then insert a test screw into a scrap piece to verify bite and seating.
- If needed, countersink or chamfer the entry to match the screw head style and finish.
Practical scenarios: wood and metal examples
In woodworking, hardwoods often need a more conservative pilot hole to prevent splitting, while softwoods tolerate slightly larger pilots. For metal, ensure the pilot hole matches the screw’s core diameter and use lubrication to reduce friction. In both cases, never force a screw into a hole without resistance; if it binds, reassess the hole size and materials. The goal is a clean bite and secure hold without material damage.
Tools & Materials
- Drill (cordless or corded)(Adequate torque and battery life for the project)
- Drill bits set (wood, metal)(Include pilot hole bits smaller than your target screws)
- Screws matching your project(Have multiple lengths/heads to test fit)
- Safety glasses(Protect eyes from chips and debris)
- Clamps or a vise(Secure workpieces during drilling)
- Calipers or a ruler(Helpful for checking hole diameter against screw core)
- Center punch (metal), countersink bit (optional)(Center punch helps start the hole; countersinking helps flush screw heads)
Steps
Estimated time: 30-40 minutes
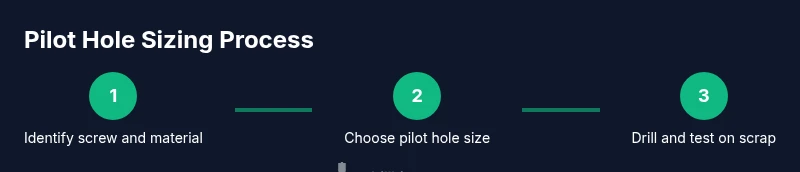
- 1
Identify screw size and material
Inspect the screw you’ll use and determine if the workpiece is wood or metal. This guides the pilot hole approach and helps you pick an appropriate drill bit size. Use the screw’s core diameter as the sizing anchor and plan your holes accordingly.
Tip: Measure the screw core diameter with calipers if possible; if not, reference the manufacturer’s sizing chart for your screw type. - 2
Choose the pilot hole concept
Decide on a pilot hole diameter that is smaller than the screw’s outer thread, focusing on the core. This ensures the screw threads have somewhere to bite without tearing the material. Consider whether you need a clearance hole in front of a through-hole for alignment.
Tip: When drilling into hardwood, start with a smaller pilot and test; you can widen slightly if the screw binds but seating remains clean. - 3
Mark the hole location securely
Use a center punch (metal) or a sharp pencil to mark the exact center. Clamp the workpiece to prevent movement during drilling. Accurate placement minimizes misalignment and reduces risk of damaged work.
Tip: Double-check measurements before drilling; a small misalignment can be hard to correct after the hole is made. - 4
Drill the pilot hole with the correct bit
Select a bit that is smaller than the screw’s outer diameter and drill perpendicular to the surface. Apply steady pressure and let the bit do the work; avoid forcing the drill. In metal, consider lubrication and slower speeds to control heat.
Tip: Clear the debris frequently to prevent binding and ensure a clean hole for the screw to follow. - 5
Optionally countersink or chamfer the entry
If you want the screw head to sit flush or slightly below the surface, countersink the entry with a suitable bit. Chamfering reduces the risk of cracking at the hole edge and improves finish quality.
Tip: Test both with scrap material to verify the surface finish and seating height. - 6
Test-fit the screw in the hole
Drive a screw into the pilot hole only partway to check bite and seating. If the screw binds, reassess the pilot hole size and material compatibility. Adjust by slightly increasing the hole diameter if needed.
Tip: Always test on scrap material before committing to the final workpiece. - 7
Drive the screw to final depth
Continue driving the screw with a steady speed and without excessive torque. If the screw heads sit proud or the material splits, stop and re-evaluate the hole sizing and technique.
Tip: Use a screwdriver or drill with a clutch to prevent overdriving and damage to the workpiece. - 8
Evaluate finish and adjust if needed
Inspect the joint for seating and alignment. If the hole seems undersized or the grain splits, re-test on a scrap and adjust the hole size or screw type before proceeding with the final assembly.
Tip: Record which hole size worked well for future projects to speed up setup.
Got Questions?
Should the drill bit always be smaller than the screw?
In most cases, yes. A pilot hole smaller than the screw’s outer diameter helps the threads bite into the material and reduces the risk of splitting. The exact size depends on material and screw type, so test on scrap when possible.
Yes. A pilot hole smaller than the screw's outer diameter generally helps the screw bite and prevents splitting, with exact sizing depending on material and screw type.
What happens if the hole is too large?
A hole that’s too large reduces holding power and can cause the screw to loosen over time. It may also let material fibers deform, especially in softwoods. If in doubt, start smaller and test by driving a screw into a scrap piece.
If the hole is too large, holding power drops and you may see loosening or fiber deformation; test on scrap first.
Can I reuse the same bit for different screw sizes?
It’s best to use the correctly sized pilot hole for each screw type. Reusing the same bit for different screws can lead to misfits and stripped threads. Use a pilot hole gauge or refer to sizing charts to select the right bit.
Use the right bit for each screw type; don’t rely on a single size for all screws.
Is countersinking always necessary?
Not always, but countersinking can help if you want a flush or recessed head and a cleaner finish. It’s especially useful for softwood where a protruding head looks rough or could snag.
Countersinking isn’t always required, but it helps achieve a flush finish and smoother surfaces.
How do I determine screw size without a gauge?
Use a quick comparison with a screw you already have: compare overall diameter and thread pitch. If unsure, rely on manufacturer guidelines or a sizing chart and test on scrap material first.
If you don’t have a gauge, compare to a known screw or check guidelines, then test on scrap.
Watch Video
Top Takeaways
- Size pilot holes to match screw core, not the outer thread.
- Test hole size on scrap to confirm bite and seating.
- Differentiate wood vs metal strategies for pilot holes.
- Clamp securely and drive with control to avoid material damage.
- Use countersinking when flush heads are needed.