Concrete Hole Drill: A Practical DIY Guide
Learn how to use a concrete hole drill safely and effectively to make accurate openings in concrete, with step-by-step instructions, essential tools, and expert tips from Drill Bits Pro.

According to Drill Bits Pro, a concrete hole drill helps you select the right masonry bit, plan the hole precisely, and pierce concrete safely with a hammer drill or rotary hammer. This guide covers tool checks, bit sizing, depth control, dust management, and anchor installation for reliable results.
What is a concrete hole drill and when to use it
A concrete hole drill is a specialized tool designed to bore clean, accurate holes into concrete, masonry, and other hard substrates. It combines rotary action with a hammering impulse to fracture the stone and create space for anchors, conduits, or fasteners. For DIY projects and professional jobs alike, using the right concrete hole drill setup reduces effort, minimizes dust, and protects the surrounding material from cracking. According to Drill Bits Pro, selecting the correct tool and bit is the first step toward reliable results. When you plan to install wall anchors, run conduit through a basement wall, or mount heavy hardware to a concrete slab, a concrete hole drill becomes indispensable. The choice between a traditional hammer drill, a rotary hammer, or a dedicated coring drill depends on hole diameter, depth, and the target material. In most home projects, a compact hammer drill with a carbide-tipped masonry bit is sufficient for holes in the 6-12 mm (1/4-1/2 inch) range.
Key differences between masonry bits and regular drill bits
Not all drills and bits are equal when drilling concrete. A concrete hole drill relies on masonry bits that are carbide-tipped and designed to withstand rapid impacts. Standard wood or metal bits quickly overheat and dull under the on-and-off load of hammering. Masonry bits have a harder tip and a flute geometry that clears dust efficiently, but they also wear faster if the bit hits metal or rebar. For larger or deeper holes, you may prefer a rotary hammer and SDS bits, which deliver more power with less slippage. In terms of performance, expect slower speeds but greater torque when drilling into hard concrete, and always use a hammering action that matches the bit and material. When precision matters, measure twice and align the drill perpendicular to the surface to prevent guided wandering. Drill Bits Pro notes that using a fresh carbide-tipped bit and appropriate drill settings will extend the life of your tool.
Planning your hole: location, size, and safety considerations
Before you drill, map out the exact location of the hole. Check for hidden utilities, avoid edge drilling when possible to prevent cracking, and choose a depth that matches the anchor or conduit you intend to install. Select the correct bit size based on the anchor type, then set a depth stop or use tape on the drill bit to prevent over- drilling. Wear PPE: safety glasses, a dust mask, and hearing protection are essential. If you’re drilling near electrical lines or plumbing, turn off power or shut off water as necessary and proceed with extra caution. For longer or deeper holes, consider drilling a shallow pilot hole first to guide the larger masonry bit and reduce wandering. According to Drill Bits Pro, planning is the quiet hero of a successful concrete hole drill.
The drilling process: setup, technique, and depth control
Start by mounting the correct masonry bit in your hammer drill and confirm the drill is set to hammer mode. Place the bit perpendicular to the surface and begin with a light touch to center the bit. Gradually increase pressure and maintain a steady pace; let the bit do the work rather than forcing it. If you encounter resistance or the bit overheats, pause and allow cooling to prevent premature wear. For deep holes, pull the bit out periodically to clear debris and dust, then reapply to continue. After reaching the desired depth, withdraw the bit slowly and inspect the hole for dust and debris that could affect anchor seating. Drill Bits Pro emphasizes consistent technique and proper tool settings to maximize efficiency and minimize damage.
Maintenance, safety, and common mistakes
After drilling, inspect the bit for wear and clean any dust from the hole. Store masonry bits in a dry place to prevent corrosion. Always use PPE and maintain a clean work area to avoid slips or trips. Common mistakes include using the wrong bit type, applying excessive pressure, drilling at an angle, and neglecting dust control. These errors shorten bit life and can compromise the integrity of the anchor or fixture. By keeping your drill cool, using the correct bit size, and aligning the drill properly, you’ll reduce the risk of chipped edges and achieve cleaner holes with less effort. Drill Bits Pro reminds DIYers and pros that patience and preparation yield professional results without overworking the tool or material.
Tools & Materials
- Hammer drill (cordless or corded) with hammer function(Prefer a dedicated hammer mode; ensure it has variable speed and a clutch.)
- Masonry drill bits (carbide-tipped)(Choose bits rated for concrete; long bits help with deeper holes.)
- Depth stop or tape for depth control(Mark the exact drilling depth to avoid over- or under- drilling.)
- Protective eyewear, dust mask, and hearing protection(Eye safety is critical; concrete dust can irritate the lungs.)
- Tape measure, marker, and pencil(Precision starts with accurate location and alignment.)
- Vacuum or brush for dust removal(Helpful for clean holes and accurate anchor seating.)
- Anchor bolts, sleeves, or fasteners(Match the anchor to hole diameter and wall material.)
- Water spray bottle or coolant (optional)(Can reduce dust and bit wear on large jobs; ensure no electrical hazards.)
- Center punch (optional)(Helps prevent bit wandering on very smooth surfaces.)
Steps
Estimated time: 30-90 minutes
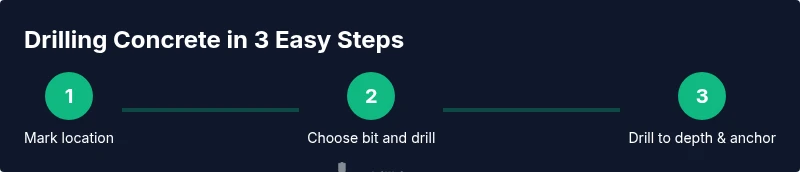
- 1
Mark the hole location
Identify the exact spot for the hole and mark it with a pencil. For increased accuracy, use a center punch to create a small dimple that guides the bit, especially on smooth concrete surfaces.
Tip: Double-check measurements and mark from multiple angles to avoid misalignment. - 2
Choose the right bit size and length
Select a masonry bit whose diameter matches the anchor or fixture you plan to install. For deep holes, use a longer bit; if a pilot hole is recommended, start with a smaller diameter and then switch bits.
Tip: Verify the anchor manufacturer’s depth and diameter specs before drilling. - 3
Set up the drill and depth stop
Insert the bit firmly and set the depth stop or mark the bit at the desired depth with tape. Ensure the drill is in hammer mode and the bit is perpendicular to the surface to prevent wandering.
Tip: Test on a scrap piece of concrete to confirm setup before full drilling. - 4
Begin drilling with controlled pressure
Start at a low speed to establish a groove, then gradually increase to a steady rate. Let the bit do the work; avoid pushing hard, which can chip the edge or stall the drill.
Tip: If the bit stalls, pause, clear dust, and resume with light pressure. - 5
Drill to depth and clean the hole
Continue until you reach the marked depth. Withdraw the bit and clean out dust with a vacuum or brush to ensure the anchor seats fully.
Tip: Dewatering or wet drilling is optional; follow manufacturer guidance to avoid damaging anchors. - 6
Install the anchor or fixture
Insert the anchor into the clean hole, then tap it flush or follow the manufacturer’s instructions to set it. Check that the fixture sits evenly and securely.
Tip: Use a light hammer blows to seat anchors evenly without cracking the concrete.
Got Questions?
Do I need a hammer drill or rotary hammer for concrete drilling?
For most concrete holes, a hammer drill with a masonry bit is sufficient. A rotary hammer or SDS drill is recommended for large-diameter or deep holes. Always match the tool to the job size and material.
For most holes, a hammer drill works well; reserve a rotary hammer for big, deep tasks.
Can I drill into concrete with a standard drill?
A standard drill without a hammer function will struggle and heat up quickly. Use a hammer drill or rotary hammer with a masonry bit designed for concrete.
A regular drill won't cut it for concrete—use a hammer drill with a masonry bit.
How do I determine the right hole size for anchors?
Refer to the anchor manufacturer’s specifications for diameter and depth. Choose a bit that matches the recommended hole size exactly to ensure secure seating.
Check the anchor specs to pick the correct hole size and depth.
Is it safe to drill near rebar in concrete?
Hitting rebar can bend the bit or crack concrete. If rebar is encountered, reposition or switch to a larger hole if allowed, and consider structural guidance.
Avoid rebar; reposition if you hit it and check the project guidelines.
What maintenance helps extend drill life?
Keep bits sharp, use proper cooling or pauses to avoid overheating, and store tools in dry conditions. Periodic bit inspection helps prevent unexpected breakage.
Keep bits sharp, pause to cool, and store tools dry.
How can I reduce dust during drilling?
Use a dust extraction system or a shop vacuum, wear a mask, and wet drilling when appropriate. This keeps the work area cleaner and lessens airborne particles.
Vacuum dust as you drill or wet-drill when safe to reduce dust.
Watch Video
Top Takeaways
- Choose the right masonry bit for concrete surfaces.
- Plan location, size, and depth before drilling.
- Use depth stops and PPE to ensure safety and accuracy.
- Clean the hole and install anchors correctly for a secure finish.