How to Drill Concrete: A Practical Step-by-Step Guide
Learn how to drill concrete safely and accurately with the right drill bits, technique, and finishing tips. Practical steps for DIY and pros.

This guide shows you how to drill concrete safely and accurately using a hammer drill and masonry bits. You’ll choose the right bit, mark the hole, drill with steady pressure, and finish cleanly. By following these steps, you’ll learn how to drill concrete like a pro. Keep safety gear on, and verify your setup before starting. This quick answer primes you for the deeper, step-by-step guidance below.
Why Concrete Drilling Demands Precision
Concrete is extremely hard and unforgiving. A small error in location, angle, or depth can compromise anchors, create cracks, or produce an unusable hole. This is why precision matters: it saves time, material, and effort in the long run. According to Drill Bits Pro, selecting the right carbide-tipped masonry bit and using a controlled drilling technique yields cleaner holes in concrete, reducing wear on the bit and minimizing heat buildup. Plan for dust control and safety from the outset to protect your workspace and health.
Key Challenges When Drilling Concrete
Wandering bits, dull cutting edges, and excessive dust are the most common headaches. Hard surface transmission of vibrations can push the bit off-axis if the setup isn’t secured. Proper technique includes starting slowly, using a pilot hole for guidance, and applying steady pressure instead of forcing the bit. Drill Bits Pro analysis shows that addressing dust control, bit alignment, and steady feed rates dramatically improves hole quality and reduces breakage during tough pours and masonry blocks.
Choosing the Right Drill Bits for Concrete
For most DIY and professional tasks, carbide-tipped masonry bits are the standard choice for concrete. Look for bits rated for hammer action with a robust cutting edge. For larger holes or anchors, you may start with a smaller pilot hole and progress to the final diameter to minimize bit wandering and heat buildup. Distinguish between standard masonry bits and SDS-plus variants if you’re using a rotary hammer. The right combination of bit type and diameter determines edge quality and depth control.
Pre-Drilling Prep and Safety Steps
Prepare the workspace by removing debris and securing the workpiece. Wear eye protection, a dust mask, and hearing protection. Mark the hole location with masking tape, which helps prevent the bit from skidding on the surface. Check your drill’s chuck and ensure the bit is clean and straight before starting. If you plan to drill deep holes, consider a depth stop or a measured depth guide to prevent over-penetration, which could compromise the fixture or contaminate the anchor.
Planning the Hole Pattern and Depth
Before drilling, verify the pattern aligns with your fixture’s mounting requirements and the concrete’s strength. For anchor installations, confirm embedment depth from the manufacturer and provide a margin for dust removal. Use a depth stop or tape to set your drilling depth, and maintain perpendicularity to the surface for uniform holes. Document hole locations to ensure accurate installation of anchors or fasteners later in the project.
High-Level Step-By-Step Overview
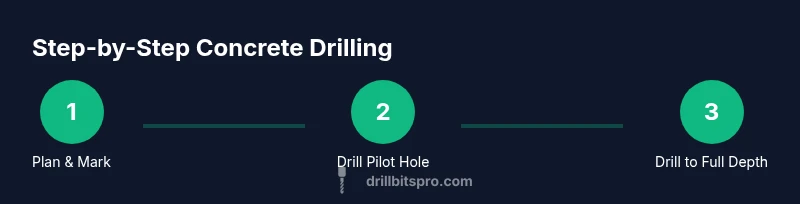
Here is an overview of the key actions you’ll perform in the step-by-step section: select the appropriate bit, secure the workpiece, mark and set depth, drill a pilot hole, drill to full depth with steady pressure, and clean the bore before installing anchors. Each action reduces wandering, improves cleanliness, and helps you achieve precise results when drilling concrete.
Finishing Your Hole and Clean Up
After drilling, remove dust with a brush or vacuum to reveal a clean bore edge. Deburr the hole to prevent snagging when inserting anchors and verify depth one final time. If moisture or debris is a concern, seal the edge or install the anchor according to manufacturer specs. Proper cleanup protects equipment and reduces injury risk during subsequent steps of the project.
Real-World Scenarios: DIY vs Professional Jobs
For small anchor holes in home projects, a standard hammer drill and carbide bits suffice. For large-scale installations or high-precision requirements (e.g., heavy machinery anchors), professional-grade rotary hammers, SDS bits, and dust-control systems may be warranted. In all cases, plan, measure, and verify depth before drilling, and select bits designed for concrete to extend tool life and ensure reliable results.
Tools & Materials
- Hammer drill or rotary hammer(Choose a model with variable speed and hammer function for concrete)
- Masonry drill bits (carbide-tipped)(Select bits rated for concrete; start with pilot hole for larger diameters)
- Masking tape or chalk(Mark and protect the drill point to prevent wandering)
- Dust collection tool or vacuum(Helps keep work area clean and safe)
- Safety gear (safety glasses, dust mask/respirator, ear protection)(Protect eyes, lungs, and hearing)
- Depth stop or measuring tape(Control drilling depth accurately)
- Water spray bottle or misting system (optional)(Cools bit and suppresses dust)
Steps
Estimated time: 45-90 minutes per hole depending on diameter and depth
- 1
Set up and mark the hole
Mark the exact location with masking tape and chalk. Align the drill point carefully to avoid wandering and mark drilling depth with tape.
Tip: Secure the workpiece and ensure the surface is dry before starting - 2
Install bit and set depth
Choose a carbide-tipped masonry bit of the appropriate diameter and set your depth stop or tape. Verify the bit is clean and straight in the chuck.
Tip: Use a pilot hole for larger diameters to prevent wandering - 3
Begin drilling with a pilot hole
Drill a small pilot hole at slow speed to guide the larger bit. Keep the bit perpendicular to the surface to maintain hole accuracy.
Tip: Start slow to prevent bit skating on the surface - 4
Drill to full depth with steady pressure
Increase to full diameter and apply steady, moderate pressure. Let the bit cut; avoid forcing it.
Tip: Periodically pause to clear dust and prevent clogging - 5
Clean and inspect the hole
Wipe away dust with a brush or vacuum. Check depth and edge quality; deburr if needed before installation of anchors.
Tip: A clean bore ensures proper anchor seating - 6
Finish and anchor, if required
Install anchor or dowel according to manufacturer specs. Seal or protect the edge if moisture exposure is expected.
Tip: Use appropriate anchors for concrete strength and load
Got Questions?
What is the best drill bit for concrete?
Carbide-tipped masonry bits are typically best for concrete. Start with a smaller pilot hole for larger diameters and use a hammer drill to achieve efficient cutting.
Carbide-tipped masonry bits work best for concrete, and a pilot hole helps large diameters.
Can I drill into concrete without a hammer drill?
A regular drill struggles with concrete; a hammer drill or rotary hammer makes the job safer and faster. For small holes you may manage with a masonry bit and tapping with an impact driver, but a hammer drill is recommended.
A hammer drill is strongly recommended for concrete.
How deep should anchors be for concrete?
Anchor depth depends on the anchor type and load. Always follow the manufacturer's recommended embedment depth and test fit before full installation.
Follow the anchor manufacturer’s depth recommendations.
What safety gear is essential when drilling concrete?
Wear safety glasses, a dust mask or respirator, and hearing protection. Use gloves and ensure proper ventilation to manage silica dust.
Always wear eye protection, a mask, and ear protection.
Should I cool the drill while drilling?
Cooling isn’t always required, but using water mist or keeping the bit cool can extend bit life and reduce dust. Avoid overheating.
You can use water mist to cool the bit and reduce dust.
Watch Video
Top Takeaways
- Choose the right masonry bit and drill with steady pressure
- Mark and protect the drill point to prevent wandering
- Use a pilot hole for larger diameters to improve accuracy
- Clean the bore regularly to maintain anchor seating
- Plan depth and confirm anchor compatibility before drilling