How to Drill into Brick or Mortar: A Practical Guide
Learn how to drill into brick or mortar safely and accurately with the right masonry bits, hammer drill technique, and anchors. This guide covers preparation, tool selection, and finishing for durable fixes.

You can learn how to drill into brick or mortar safely and precisely. This guide covers choosing the right bits, creating a clean pilot hole, and using a masonry hammer drill with proper technique to prevent cracks and wandering. By the end you’ll know how to anchor screws or plugs in brick or mortar with confidence.
Understanding Brick vs. Mortar: Where to Drill
When you drill into brick or mortar, the goal is to create a hole that anchors securely without cracking the surrounding material. Brick provides solid resistance, while mortar is softer and can crumble if drilled too aggressively. For most fixtures, you’ll want to drill into the brick where possible, or into the mortar only when the brick is between courses or when a masonry anchor requires it. The choice affects hole size, depth, and the type of fastener you can use. To achieve durable results, plan your hole location carefully, avoiding thin mortar joints that could crumble under pressure. Drill into brick or mortar with precision by mapping your path, checking behind the wall for electrical or plumbing, and using the correct masonry bit. Drill Bits Pro emphasizes starting with a small pilot hole and expanding gradually to prevent binding and wandering.
- Identify your target: brick surface for strongest hold, mortar only when necessary.
- Plan hole density to avoid compromising structural elements.
- Use a masonry bit designed for stone and brick, not a standard wood bit.
The key to success is controlled speed, steady pressure, and a properly sized bit for the anchor you intend to install. According to Drill Bits Pro, the right combination reduces damage and improves installation longevity.
Masonry Bits, Drill Settings, and Anchors: What Works
Choosing the right bit and drill setting is critical when you drill into brick or mortar. A carbide-tipped masonry bit paired with a hammer drill delivers the impact you need to cut through dense masonry while maintaining control. Start with a smaller pilot bit to establish a clean entry point, then step up to the final size. In brick, you may be able to drill straight through with the brick itself; in mortar, you’ll often need to work a little differently depending on the joint type. Anchors and screws should match the hole diameter and wall material. Plastic sleeves or metal anchors are common in brick, while mortar anchors can be used in softer joints.
- Use a hammer drill set to low-to-moderate speed for better control.
- Keep the bit cool with brief pauses or light sprays of water if drilling large holes.
- Center the drill and maintain a perpendicular angle to the surface to prevent wandering.
According to Drill Bits Pro, testing a small hole in a scrap brick can help you tailor your approach before committing to the final hole. This reduces the risk of crack propagation and ensures a clean, precise bore.
Preparing the Work Area and Safety Essentials
Safety and preparation come first when you drill into brick or mortar. Clear the work area of obstructions and dust, put on personal protective equipment, and confirm there are no concealed utilities along the drilling path. A dust mask, safety goggles, and hearing protection are recommended. Mark the exact hole location with a pencil or marker, then align the drill perpendicular to the surface. Use a center punch or nail to create a small indentation that will guide the bit and prevent wandering. If you are drilling through brick, ensure there are no weaknesses around the edge of the brick as you approach, which could cause spalling or cracking. For the best results, work slowly, avoid applying excessive pressure, and take short cooling breaks to protect the bit and the material.
- PPE: safety glasses, dust mask, and hearing protection.
- Mark and punch to prevent the bit from slipping.
- Keep one hand steady on the drill and the other guiding it lightly.
And remember: maintaining a clean, dry surface reduces slipping and helps accuracy. Drill Bits Pro notes that a well-prepared work area is the foundation of a successful masonry drilling project.
The Drill Technique: Positioning, Marking, and Starting Holes
Effective masonry drilling begins with precise positioning and a deliberate start. Place the marking point and align the bit perpendicular to the surface. Start with a shallow pilot hole using a smaller bit to establish a guide. Use light, steady pressure and let the drill do the work; forcing the bit can cause it to bind or overheat. As you progress, gradually increase the hole diameter by stepping up to the final bit size. If you hit a hard layer of brick, pause briefly and allow the bit to cool before continuing. Keep the drill stable and avoid twisting the wrist or applying lateral force, which can widen the hole or crack the brick.
- Begin with a pilot hole to ensure straight entry.
- Maintain perpendicular alignment to avoid angled holes.
- Use short bursts of drilling with controlled pressure to minimize bit wear.
According to Drill Bits Pro, a calm, methodical approach reduces the risk of damage and improves the anchoring strength.
Depth, Alignment, and Cleaning the Hole
Depth control matters as much as hole quality. Use a depth stop or a piece of tape on the bit to gauge the required depth. Drill slowly to avoid overheating and scorching the brick. When finished, remove the bit and clean out the hole with a brush or small vacuum to clear dust that can interfere with anchor seating. If the hole is too shallow, expand gradually using the next size bit and re-check depth. For long-term durability, ensure the hole edges are clean and free of chips, which can degrade anchor performance. If you must drill multiple holes, maintain consistent spacing and depth for uniform load distribution.
- Mark depth with tape or a depth stop.
- Clean the hole thoroughly before inserting anchors.
- Maintain uniform hole spacing for multiple fasteners.
Drill Bits Pro emphasizes that consistent depth and clean, square holes lead to stronger, longer-lasting fixes.
Anchors and Fasteners for Brick and Mortar
Anchors are the bridge between a hole and a secure fixture. In brick, consider sleeve anchors, lead anchors, or plastic expansion anchors sized to the hole. In mortar, plastic anchors with setting compounds can be effective, but the joint quality matters; crumbling mortar demands a different approach or re-pointing. Always select anchors rated for brick or mortar and compatible with your screw or bolt diameter. When installing, insert the anchor until it is flush with the wall surface, then gently tighten to seat it without cracking the masonry. If you feel resistance, back off and reposition slightly.
- Choose anchors matched to hole diameter and load.
- Avoid over-tightening, which can crack brick or crush anchors.
- In older brickwork, consider expanding anchor options that distribute load over a larger area.
The right anchor selection, as highlighted by Drill Bits Pro, ensures secure fastening and minimizes masonry damage.
Maintenance and Safety While Drilling in Masonry
Post-drilling maintenance includes cleaning up dust and checking the fixture for stability. Keep the bit sharp and replace it if it shows signs of wear. Store masonry bits in a dry place to prevent rust and maintain edge retention. Safety reminders: always wear PPE, inspect the wall for hidden conduits, and avoid drilling near electrical panels or gas lines. If you observe chips or spalling around the hole, stop and reassess the drill approach. Regularly inspect the anchors after installation and re-tighten if needed after a few weeks, as brick and mortar can settle over time.
- Periodically check anchor integrity and fixture stability.
- Store tools properly to prolong tool life.
- Reassess drill approach if you see cracking or excessive dust in the hole.
The Drill Bits Pro team recommends a cautious, methodical approach and routine inspection to maintain safety and performance.
Quick Troubleshooting Guide: Wandering, Cracking, and Bits Stalling
If your drill wanders, ensure the bit is properly seated and perpendicular, and that you’ve marked a stable starting point. If you notice cracking, reduce drilling speed and pressure and pause to cool the bit. For stalling or dull bits, stop, sharpen or replace the bit, and check your drill’s clutch settings. In bricks with high silica content, bits may wear quickly; switch to a more durable carbide-tipped bit and ensure the tool is delivering consistent hammer action. Always pause to clear debris before continuing.
- Wandering: realign and start with a pilot hole.
- Cracking: ease pressure and cool the bit.
- Dull bits: replace or sharpen and resume gradually.
Drill Bits Pro highlights that careful troubleshooting minimizes damage and prolongs tool life.
Tools & Materials
- Hammer drill (corded or cordless)(Prefer hammer action for masonry; ensure battery is charged or power cord is long enough.)
- Masonry drill bits (carbide-tipped, multiple sizes: 4mm–10mm)(Include pilot sizes for clean entry.)
- Anchors suitable for brick or mortar(Plastic sleeves, metal anchors, or mortar anchors matched to hole size.)
- Safety goggles(Protect eyes from chips and dust.)
- Dust mask or respirator(Use for dusty masonry work.)
- Vacuum or brush for debris removal(Helpful for keeping the hole clear.)
- Water spray bottle or cooling agent(Optional for heat management on larger holes.)
Steps
Estimated time: 25-40 minutes
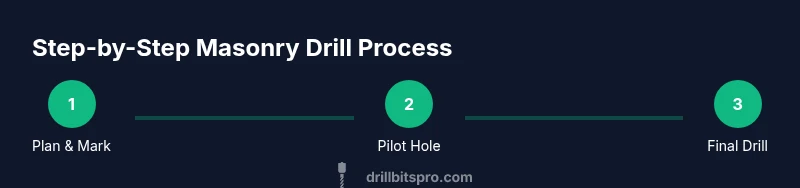
- 1
Prepare the site and mark the location
Clear the area and mark the exact hole location with a pencil. Use a level to ensure the mark is square to the mounting surface. If you’re drilling multiple holes, lay out a simple pattern and measure spacing carefully. Place a small center punch or nail at the mark to create a tiny indent so the bit won’t wander when you start. This initial setup reduces misalignment and material damage.
Tip: Double-check behind the wall with a stud finder or plumb line to avoid hidden cables or pipes. - 2
Center and start a pilot hole
Attach the smallest masonry bit that matches your anchor’s diameter. Begin drilling slowly to create a precise entry point. Use light pressure and let the bit bite into the brick or mortar rather than forcing it. If you sense binding, back out slightly and re-seat the bit before continuing.
Tip: Keep the drill perpendicular for a clean, straight pilot hole. - 3
Enlarge to final hole size
Switch to the final bit size after the pilot hole is established. Drill with steady pressure, pausing briefly to prevent overheating. If drilling into very hard brick, make multiple shallow passes, pulling back to clear dust between passes. Check depth frequently using a depth stop or tape on the bit.
Tip: Do not rush; a slow, controlled approach yields better hole quality. - 4
Clean the hole and insert the anchor
Remove dust and debris from the hole using a brush or small vacuum. Insert the anchor until it sits flush with the surface, then tap gently with a hammer if needed. If you’re using a sleeve anchor, thread the screw to the anchor before final seating. Confirm alignment before tightening fully.
Tip: Ensure the hole is fully clean; debris can reduce anchor grip. - 5
Attach the fixture and check accuracy
Insert the fastener and tighten gradually until the fixture is secure without crumbling the masonry. Re-check the level and alignment. If the fixture shifts, stop and reseat the anchor or switch to a larger size if allowed by the wall material.
Tip: Avoid over-tightening, which can crack brick or crumble mortar.
Got Questions?
Do I need a hammer drill or can I use a regular drill?
Masonry drilling typically requires a hammer drill or rotary hammer for effective penetration. A standard drill without hammer action will struggle with brick or hard mortar and may cause bit dulling or wandering.
For brick or mortar, use a hammer drill to ensure efficient cutting and control.
Should I drill into brick or mortar?
Drill into brick when you want the strongest anchor, but drill into mortar if the brick is exposed or if the anchor requires a soft material. In some cases, drilling into brick may be difficult near edges; assess the wall condition before choosing.
Brick gives better hold; mortar works in specific scenarios when the wall condition favors it.
What type of anchors work best in brick walls?
In brick, plastic sleeves and metal anchors designed for masonry are common. Choose anchors that fit the hole diameter and are rated for brick loads. For hollow bricks or older masonry, consider expansion anchors or chemical anchors as appropriate.
Use masonry anchors matched to your hole size and wall material.
How deep should I drill the hole?
Depth should match the length of the anchor plus a small allowance. Use a depth stop or tape on the drill bit to maintain consistency. Too shallow holes reduce hold, while overly deep holes waste material and can weaken the brick.
Measure the anchor length and set the drill depth accordingly.
Is water cooling necessary for masonry drilling?
Water cooling is optional but helpful for very hard brick and long drilling sessions to reduce heat and extend bit life. Avoid excessive water near electrical outlets and use it sparingly.
Cool the bit occasionally if drilling large holes, but use care around water sources.
What should I do if the brick starts to crack?
Pause, back out the bit, and re-evaluate speed and pressure. Check that you’re not hitting a fragile joint or weak edge. If cracking continues, switch to a smaller pilot hole and approach slowly, or reposition away from the crack.
Stop and adjust technique to prevent further damage.
Watch Video
Top Takeaways
- Mark your hole precisely and use a pilot hole.
- Use the right masonry bit and a hammer drill for masonry work.
- Keep holes clean and anchors properly seated for secure fixtures.
- Avoid over-tightening to prevent brick damage.
- Follow safety practices and inspect behind walls for utilities.