How to Drill on Concrete: A Practical Step-by-Step Guide
Master concrete drilling with this comprehensive step-by-step guide. Learn bit selection, tool setup, pilot holes, depth control, dust management, and anchor installation for sturdy, durable holes.

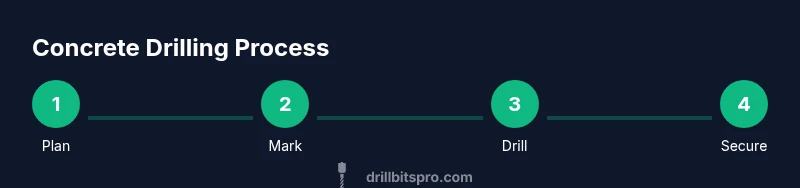
This guide shows you how to drill on concrete safely and accurately, focusing on bit choice, hammer-drill operation, pilot-hole use, and depth control to ensure clean holes and secure anchors. You'll learn how to prepare the work area, select the right tools, perform the drilling with proper technique, and finish with reliable fasteners. Safety and dust management are embedded throughout the process.
Why drilling on concrete demands the right approach
Concrete is one of the toughest materials to bore, so using the correct technique matters as much as the bit quality. A dedicated masonry bit with carbide tips, paired with a hammer action drill, creates clean entry holes and reduces bit wear. This section explains how the hydraulic impact and bit geometry influence breakout, vibration, and hole accuracy. By adopting the proven approach outlined in this guide—planning the layout, selecting the proper tool, and marking the exact starting point—you’ll set yourself up for reliable anchors, conduits, or fixtures. The Drill Bits Pro team emphasizes that the right combination of tool, bit, and technique dramatically improves hole quality and reduces dust and heat, especially on dense or old concrete.
Choosing the right tools and bits
For concrete drilling, a hammer drill or rotary hammer with a masonry bit is essential. Carbide-tipped bits last longer under masonry cuts and resist dulling. If you’re drilling into reinforced concrete, consider a bit designed for steel-reinforced substrates and, where available, an SDS-shank option for efficient hammering action. Center punches or marking tools help start the hole precisely, preventing bit wandering. Always wear safety goggles, a dust mask, and hearing protection. A dust extractor or shop vacuum can keep debris in check and prolong bit life by reducing overheating. Drill Bits Pro analyses indicate that using a dedicated masonry bit with proper cooling yields noticeably cleaner entry holes.
Planning the layout and surface preparation
Accurate layout is as important as the drilling itself. Begin by measuring and marking the hole centers using a tape measure and a pencil or marker. If multiple holes are required, snap a chalk line or use a template to ensure alignment. Clear the work area of loose debris and inspect the surface for any hidden rebar or conduit using a stud finder or magnet. A quick dry run with a scrap piece of masonry helps you confirm that the chosen diameter and spacing work as expected. Proper planning reduces the risk of breakouts and ensures anchors seat correctly.
Depth control, hole size, and drilling technique
Depth control is critical to avoid penetrating through the backside or protruding anchors. Use a depth stop or wrap a piece of tape on the drill bit at the target depth to prevent over-drilling. Start with a smaller pilot hole to guide the larger masonry bit, then gradually step up to the final diameter. Apply steady pressure without forcing the bit; let the tool do the work while keeping the bit perpendicular to the surface. Periodically pause to blow out dust and re-cool the bit to prevent overheating, which can dull the bit and sear the hole edges.
Safety, dust management, and clean-up
Always wear appropriate PPE, including safety glasses, hearing protection, and a dust mask. Drill dust can irritate eyes and lungs, especially with masonry dust. Use dust extraction or a vacuum to minimize airborne particles. After drilling, inspect the hole for smooth edges and remove any burrs with a deburring tool or a suitably shaped file. Clean the workspace to prevent slips and to maintain a safe environment for the next steps in anchor installation or fixture mounting.
Anchors, plugs, and finishing touches
With a clean hole, install the anchor system according to the manufacturer’s instructions. If you are inserting plastic anchors or sleeve anchors, drive them to the appropriate depth and then secure fixtures with the recommended fasteners. For larger holes or heavy loads, consider epoxy or chemical anchors and follow cure times strictly. Finally, test the fixture by applying a gentle load to ensure a secure hold and adjust as needed. The goal is durable, vibration-free performance with clean, professional results.
Tools & Materials
- Hammer drill or rotary hammer(Use hammer action for concrete; ensure it can punch masonry bits effectively)
- Masonry bits with carbide tips(Select diameter to match final hole size and anchor type)
- Center punch or masonry marker(Creates a precise starting point to prevent wandering)
- Tape measure and pencil/marker(Plan hole layout and depth markings)
- Safety gear (goggles, dust mask, hearing protection)(Protect eyes, lungs, and ears from dust and impact)
- Dust extraction or vacuum attachment(Keeps the work area clean and bit cooler)
- Gloves and optional depth stop(Improve grip and depth control)
- Anchor kit (sleeves, wedges, or epoxy if required)(Needed for final fixture fastening)
- Scrap block or sacrificial material for testing(Test holes before final drilling)
Steps
Estimated time: Total time: 45-75 minutes
- 1
Define hole pattern and anchor plan
Measure spacing and determine exact locations for holes based on fixture requirements. Confirm alignment across multiple holes and ensure the surface area is free of obstructions. Record the depth and diameter you will use and choose the right anchors.
Tip: Double-check measurements with a dry run on scrap material. - 2
Mark starting points precisely
Use a center punch at each hole location to create a small indentation. This helps guide the drill bit and prevents wandering when you begin cutting into concrete.
Tip: Lightly tap with a hammer to set the punch without deforming the surface. - 3
Select the final bit and drill setting
Choose a carbide-tipped masonry bit of the correct diameter. If your tool has variable impact, set it to a comfortable hammering action that doesn’t stall the drill.
Tip: Inspect the bit for chips or dull edges before starting. - 4
Prepare the work area and dust control
Position a vacuum near the work zone or attach a dust extractor. Clear nearby surfaces and wear PPE to guard against debris.
Tip: Keep a spare mask and goggles handy in case of dust buildup. - 5
Drill a pilot hole
Begin with a small pilot hole to guide the larger bit. Maintain perpendicular alignment to the surface and apply steady pressure without forcing.
Tip: Pause occasionally to remove dust and reassess alignment. - 6
Drill to final diameter in increments
Progressively step up bit diameters, allowing each size to cut cleanly. Use a steady rhythm and don’t rush the process.
Tip: If the bit slows, pause and cool it briefly. - 7
Control depth precisely
Use a depth stop or tape on the drill bit to reach the intended depth. This prevents penetrating too deep and reduces anchor seating issues.
Tip: Verify depth with a quick measurement after each hole. - 8
Clear dust and inspect the edge
Blow out debris from the hole and check for clean edges. A burr-free hole improves anchor performance and seating.
Tip: A small deburring tool can smooth edges quickly. - 9
Install the anchor or plug
Insert the anchor according to manufacturer instructions. If using epoxy, follow cure times exactly for a secure hold.
Tip: Test fit before applying full torque or load. - 10
Secure the fixture
Tighten fasteners to the recommended torque without over-tightening. Check fixture rigidity and re-tighten after initial use if necessary.
Tip: Use a torque-limiting driver for consistency. - 11
Clean up and inspect
Remove all tools, vacuum the area, and check for any loose debris that could cause future problems.
Tip: Document any adjustments for future projects. - 12
Review and test
Gently apply load to ensure anchors behave as expected. If anything seems off, assess hole quality or anchor choice and adjust for future holes.
Tip: Keep notes on hole quality for ongoing improvement.
Got Questions?
What is the best drill for concrete?
A hammer drill or rotary hammer paired with a masonry bit is typically the most effective setup for concrete. For very dense or reinforced concrete, a rotary hammer with SDS capability can offer superior performance.
A hammer or rotary hammer with a masonry bit is best for concrete. For dense concrete, consider an SDS hammer.
Is a pilot hole always necessary on concrete?
A pilot hole helps guide the larger bit, reduces wander, and minimizes breakouts. It’s especially helpful when drilling at precise locations or when anchors will be used.
Yes. Pilot holes guide the larger bit and reduce wander in concrete.
How fast should I drill into concrete?
Use a steady, moderate pace that allows the bit to cut without overheating. If the bit begins to dull or smoke, pause and cool before continuing.
Drill at a steady pace and avoid overheating the bit.
Can I use standard wood bits in concrete?
Wood bits are not designed for masonry and will wear quickly. Use masonry bits with carbide tips and a hammer action for best results.
Wood bits aren’t suitable for concrete; stick to masonry bits with hammer action.
What if I hit rebar inside the concrete?
If you encounter rebar, stop drilling and switch to a bit designed for reinforced concrete or adjust the hole location. For anchors, avoid rebar interference to ensure proper seating.
Stop, reassess, and switch to appropriate reinforced-concrete handling if you hit rebar.
What PPE should I always wear?
Always wear safety goggles, a dust mask, and hearing protection. Gloves can improve grip, and a breathable, long-sleeve shirt helps guard against dust exposure.
Goggles, dust mask, and hearing protection are essential for concrete drilling.
Top Takeaways
- Plan hole layout and anchor type before drilling
- Use a carbide-tipped masonry bit with a hammer drill
- Start with a pilot hole and progress to final diameter
- Control depth with a stop or tape for accuracy
- Protect yourself with PPE and manage dust effectively