Granite vs Concrete: Is Granite Harder to Drill?
A thorough, objective comparison of drilling granite versus concrete, covering bit types, cooling needs, speeds, costs, and best practices for DIYers and professionals.

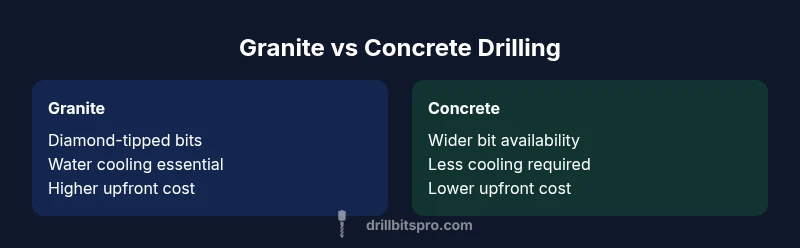
Granite is harder to drill than concrete, primarily due to its hardness and abrasive minerals. The better choice is to use diamond-tipped bits with water cooling and slow, steady feeds. For most DIY projects, drilling concrete requires less specialized tooling, while granite demands premium bits and careful technique to avoid cracks or chipping.
Understanding Granite vs Concrete: Key Properties
Is granite harder to drill than concrete? In short, yes—granite is typically harder and more abrasive than standard concrete, which makes hole quality and bit life the bigger challenges. According to Drill Bits Pro, granite’s crystalline structure and mineral content create more resistance and heat buildup during drilling. This means you can expect greater wear on conventional bits and a higher risk of micro-fractures if proper support and technique aren’t used. The takeaway for DIYers and professionals is clear: material properties drive tool choice, cooling needs, and feed rate. Granite benefits most from diamond-tipped tooling and steady, cooled drilling, while simple concrete holes can be accomplished with widely available masonry bits when supported and stabilized.
Drilling Mechanics: Why Granite Is Harder
Granite’s hardness and abrasive silica make it tougher to cut than most concretes. When a drill bit meets granite, it must shear through a dense, multi-mineral matrix, which generates more heat and accelerates bit wear. The result is a higher likelihood of glazing on carbide bits and a greater chance of chipping if the hole lands on a grain boundary. In contrast, concrete (especially reinforced or prepped masonry concrete) tends to present a more predictable, slightly softer barrier for the bit, provided you use appropriate bits and engage in controlled drilling. The practical effect is that granite requires deliberate technique, better cooling, and often more expensive tooling, while concrete remains the more forgiving baseline for most projects.
Bit Technology and Wear: Diamond vs Carbide
The choice of bit dramatically shifts outcomes. Diamond-tipped bits excel at granite because they cut through abrasive minerals with less rapid wear and deliver cleaner holes over longer use. Carbide-tipped bits perform well on softer or less abrasive materials but quickly dull on granite. For concrete, a quality masonry bit or carbide-tipped bit can yield functional holes with good speed when used with proper technique. Drill Bits Pro’s experience shows that bit life and hole quality improve substantially when upgrading to diamond tooling for granite and when applying appropriate lubrication and cooling for both materials.
Tooling Setup: Equipment and Techniques
A robust setup matters as much as the bit. For granite, pair diamond-tipped core or drill bits with a slow, steady feed and continuous cooling—usually water—to minimize heat and prevent micro-cracking. Use a drill press or a steady hand with a heavy-duty cordless impact or hammer drill designed for masonry, and ensure the workpiece is securely clamped to avoid vibration. Concrete drilling benefits from a hammer drill or rotary hammer with standard masonry bits, especially when time is a factor. In both cases, perform pilot holes and use center punches to reduce wandering. Proper dust control and personal protective equipment are essential in all cases.
Drilling Concrete: Common Scenarios and Best Practices
Concrete drilling is ubiquitous in renovations, anchoring fixtures, and creating passes for plumbing or electrical runs. Start with a sharp masonry bit, use light to moderate pressure, and let the bit cut rather than push aggressively. For reinforced concrete, use longer bits designed for rebar avoidance and consider pilot holes to guide the larger bore. Water cooling can help reduce dust and heat, but it is less essential than with granite. Always verify anchor size requirements and ensure the hole diameter matches the fastener’s needs for secure installation.
Drilling Granite: Best Practices and Pitfalls
Granite holes demand precision. Start with a high-quality diamond bit and a stable, supported workpiece. Use a minimum of water cooling to manage heat and extend bit life, and avoid high-speed feeds that generate excessive heat. Consider a pilot hole to guide the larger bore and minimize wandering. Be mindful of natural flaws, such as grain boundaries or fissures, which can cause chipping if the drill bit strikes at the wrong angle. Always check for hidden rebar or piping within the stone’s vicinity before drilling, and plan for appropriate anchor depth and hole tolerance.
Cooling, Lubrication, and Dust Control
Cooling and lubrication play a critical role in both granite and concrete drilling, but granite benefits most from continuous cooling to prevent thermal stress. Water is the most common coolant, helping to manage heat, reduce dust, and extend bit life. For concrete, water cooling improves dust control and keeps the bit cooler during longer sessions but is not as critical as with granite. Dust containment is essential to protect you and your workspace, so use a vacuum attachment and wear a dust mask. Always align the drill with the intended hole axis to avoid wobble and poor hole quality.
Cost, Availability, and Long-Term Value
Granite drilling typically requires premium diamond bits and sometimes specialized core bits, which increases upfront tooling costs. However, the extended life and higher precision can offset these costs in professional workflows or high-visibility installations. Concrete drilling uses a wide selection of affordable masonry bits that are readily available at most hardware stores, lowering initial expenditure. Over time, the choice between granite and concrete drilling becomes a cost-value decision: prioritize tool longevity and precision for granite, or prioritize speed and affordability for concrete.
DIY vs Professional Performance: When to Call a Pro
For complex installations or high-precision granite work, a professional with specialized tooling, alignment setups, and measurement accuracy can deliver consistent results. Granite projects such as countertop mounting, tile anchoring, or stone veneer require careful planning, the right bits, and robust support methods. Concrete drilling may be well within DIY reach when the scope is straightforward and the right bits are used. If you lack a stable work surface, the needed bits, or the time to manage precision, consider bringing in a pro to ensure the hole’s alignment, depth, and integrity.
Case Studies: Real-World Scenarios with Granite and Concrete
In a kitchen remodel, granite countertops demanded diamond-tipped core bits and careful planning to avoid edge cracks. The same project benefited from a pilot hole and fixture templates to ensure anchor alignment. In a bathroom renovation, concrete walls allowed faster hole creation with standard masonry bits, provided that dust control and water cooling were employed to manage heat and debris. A professional approach often reduces the risk of costly rework and ensures anchor performance aligns with architectural tolerances.
DIY Project Planning: What to Budget and Plan For
When planning a granite drill, budget for premium bits, a stable cutting setup, coolant or water management, and protective gear. For concrete work, price out common masonry bits, a suitable drill with hammer action, and dust-control accessories. Factor utility costs for cooling water, workspace preparation, and potential professional services if the project requires exact tolerances or complex anchor setups. Thoughtful planning reduces downtime and improves outcomes for both materials.
Comparison
| Feature | Granite | Concrete |
|---|---|---|
| Drilling Approach | Slow feed with water cooling; diamond-tipped bits preferred | Hammering with masonry bits; faster but less precise |
| Tooling required | Diamond-tipped or carbide-tipped; diamond preferred for granite | Masonry bits suitable; carbide-tipped common |
| Bit wear and life | Higher wear on standard bits; diamond lasts longer | Lower wear with proper technique; broader availability |
| Hole quality and accuracy | Higher precision with granite using proper tooling | Good quality with standard masonry bits under proper technique |
| Cooling and dust control | Essential water cooling; significant dust and heat management | Dust control important; cooling helps but less critical |
| Cost and availability | Higher upfront cost; premium bits required | Lower cost; widely available bits |
| Best use case | Precise mounting for countertops, high-vis installations | General masonry, walls, anchors in straightforward jobs |
What's Good
- Hole quality improves with diamond-tipped bits on granite
- Granite drilling yields precise holes when properly cooled and supported
- Diamond tooling extends bit life against granite's abrasiveness
- Concrete drilling is generally easier and cheaper for simple holes
Negatives
- Granite requires specialized bits, increasing upfront costs
- High hardness increases risk of bit wear and potential cracking if technique is poor
- Proper cooling and stable setup add to preparation time
Granite drilling is more demanding than drilling concrete, but with the right tooling and cooling, precise results are achievable.
Granite requires premium bits and careful technique for best results. Concrete is more forgiving and cost-efficient for common masonry tasks.
Got Questions?
Why is granite harder to drill than concrete?
Granite is harder and more abrasive due to its crystalline minerals, which increases friction, heat, and wear on drill bits. Proper tooling and cooling are essential to prevent damage and achieve clean holes.
Granite is harder and wears bits faster, so use the right bits and keep it cool for clean holes.
What drill bits work best for granite and concrete?
For granite, diamond-tipped bits are preferred for longevity and precision. For concrete, standard masonry bits or carbide-tipped bits work well when paired with proper technique and cooling.
Diamond bits for granite, standard masonry bits for concrete with proper technique.
Can I use a regular masonry bit on granite?
A regular masonry bit can drill granite but will wear quickly and may produce rough holes or cracks. Use diamond-tipped bits and cooling for best results.
Masonry bits wear out fast on granite; switch to diamond bits for better results.
Is water cooling necessary when drilling granite?
Yes, water cooling helps manage heat buildup, reduces dust, and extends bit life when drilling granite. It also improves hole quality by preventing thermal stress.
Water cooling keeps granite drilling cooler and quieter on the bit.
How do I know if a granite hole is aligned correctly?
Plan the layout with fixtures or templates, use pilot holes, and verify with a test hole before deep drilling. Proper support and steady feeds minimize wandering and cracks.
Use templates and pilot holes to keep granite holes accurate.
Top Takeaways
- Granite requires diamond-tipped tooling for best results
- Water cooling is essential when drilling granite
- Concrete is generally easier and cheaper to drill
- Pilot holes can improve granite accuracy
- Plan for tooling costs when granite is involved