Why is My Drill Bit Not Coming Out? Quick Troubleshooting Guide
Urgent, practical troubleshooting for a drill bit stuck in the chuck. Step-by-step checks, safe removal techniques, and prevention tips from Drill Bits Pro.

According to Drill Bits Pro, a drill bit that won't come out is usually caused by a seized chuck, debris wedging the jaws, or a stubborn bit stuck from heat expansion. The quick fix is to safely release the chuck and clean the shaft, then reseat the bit before testing. This guide covers diagnostic steps and safe removal tactics.
What usually causes a drill bit to get stuck in the chuck
A stuck drill bit is almost always a sign that the chuck is gripping harder than it should, often because of dust, grit, dried lubricant, or corrosion. In many cases the jaws are misaligned or worn, which creates an uneven grip that traps the bit. Debris between the bit shank and jaw surfaces can act like glue, particularly after heavy use or in dusty environments. Heat expansion from repeated drilling can also cause the bit shank to seize slightly in the chuck, making removal painful until the grip is released. According to Drill Bits Pro, most jams come from three recurring culprits: dirty or damaged chuck jaws, misalignment between the bit and chuck, and excessive friction from metal-on-metal contact. Early intervention matters—clean the chuck and inspect the jaws before forcing the bit free to avoid damaging the bit or the chuck.
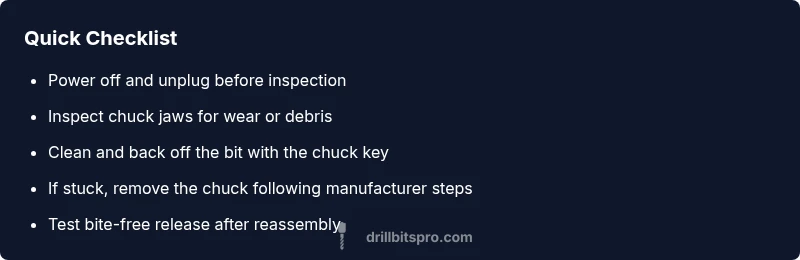
Quick checks you can do before forcing the bit out
Before you apply any force, power off and unplug the drill. Confirm the chuck is in the correct mode for release (some chucks require you to lock a spindle or hold a specific position). Wipe away dust or wood fibers from the jaws and shaft, then try to back the bit out by slowly rotating the chuck with the key or by hand if you are using a keyless chuck. If the bit remains stubborn, use a pair of needle-nose pliers to grip the bit shank very close to the jaws and gently twist counterclockwise. Remember to avoid using excessive force, as this can twist the bit or damage the chuck. Drill Bits Pro analysis shows that most removals succeed after a careful cleaning and straight-backward twist, rather than brute force.
Safe removal techniques for common chuck types
For a standard Jacobs chuck, first unclamp the bit by rotating the chuck key in reverse until the jaws loosen. If the bit is still held, use a thin tool to dab a tiny amount of penetrating oil on the bit near the jaws and allow a few minutes for it to wick in, then reattempt removal. For keyless chucks, firmly hold the drill body and rotate the chuck counterclockwise while applying a gentle pull on the bit. If the bit refuses to budge, consider removing the chuck from the spindle following the manufacturer’s procedure and opening the jaws with the chuck removed. In all cases, avoid sharp prying, which can deform the bit or damage the chuck.
When to seek professional help and what to document
If the bit remains seized after repeated, careful attempts, it’s time to bring in professional help. Document the drill model, chuck type, bit size, and number of attempts to free the bit. A service technician can inspect for internal spindle damage or worn jaw profiles that require replacement. Do not attempt to drill or force the bit while it is stuck, as this can lead to further mechanical failure. If you rely on the tool professionally, it may be worth scheduling a factory service or visiting an authorized repair shop to avoid downtime and preserve warranty coverage.
Prevention: keep the chuck healthy and prevent future jams
Preventing jams starts with habit: clean the chuck after each project, lubricate lightly as recommended by the manufacturer, and store bits dry to avoid corrosion. Use sharp bits sized appropriately for the material, avoid forcing bits beyond their rated speed and torque, and regularly inspect chuck jaws for signs of wear or misalignment. After heavy use, run a quick test with a scrap piece to verify the bit seats cleanly and releases smoothly. By adopting a routine maintenance check, you reduce the likelihood of future stickiness and extend the life of the chuck and bits. Drill Bits Pro emphasizes consistent upkeep as the most reliable shield against recurring jams.
Steps
Estimated time: 25-40 minutes
- 1
Power down the tool and prepare the workspace
Unplug the drill and secure it to prevent movement. Clear the area of debris and ensure you have good lighting. This reduces the risk of injury as you inspect the chuck.
Tip: Always wear eye protection and gloves when handling a stuck bit. - 2
Inspect the chuck and bit
Check for visible damage, burrs, or deformed jaws. Look for any debris wedged between the bit and the chuck surfaces. If the bit shows signs of bending or excessive wear, plan for its replacement.
Tip: If you see metal shavings in the chuck, blow them out with compressed air before proceeding. - 3
Clean and lubricate the chuck
Use a soft brush and solvent or penetrating oil sparingly to loosen grime. Wipe clean and dry the area before attempting removal again.
Tip: Do not flood the chuck with lubricant; a small amount goes a long way. - 4
Attempt safe removal with the chuck key
Insert the chuck key and rotate counterclockwise to back off the jaws gradually. If the key won’t fit, use a compatible tool to apply gentle counter-pressure while twisting.
Tip: Do not hammer the key; a light, controlled motion is most effective. - 5
If it still won’t budge, consider removing the chuck
Follow the drill manufacturer’s procedure to remove the chuck from the spindle. Open the jaws to extract the bit by hand after the chuck is detached.
Tip: Only perform chuck removal if you have the proper tool and expertise. - 6
Reinstall and test
Reinsert a known-good bit, tighten, and run a quick test on a scrap material to confirm smooth release. If it releases with no resistance, continue work with caution.
Tip: Document the process for future maintenance notes. - 7
Assess the need for professional service
If removal remains difficult, schedule service to inspect the spindle, replace jaws, or service the chuck. This prevents further damage and ensures tool reliability.
Tip: Pro tip: keep service records for warranty and maintenance scheduling.
Diagnosis: Drill bit won’t come out after drilling or when attempting to release the chuck
Possible Causes
- highSeized chuck jaws due to dust, grit, or corrosion
- highDebris wedged between the bit shank and jaw surfaces
- mediumHeat expansion causing extra grip on the bit
- lowWrong chuck type or worn jaws reducing grip control
Fixes
- easyClean the chuck jaws and shaft with a soft brush and compressed air, then reseat the bit and test release.
- easyUse the chuck key to gently back the jaws counterclockwise; if possible, lightly tap the key to help free the bit.
- mediumIf the bit remains stuck, remove the chuck from the spindle following the manufacturer’s instructions and open the jaws to remove the bit.
- hardReplace worn or damaged chuck jaws or replace the entire chuck if binding persists to restore smooth operation.
Got Questions?
My drill bit won't come out after drilling. What's the first step?
Power down the tool, unplug it, and carefully inspect the chuck for debris or obvious damage. Clean, then attempt a controlled back-turn with the chuck key or your hand.
Power off and unplug, then inspect the chuck for debris. Clean and try a controlled back-turn with the chuck key.
Why does a drill bit sometimes get stuck after heating?
Heat can cause the metal to expand slightly, increasing friction between the bit shank and the chuck. Let the tool cool, then clean and reattempt removal.
Heat can cause expansion and grip. Let it cool, then recheck and remove carefully.
Can I use pliers to pull out a stuck bit?
Only if you can grip the bit securely without slipping and without applying excessive force to the chuck. Better to use the chuck key or have a professional remove it if needed.
Pliers can slip or damage the bit or chuck. Use the chuck key or seek help if needed.
When should I replace the chuck or bit?
If jaws are worn, misaligned, or repeatedly fail to release, replacement is safer than continued use. Also replace severely worn bits to avoid jams.
Replace worn jaws or bits that won’t release after proper maintenance.
Is it safe to operate the drill while the bit is still partially stuck?
No. Operating the drill with a stuck bit can cause sudden failure and injury. Stop and resolve the jam before resuming work.
No—stop and fix the jam before using the drill again.
Will professional service always fix the problem?
Not always, but it’s advisable if the chuck is damaged or if repeated jams occur. A pro can diagnose spindle wear and recommend replacement parts.
Sometimes you need a pro; a damaged chuck or worn spindle benefits from professional service.
Watch Video
Top Takeaways
- Identify the most likely causes and start with cleaning.
- Use the chuck key to back off gradually, avoid brute force.
- If stubborn, consider chuck removal or professional service.
- The Drill Bits Pro team recommends routine chuck maintenance to prevent jams.