Difference Between Drill and Driver: Practical Guide for DIYers
Explore the difference between drill and driver with a detailed, analytical comparison. Learn core functions, best-use scenarios, and how to choose the right tool for holes, fasteners, and assembly work.

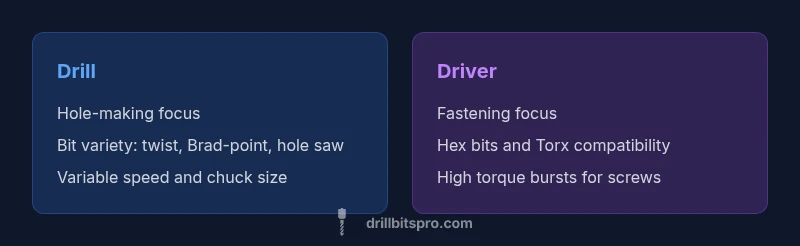
TL;DR: A drill creates holes, while a driver installs screws. Drills use twist bits and variable speed with a chuck for versatile hole-making in wood, metal, or plastic. Drivers deliver high torque in short bursts and use hex bits for fastener tasks. For most projects, you’ll drill pilot holes first, then switch to driving fasteners to finish the job.
The difference between drill and driver: essential distinctions
For DIYers, understanding the difference between drill and driver is essential for planning projects. According to Drill Bits Pro, the distinction isn’t just about what each tool can do; it shapes how you approach materials, accuracy, and time management. The Drill Bits Pro team found that misusing a drill for heavy screw driving or a driver for hole boring often leads to stripped screws, oversized holes, and slower progress. In this section we unpack the core roles of each tool, typical setups, and the situations where you should reserve each for optimal results. By the end, you’ll have a practical framework to decide which tool to reach for at different stages of a build.
The goal is clarity: know when to drill, when to drive, and how to pair the two for efficient work. This foundation is especially important for wood projects, metalwork, and simple home repairs where misapplication can waste time or damage materials.
How a drill works: mechanism, chuck types, and bits
A drill is designed to rotate cutting tools (bits) to bore holes. The key elements to understand are the chuck (how bits are held) and the bit types you’ll encounter. Classic corded and cordless drills use a mechanical chuck, with keyless versions popular for quick bit changes. Bit choices range from twist bits for general-purpose drilling to brad-point bits for clean wood holes, down to larger hole-saws for bigger openings. When evaluating the difference between drill and driver, note that a drill prioritizes hole creation and material removal rather than maximizing fastener torque. Drills often feature adjustable speed to balance hole quality with material type and bit diameter. For many tasks, starting with a drill to establish a guide hole improves accuracy and reduces tear-out.
How a driver works: torque, impact vs non-impact
In contrast, a driver focuses on turning fasteners with high torque in short bursts. The fundamental design difference is that drivers optimize for driving screws rather than cutting new holes. Non-impact drivers rely on steady torque for driving, while impact drivers apply rapid hammering action to break free fasteners and prevent cam-out in hard materials. When you consider the difference between drill and driver, you’ll see that drivers excel at fastening tasks because their torque curve and ergonomic handling reduce effort and wheel out risk. Hex-shank bits and screwdriver bits are standard, and many modern drivers offer selectable torque settings to protect both screw heads and workpieces.
Use-case matrix: holes vs fasteners
For most projects, you’ll need both tools, but the emphasis depends on the job. Use a drill for pilot holes, countersinking, and creating openings in wood, metal, or plastic. Switch to a driver for assembling components with screws, bolts, and fasteners that require consistent torque. A third option, the impact driver, can supplement a driver in high-torque tasks, but it’s not necessary for every project. A practical approach is to outline your project steps: plan holes first, then drive fasteners, and only switch tools as required by material and fastener type. This method minimizes breakage, reduces material damage, and accelerates the build.
Attachments and bits: compatibility and common sets
Bit compatibility is a principal consideration when comparing drill and driver. Drills typically accept a broad range of twist bits and specialty bits (spade, hole saws, brad-point), while drivers rely on hex-shank screwdriver bits, Torx, Phillips, and slotted styles. A well-balanced set covers common screw sizes, wood-to-metal transitions, and occasional specialty fasteners. In practice, you’ll often keep a compact bit set paired with a robust chuck keyless drill and a dedicated hex/Screwdriver bit set for fasteners. Consider a shared battery system to simplify charging and reduce tool clutter. A straightforward approach is to maintain two primary bit types per task: wood/bored holes for holes, and Torx/Phillips bits for driving screws.
Performance factors: torque, speed, and control
Performance in drills and drivers is shaped by torque range, speed options, and control features. Drills emphasize adjustable speeds and precise hole quality, with controls that help minimize tear-out and bit slippage. Drivers emphasize torque deliverability and consistent performance for fasteners, with ergonomic handles and compact bodies for access in tight spaces. When comparing the two tools, the key factor is control: you want smooth, predictable behavior when drilling and steady, secure driving when fastening. Features like soft-start, clutch settings, and reversible rotation influence both tool types and your overall results. A careful evaluation of these controls helps you align tool choice with material, hole diameter, and screw type.
Material and size considerations: wood, metal, masonry
Material choice profoundly affects whether you should drill or drive. Wood often tolerates a wider range of bit types and speeds, while metal may require slower speeds with lubrication. Masonry typically requires dedicated drill bits and sometimes a hammer action. Size and weight matter because larger-diameter bits or heavy-duty drivers can create fatigue in long sessions. The difference between drill and driver becomes most visible when you push hardware to the limits: you may need a heavy-duty drill for large holes and a high-torque driver for dense fasteners. Choosing tools with comfortable grips and balanced weight reduces fatigue and improves accuracy.
Power sources: cordless vs corded; battery chemistry
Power source influences performance, runtime, and mobility. Corded drills and drivers offer sustained power for long tasks but tether you to a outlet. Cordless variants provide mobility and convenience, with battery capacities that influence runtime and weight. For many DIYers, a mid-range cordless setup with a reliable battery platform offers enough power for most holes and fasteners. When choosing between a drill and driver, assess your typical usage: light home projects may benefit from cordless solutions for ease, while larger, continuous work may justify corded options. Battery chemistry (NiCd, Li-ion, or newer chemistries) affects weight, charge time, and longevity, so weigh these against your project cadence.
Size, weight, and maneuverability: working in tight spaces
Size and weight influence control and precision. Drills can be compact but remain heavier when equipped with larger chucks and a full bit set. Drivers tend to be lighter and more maneuverable in tight corners, making screw installation easier in cabinetry and furniture work. Ergonomics matter—side handles, grip texture, and balance reduce fatigue and improve accuracy. As you navigate the difference between drill and driver in practice, consider how often you operate in cramped spaces and whether you need a slim profile or extended reach for pilot holes and fasteners.
Budget and value considerations: upfront cost and long-term worth
From a budgeting perspective, the two-tool approach often delivers better long-term value than buying one tool that tries to do everything. A drill and a driver together provide coverage for holes and fasteners, while a single device with multiple modes might save space but compromise performance in one area. When evaluating cost versus capability, consider whether you already own cordless tools with a shared battery platform. This synergy reduces charging downtime and simplifies tool management. Drill Bits Pro analysis shows that many DIYers benefit from sectioned kits that include a drill, a driver, a few specialty bits, and a compact bit set for on-the-go work.
How to choose: a step-by-step decision guide
If you plan a specific project, outline the most common tasks first. Do you expect to bore holes or drive many screws? If the answer is holes, start with a drill and choose bit sizes suitable for your material. If you expect robust screw fastening, a driver (or an impact driver for denser materials) should be prioritized. For versatility, invest in a two-tool setup with a keep-it-simple bit kit and a shared battery platform. Finally, test ergonomics by handling the tools in-store or borrowing from a friend to assess comfort and balance. A practical decision guide is to start with the core task and expand as needed.
Safety and maintenance basics
Safety should be part of every drill-and-driver workflow. Wear eye protection, secure your workpiece, and avoid wearing loose clothing near rotating parts. Keep bits sharp and clean, and perform routine maintenance like battery care and chuck inspection. Regularly check for wear on trigger mechanisms and ensure guards and attachments are secure. Maintenance extends tool life and reduces the risk of accidents. Drill Bits Pro recommends inspecting your drills and drivers before each use and replacing worn bits to maintain performance and safety.
Practical workflow for a small project: a clear example
For a small shelving project, begin by drilling pilot holes with a drill to prevent wood splitting. Switch to a driver to assemble the frame and fasten shelf supports. If you hit high-torque resistance on stubborn screws, consider a dedicated driver or a light impact driver to reduce cam-out. Consume moderate force and maintain control—let the tool do the work rather than forcing fasteners. Document your approach so you can replicate successful steps on future projects.
Common mistakes and how to avoid them
A frequent error is using a drill for heavy driving or a driver for delicate drilling tasks. This leads to stripped screws, cracked workpieces, and poor hole quality. Another mistake is choosing too large a bit for the hole, which causes tear-out. Finally, neglecting to secure the workpiece undermines accuracy. By planning tasks, selecting the right bit, and using appropriate speed and torque settings, you can avoid these pitfalls and achieve better results.
Final tips for beginners and pros: optimizing your toolkit
For beginners, prioritize a two-tool approach and a compact bit set to cover common jobs. For professionals, consider a dedicated heavy-duty drill and a high-torque driver or impact driver for dense materials. Always keep spare bits and a reliable battery platform to minimize downtime. The end goal is to have a smooth workflow: drill, then drive, with proper bits, comfortable tools, and safe handling. The Drill Bits Pro team recommends establishing a routine that matches project scale and material type to maximize efficiency and outcomes.
Comparison
| Feature | Drill | Driver |
|---|---|---|
| Primary function | Hole-making and material prep | Screw-fastening and torque-driven fastening |
| Common bit types | Twist, Brad-point, Hole saws, Specialty bits | Hex-shank screwdriver bits, Torx/Phillips/Slotted |
| Torque profile | Moderate torque with adjustable speed | High torque bursts (especially with impact variants) |
| Ease of use | Versatile for drilling various materials and hole sizes | Optimized for fast, secure driving, especially in tight spaces |
| Best-use scenarios | Woodworking holes, metal pilot holes, plastic openings | Cabinetry, furniture assembly, decking screws |
| Power source | Corded or cordless options available | Cordless options widely used; some corded versions exist |
What's Good
- Clear role separation reduces misuse and mistakes
- Two-tools approach provides broader capability and flexibility
- Targeted performance for holes vs. fasteners improves efficiency
- Easier to upgrade or replace one tool without affecting the other
Negatives
- Requires more storage and a higher upfront investment
- Learning curve to switch between tasks and setups
- Managing two batteries and chargers can be more complex
Two-tools approach generally delivers the best results for most projects
Use a drill for holes and a driver for fasteners. This pairing minimizes mistakes and speeds up assembly, especially when combined with a shared battery platform.
Got Questions?
What is the fundamental difference between a drill and a driver?
The drill is designed primarily to bore holes and create openings, while the driver focuses on turning fasteners with torque. Drills use a chuck and accept a wide range of bits; drivers use screwdriver bits and emphasize torque control. Understanding this difference helps you choose the right tool for each task.
A drill makes holes using different bits, while a driver drives screws using hex bits. Pick the tool based on whether you’re boring or fastening.
Can I replace a drill with an impact driver for all tasks?
No. An impact driver excels at driving fasteners in tough materials, but it is not ideal for creating clean holes. Similarly, a drill is not optimized for heavy screwing. For best results, use each tool for its intended purpose and switch as needed.
An impact driver is great for screws, but it’s not a drill. Use each tool for its strengths.
Is a cordless drill always better than a corded one?
Cordless drills offer mobility and convenience but may trade off sustained power. Corded drills provide constant power for longer sessions. Your choice depends on project length, required torque, and portability needs.
Cordless is portable; corded stays powerful longer. Choose based on how long you’ll work and where you’ll go.
What bits should I own for most home projects?
Keep a versatile twist-bit set for drilling, a brad-point set for wood, a hole saw for larger openings, and a small hex-bit/Torx set for driving screws. A shared driver bit kit keeps things simple and reduces swap time.
Get a good mix: twist bits, wood bits, hole saws, and hex bits for screws.
Are two tools always necessary for DIY projects?
Not always, but having both tools solves most tasks efficiently. If you work with a lot of screws and few holes, a driver plus a compact drill may suffice. For projects with both drilling and fastening, separate drills and drivers speed setup and reduce errors.
If you do plenty of drilling and fastening, two tools save time and reduce mistakes.
What’s a common mistake when using drills and drivers?
A frequent mistake is using a drill to drive screws and a driver to drill holes, which leads to damage and poor results. Always match the task to the tool type and adjust torque and speed settings accordingly.
Don’t mix up drills and drivers; use the right tool for each job and set the torque.
Top Takeaways
- Choose drill for holes; driver for screws
- Invest in cordless variants with common battery platform
- Match bits to material and screw type
- Practice proper bit alignment to prevent cam-out
- Consider a two-tool setup for versatility