Fingernail Drill Guide: Safe Use and Step-by-Step
Master fingernail drill technique with safe setup, correct bit selection, and a practical step-by-step guide tailored for DIYers and professionals.

Learn how to safely use a fingernail drill with the right bits, setup, and technique. This quick guide covers essential safety steps, gear recommendations, and a practical, step-by-step workflow designed for both DIYers and professional manicure techs. It helps minimize heat, damage, and burn risk while delivering smooth shaping.
Understanding Fingernail Drills: What They Are and How They Work
A fingernail drill is a compact rotary tool used in manicures and pedicures to shape, smooth, and prep nails. Unlike larger workshop drills, fingernail drills operate at gentle speeds and use specialized bits designed for soft organic materials and nail enhancements. According to Drill Bits Pro, selecting the right fingernail drill and compatible bits is essential for safety and results. These tools are versatile: they can remove gel overlays, shorten natural nails, refine acrylics, and clean cuticles when used with care. The goal is to achieve a refined nail surface without overheating the nail bed or causing microtrauma. For DIY enthusiasts, choose a compact model with variable speed and a stable handpiece. For professionals, look for a reliable unit with low noise, good bit retention, and easy sanitation. Understanding the basics sets the foundation for safe, reproducible results and reduces the risk of damage to natural nails.
Safety First: PPE and Safe Handling
Safety is non-negotiable when using a fingernail drill. Always wear eye protection to shield against airborne particles, a mask to reduce inhalation of dust, and a finger-safe workstation to prevent accidental contact. Before starting, sanitize your hands and workspace, and unplug the tool when changing bits. Keep nails and cuticles dry to avoid slipping, and test the drill on a dummy surface or a practice nail before touching actual clients. Hold the drill at a comfortable angle, maintain a light touch, and avoid pressing hard—excess pressure generates heat and can damage the nail bed. If heat builds up, pause, cool, and recheck your technique. Consistent sanitation and a clean environmental setup help prevent cross-contamination and infections.
Brand mention: The Drill Bits Pro team emphasizes safety as the cornerstone of any fingernail drill workflow.
Bit Types and Their Best Uses for Nails
Bits come in a variety of shapes and materials. Carbide-tipped bits excel at removing gel and acrylic efficiently, while diamond-coated bits are gentler on natural nails and better for smoothing ridges. Fine-grit sanding bands are ideal for prepping the nail plate and creating a smooth finish for polish. Avoid metal bits on natural nails, which can gouge the surface. When selecting bits, consider your task: shaping, shortening, cuticle work, or surface finishing. Always attach bits securely and inspect for wear before use. Regularly replace worn bits to maintain cutting efficiency and reduce heat generation. In practice, a mixed bit set tailored to nails—carbide for bulk removal, diamond for smoothing, and sanding bands for finishing—provides versatility without compromising safety.
Your Fingernail Drill Setup: Power, Speed, and Stability
Set up your fingernail drill on a stable, flat surface with enough room for hand movement. Use a variable-speed model so you can start slow and increase gradually as needed. For most manicure tasks, begin at a low speed to minimize heat generation and increase only when you have a confident, light touch. Mount the handpiece securely and keep a spare battery or a reliable power source nearby. Maintain steady, controlled movements and avoid twisting or bending the wrist too aggressively. A properly adjusted setup reduces vibration, which improves precision and reduces fatigue over long sessions. Sanitize the workstation and consider a dedicated stand for your drill to prevent accidents and clutter.
Step-by-Step Use: Shaping, Smoothing, and Buffing
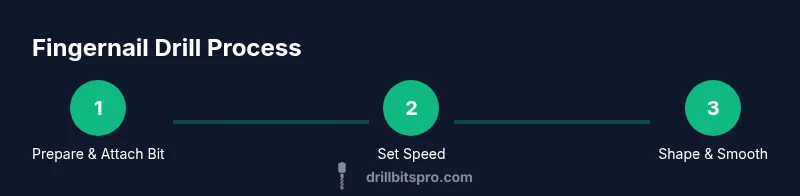
- Attach the correct bit and verify it is securely seated. 2) Power on at a low speed and test on a practice nail or synthetic nail. 3) Gently bring the bit to the nail surface with a light, even pressure, moving slowly along the natural contour. 4) Use short, controlled passes rather than long strokes to prevent heat buildup. 5) Switch to a finer bit for smoothing and refine edges, then lightly buff the surface to prepare for polish. 6) Pause if any warmth is felt and regularly check skin contact to avoid irritation. 7) Clean any dust from the nail and surrounding skin with a soft brush. 8) Sanitize the bit and handpiece after use and store in a clean, dry place.
Finishing Touches: Buffing, Polish, and Nail Health
After shaping, apply a buffer to create a smooth surface free of micro-scratches. Buffing helps polish adherence and reduces micro-tears in the natural nail. If you use gel or acrylic overlays, ensure you follow the manufacturer’s curing and removal guidelines to avoid compromising the nail bed. Always sanitize your tools between clients and use disposable wipes or clean towels to maintain hygiene. Regular maintenance of nails and tools supports long-term health and strength, particularly for individuals with sensitive nails. Drill Bits Pro notes that proper technique and sanitation extend tool life and improve outcomes over time.
Maintenance and Cleaning After Use
Power down and unplug the fingernail drill before disassembly. Remove the bit and wipe the shank with an isopropyl-alcohol wipe to remove residue. Clean the handpiece exterior with a damp cloth and allow everything to dry completely before storage. Inspect belts, bearings, and chuck for wear and replace as needed. Store bits in a protective case to prevent dulling and cross-contamination. Regular maintenance reduces friction, heat, and noise, prolonging tool life while keeping your workspace sanitary and safe for clients.
Common Mistakes and How to Avoid Them
Common mistakes include applying too much pressure, working too quickly, and neglecting sanitation. These can lead to heat damage, cuticles being nicked, and infections. Always start slow, use a light touch, and monitor the heat visually and by touch. Don’t skip a test run on a practice nail before touching live nails. Keep your bits clean and replace dull or chipped bits. Finally, never rush sterilization—proper disinfection prevents cross-contamination and protects clients.
Troubleshooting Common Issues
If the drill stalls or sounds rough, stop and inspect the bit for damage or improper seating. Check the power source and ensure the bit is compatible with your handpiece. If you notice excessive heat, pause and reduce speed, or switch to a coarser bit for initial removal, then switch back to a finishing bit at a lower speed. If debris accumulates near the cuticle, pause and clean the area before continuing. Regular maintenance minimizes these problems and keeps your fingernail drill performing reliably.
Tools & Materials
- Fingernail drill machine (handpiece with power cord or battery)(Choose a model with variable speed and good bit retention)
- Carbide bit for removal of gel/acrylic(Ensure shank fits your handpiece)
- Diamond-coated bit for smoothing(Gentler on natural nails)
- Fine-grit sanding bands(For prepping and finishing)
- Cuticle-friendly bit or mini cone(Used with care near cuticles)
- Protective eyewear(Shields eyes from dust and particles)
- Dust mask or respirator(Prevents inhalation of nail dust)
- Nail buffers and soft file(For final surface refinement)
- Alcohol wipes or disinfectant(Sanitizes bits and handpiece)
- Soft brush for dust removal(Keeps the nail area clean during work)
- Storage case or stand(Keeps equipment organized and dry)
- Workstation mat and towel(Contains debris and protects surfaces)
Steps
Estimated time: Total time: 25-40 minutes
- 1
Inspect and prepare equipment
Unwrap and inspect the fingernail drill, bits, and power source. Confirm the handpiece runs smoothly at a low speed. Attach the selected bit securely and test on a practice nail or dummy surface to verify seating. This initial check prevents mid-task failures.
Tip: Always unplug when changing bits and wear safety glasses during setup. - 2
Attach the correct bit
Choose a bit suited to the task (carbide for bulk removal, diamond for smoothing). Seat it fully, and rotate the handpiece gently to confirm it’s locked. Avoid forcing bits into the chuck.
Tip: Use a bit lock or snug fit to prevent wobble during work. - 3
Power up and set safe speed
Start at a low speed and gradually increase only after you confirm control. Keep your wrist loose and your hand steady to minimize vibration and heat buildup. Always monitor warmth on the nail surface.
Tip: If you feel heat, pause and reduce speed immediately. - 4
Position hand and nail
Position the client's hand or your own hand so you have a stable base. Rest your pinky or ring finger on the table for additional control. Avoid overreaching to keep precision but reduce fatigue.
Tip: Use a soft pad under the hand to minimize movement. - 5
Shape the edge and shorten
Gently bring the bit to the free edge and contour along the natural nail shape with light passes. Avoid aggressive pressure—the goal is even removal with minimal friction. Use short strokes rather than long, sweeping motions.
Tip: Maintain a light touch and let the bit do the work. - 6
Smooth and refine
Switch to a finer bit or sanding band for smoothing surfaces and refining edges. Work in small circles or straight passes; verify there are no burrs or rough patches. Clean any dust before moving on to finishing.
Tip: Always check both sides of the nail for uniformity. - 7
Finish and sanitize
Buffer the nail surface lightly to prep for polish or overlays. Wipe down the drill bits and handpiece with alcohol. Return tools to their case, and store in a dry, clean area. Document any wear to plan replacements.
Tip: Sanitation protects clients and prolongs tool life. - 8
Review and wrap up
Review the work with the client, check for smoothness, and confirm comfortable nail edges. Leave a brief care note, and remind the client of proper aftercare. End with a quick clean-up of the workstation.
Tip: A calm, clean finish enhances perceived professionalism.
Got Questions?
What is a fingernail drill and what is it used for?
A fingernail drill is a compact rotary tool used to shape, shorten, and prep nails, including natural nails and enhancements like gel or acrylic overlays. It speeds up routine prep and can improve surface smoothness when used correctly.
A fingernail drill is a small rotary tool for nails that shapes and smooths natural and enhanced nails. Used properly, it speeds prep and improves surface quality.
Can I use a fingernail drill at home safely?
Yes, with proper safety steps, appropriate bits, and careful technique. Start with low speed, practice on a dummy nail, and sanitize tools between uses to protect your nails and skin.
Yes, safely at home if you follow safety steps and practice on a dummy nail first.
Which bits are best for natural nails?
Diamond-coated bits are gentle on natural nails, while carbide bits excel at removing gel or acrylic. Use the lightest effective bit to minimize damage and heat.
Diamond bits are gentler on natural nails; carbide bits remove enhancements efficiently. Use the lightest effective bit.
How do I clean and sanitize the fingernail drill?
Wipe the handpiece and bits with isopropyl alcohol after use, and sanitize the workstation. Store bits in a clean container to prevent contamination.
Wipe down the tool with alcohol after use and sanitize your workspace.
Can I use a fingernail drill for acrylics or gels?
Yes, but select appropriate grinding bits and work slowly to prevent heat damage. Follow manufacturer guidelines for removal and curing of overlays.
Yes, with the right bits and careful technique.
What safety gear should I wear?
Wear protective eyewear and a dust mask. Ensure your workspace is well-ventilated and clean to minimize exposure to nail dust and chemicals.
Protective glasses and a mask are essential; work in a clean, ventilated space.
Watch Video
Top Takeaways
- Start slowly and maintain a light touch.
- Choose the right bit for each task to protect natural nails.
- Prioritize sanitation and tool maintenance.
- Monitor heat and stop if warmth increases quickly.
- Maintain a dedicated, organized workspace for safety.