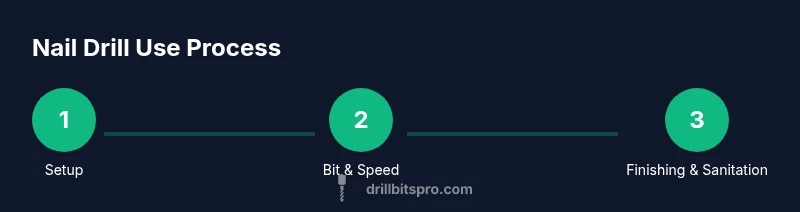
How to Use a Nail Drill: Safe DIY Guide
Learn how to use a nail drill safely for manicures, including bit selection, speed control, technique, and maintenance. A practical, step-by-step guide from Drill Bits Pro to help DIY enthusiasts and pros.

You will learn how to use a nail drill safely for manicures, including selecting the right bits, setting speed, and cleaning up after use. This step-by-step guide covers preparation, technique, and maintenance to minimize heat, prevent dehydration of the nail, reduce dust, and protect natural nails and cuticles. By following these steps, you’ll achieve consistent results with confidence.
What is a nail drill and why use one
A nail drill is a compact, motorized handpiece that spins abrasive bits to shape, file, and remove material from nails. It offers faster, more uniform results than traditional hand files, making tasks like shortening thick nails, thinning acrylic overlays, and smoothing gel surfaces more efficient. According to Drill Bits Pro, quality control starts with choosing the right bit and using appropriate speed settings to avoid heat buildup and nail damage. For DIY enthusiasts and professionals, a nail drill can save time on routine maintenance and nail restorations while delivering a salon-grade finish when used correctly. Remember, the goal is precision with gentle, controlled action rather than aggressive filing. When you learn how to use a nail drill properly, you reduce fatigue and improve consistency across multiple nails or clients. The key concepts include bit selection, speed control, angle, pressure, and hygiene. This section will build the foundation you need before you start working with equipment, gels, or acrylics.
In the broader world of nail care, you’ll encounter terms like carbide, ceramic, diamonds, and abrasive grits. Each bit type serves a different purpose, and understanding their roles helps you plan your workflow. Always begin with a clear plan for the task at hand, whether you’re shortening a nail, blending a gel overlay, or removing old product. With a solid plan and the right bit family, your nail drill becomes a precise tool in your kit, not a guesswork gadget. Drill Bits Pro analyses emphasize starting slow and testing on a practice surface before touching natural nails. This mindset minimizes risk and maximizes control.
When you see the phrase how to use a nail drill, the emphasis should be on safe technique, proper sanitation, and consistent results. The drill can generate heat, which may irritate the nail plate or surrounding skin if used improperly. The following sections guide you through selecting bits, prepping your space, performing a controlled technique, and maintaining your equipment for long-term performance.
note
Tools & Materials
- Nail drill machine (electric handpiece)(Choose a device with variable speed and a secure handpiece; ensure compatibility with common bits.)
- Drill bits set (carbide, ceramic, and diamond varieties)(Include coarse bits for product removal and fine bits for smoothing.)
- Bit shank adapter or chuck(Ensure proper grip to prevent wobble during use.)
- Safety goggles(Protect eyes from dust and debris.)
- Dust mask or respirator(Minimize inhalation of nail dust during removal.)
- Nail file and buffer blocks(Use after drilling for final shaping and smoothing.)
- Cuticle pusher or orange wood stick(Helpful during prep to ease lifting debris before drilling.)
- Sanitizing spray or wipes(Clean tools and surfaces before and after use.)
- Isopropyl alcohol (at least 70%)(For sanitizing and cooling during drilling when necessary.)
Steps
Estimated time: 30-45 minutes
- 1
Prepare workspace and PPE
Set up a clean, well-lit area. Lay down a disposable mat, connect the nail drill, and put on safety goggles and a mask. Ensure good ventilation and have all required bits within reach. Confirm your work surface can be easily disinfected.
Tip: Test a dust mask seal to avoid leakage and keep a small trash bin nearby for debris. - 2
Choose the correct bit and attach it
Select a bit appropriate for the task (coarse for product removal or shape changes; fine for smoothing). Secure the bit firmly in the handpiece to prevent wobble during use. Do not mix bits in haste—misplacement can cause damage or injury.
Tip: If you’re unsure, start with a mid-range bit and adjust after a test run on a practice nail. - 3
Set the speed to a safe baseline
Turn on the drill and start at a low speed. Avoid high speeds on delicate natural nails; gradually increase only as needed while monitoring heat and resistance. Use smooth, controlled movements rather than rapid, aggressive passes.
Tip: Apply minimal pressure and let the bit do the work; pressing hard increases heat and damages the nail plate. - 4
Begin with light, controlled passes
Place the bit at a shallow angle and move it gently along the nail surface. For natural nails, use broad, sweeping motions to blend the surface without thinning the plate excessively. Pause if you notice heat or discomfort.
Tip: Keep the bit moving; staying in one spot creates heat hotspots that can injure the nail bed. - 5
Transition to smoothing and refining
Switch to a finer bit for smoothing, shaping, and refining edges. Work slowly around the cuticle area, lifting product or dead skin with light touches. Check the nail edge for uniformity and remove any rough patches.
Tip: Avoid rounding the free edge too aggressively; maintain a natural arch to protect breakage risk. - 6
Cool-down, cleaning, and sanitizing
After drilling, wipe the nail surface with alcohol or sanitizing spray, then sanitize the drill and bits. Allow tools to dry completely before storage. Document any issues with the bit for future maintenance.
Tip: Always sanitize before and after use to prevent contamination between clients or tasks. - 7
Final inspection and aftercare
Inspect for evenness, smoothness, and intact natural nail. Apply aftercare, such as cuticle oil, to rehydrate the surrounding skin. Store tools securely and in a clean case.
Tip: If you notice persistent heat or pain, pause and reassess bit choice and technique.
Got Questions?
What is a nail drill and what can it do?
A nail drill is a motorized handpiece that uses rotating bits to shape, file, and remove material from nails. It speeds up tasks like shortening nails, thinning overlays, and smoothing surfaces when used with proper technique and sanitation.
A nail drill is a motorized tool with rotating bits that shapes and refines nails, making several manicure tasks faster and more consistent.
Can I use a nail drill at home?
Yes, many DIY enthusiasts use a nail drill at home, provided you follow safety guidelines, use the correct bits, and maintain proper hygiene. Start with simpler tasks on yourself or practice nails before attempting clients.
You can use a nail drill at home by following safety steps and starting with simple tasks on your own nails or practice surfaces.
What safety gear should I wear?
Wear safety goggles and a dust mask to protect eyes and lungs from dust. Ensure good ventilation and keep a clean workspace. Sanitize hands and tools before and after every session.
Put on goggles and a dust mask, work in ventilation, and sanitize everything before and after you drill.
How do I clean and sanitize the drill?
Wipe the surface with isopropyl alcohol and a sanitizing spray. Clean the bits and handpiece according to the manufacturer’s instructions, and let everything dry completely before storage.
Wipe down the drill and bits with alcohol, then sanitize per the instructions and let dry.
What are the best bit types for natural nails?
For natural nails, start with a fine or medium abrasive bit to blend and shape without thinning the nail plate excessively. Reserve coarse bits for artificial overlays or heavy product removal.
Use fine or medium bits for natural nails to shape safely and avoid thinning the nail.
How do I know if I’m overworking a nail?
If you notice heat, redness, or patient discomfort during drilling, pause immediately. Check bit sharpness, reduce speed, and reassess pressure. Overworking can lead to nail plate damage and increased sensitivity.
If you feel heat or see redness, stop, slow down, and check your bit and technique.
Watch Video
Top Takeaways
- Start with low speed and light pressure.
- Choose bits by task and keep bits clean.
- Keep the drill moving in smooth passes to prevent heat buildup.
- Sanitize tools and surfaces before and after use.
- Practice on a dummy nail before client use.