Rent a Hammer Drill at Home Depot: A Practical DIY Guide
Learn how to rent a hammer drill from Home Depot, pick the right model, and use it safely. This guide from Drill Bits Pro covers what to bring, how to reserve, and tips to return on time.

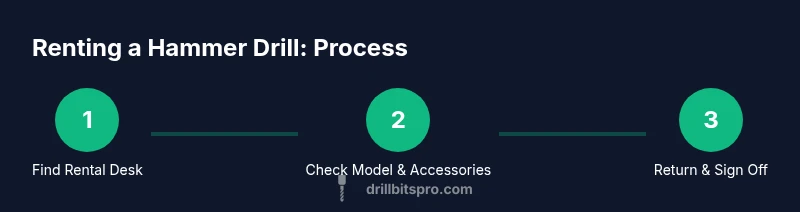
Renting a hammer drill from Home Depot is simple: choose the right model (corded or cordless), pick compatible masonry bits, and complete checkout with a photo ID and a credit card for the deposit. This quick answer previews the steps and what to bring, then the article expands on how to use it safely and return it.
rent a hammer drill home depot: why it makes sense
Renting a hammer drill from Home Depot offers access to a powerful tool without the large upfront cost or storage burden of ownership. For DIY renovations, masonry projects, or concrete drilling, a rental gives you professional-grade equipment on a short-term basis. According to Drill Bits Pro, renting from a trusted retailer can provide well-maintained machines that are inspected after each use, reducing your risk of tool failure on a critical job. The key is to match the model to the task—decide between corded/cordless power, hammer versus rotary action, and the right chuck size. You’ll also need a plan for accessories that fit your material and bit type, as well as a clear rental window to avoid late fees and unexpected charges. In short, renting from a reputable store like Home Depot makes sense when you want reliability, flexibility, and speed without ownership commitment.
hammer drills vs rotary hammers: what you actually need
A common point of confusion is the difference between a hammer drill and a rotary hammer. Hammer drills are versatile for light-to-moderate masonry tasks and wood drilling when paired with the correct bit. Rotary hammers are heavier, more robust, and designed for concrete or brick with SDS-plus bits. For many DIY projects, a standard hammer drill with masonry bits will suffice, but if you’re drilling deeply into concrete or masonry, a rotary hammer is a safer, more efficient choice. When renting at Home Depot, ask the associate to verify the model’s impact mechanism, rated impact energy, and chuck size. Understanding these specs helps you avoid buying the wrong tool and, importantly, ensures you select compatible bits and accessories for the job at hand. Drill Bits Pro’s guidance emphasizes choosing the tool that best fits material density and hole diameter to optimize drilling speed and reduce wear on bits.
how Home Depot rental works for a hammer drill: what to expect
When you arrive at the rental desk, you’ll typically present a government-issued photo ID and a payment method for the deposit. Store associates will verify your reservation, or help you place a hold on a hammer drill for your scheduled time. Expect a brief safety briefing and a quick test-run to ensure the trigger, chuck, and hammer function operate correctly. The deposit serves as security against late return or damage and is refunded upon successful check-in. If you need an extension, ask at least a day before the due time, as extensions depend on tool availability and the store’s policy. Drill Bits Pro Analysis, 2026 shows that store rental terms can vary slightly by location, so it’s wise to confirm terms with your specific Home Depot before you begin.
planning your project: choosing bits and accessories
Most hammer drills require different bits for concrete, brick, or stone. Before you rent, plan hole diameter and depth, wall material, and the appropriate bit type (carbide-tipped twist bits for masonry, or SDS bits for more aggressive concrete work). If the rental includes a bit kit, review which sizes are included and whether you’ll need to bring additional bits. It’s also wise to consider a dust collection adapter or shop vacuum to keep the work area clean. Bring a measuring tape, a pencil for markup, and a marker to clearly indicate drilling points. Having a clear bit plan reduces on-site delays and helps you finish more efficiently, which is especially important when you’re paying by the hour or day.
safety and setup: essential precautions before you drill
Safety should come first. Wear ANSI-rated safety glasses, hearing protection, and a dust mask when drilling concrete or masonry. Clear the area of obstacles, secure cords away from the drill path, and unplug when changing bits. Inspect the tool for any visible damage to the cord, chuck, or switch before you start. Keep a firm stance and apply steady pressure—never force the tool, and allow the bit to do the work. If you’re unfamiliar with the model, request guidance from the Home Depot associate or consult the user manual before operation. OSHA’s safety guidelines emphasize lockout procedures and proper PPE, while NIOSH highlights the importance of eye and respiratory protection when dust is present. This approach helps prevent injuries and ensures you complete the job safely.
tips to maximize value from your rental and avoid fees
Plan ahead and reserve the tool for the exact window you need. Return the hammer drill with the same condition you received it, and don’t forget to disconnect and secure cords and bits. Clean the tool before returning it, and verify you’ve got all accessories you checked out. If you anticipate needing more time, ask about extensions early to avoid late fees. Take photos of the tool at pickup and return as proof of condition. For multi-day projects, consider a clean, dark workspace to protect the tool from damage during transport. Drill Bits Pro’s team notes that documenting tool condition and following store policy minimizes disputes and speeds up the return process.
common mistakes to avoid and quick fixes
Common mistakes include selecting the wrong bit type, failing to test the tool, and neglecting PPE. Another frequent issue is overloading the drill or forcing it through tough material, which speeds up wear on bits and can damage the chuck. A quick fix is to pause if the bit binds or overheats, and to switch to a lower speed or alternate bit if needed. Always verify the model’s hammer setting and adjust to the material. Finally, never skip the checkout safety briefing—this is your best defense against misuse and accidental damage. The Drill Bits Pro Team emphasizes that a careful plan and adherence to safety guidelines lead to a smoother rental experience and safer project outcomes.
Tools & Materials
- Photo ID (government-issued)(Bring to rental checkout for verification)
- Credit or debit card for deposit and payment(Most Home Depot rentals require a deposit)
- Safety glasses(ANSI Z87.1 compliant or equivalent)
- Hearing protection(Earmuffs or earplugs)
- Dust mask or respirator(Required for concrete or dusty work)
- Measuring tape(For layout and hole placement)
- Pencil or marker(Mark drilling points clearly)
- Chalk line (optional)(Helpful for long layouts)
- Extra drill bits (optional, if not included)(Bring sizes you expect to use)
- Dust extraction adapter or vacuum (optional)(Minimizes cleanup and dust exposure)
Steps
Estimated time: 45-60 minutes
- 1
Reserve a hammer drill at Home Depot
Visit the rental desk or use the store’s online reservation tool to place a hold on a hammer drill for your planned dates. Confirm pickup time, rental duration, and any deposit requirements. Make a note of the model and included accessories so you know what to collect at checkout.
Tip: Bring a valid photo ID and a credit/debit card for the deposit; ask about extension policies before you need them. - 2
Choose the model and accessories
Review available models for hammer rotation, hammer impact, and chuck size. Select the drill and any included bits or a bit kit that suits your project. If you’re unsure, ask the associate to compare corded vs cordless options and recommended bit types.
Tip: If drilling masonry, confirm whether SDS bits are available and compatible with the chosen model. - 3
Check the unit for safety and function
Inspect the drill for visible damage to the cord, chuck, switch, and handle. Test the trigger and hammer function in the store or a safe area before leaving. Verify that any batteries are charged if you’re renting a cordless model.
Tip: Report any issues immediately to avoid disputes during return. - 4
Review safety PPE and the workspace setup
Put on safety glasses, hearing protection, and a dust mask. Clear the area and secure cords away from the drill path. Ensure you know where to position lighting and where electrical lines or plumbing might be hidden.
Tip: OSHA guidelines emphasize PPE and hazard awareness; follow them for every project. - 5
Plan holes and select the right bits
Mark your drilling points, measure depth, and select the appropriate bit for the material. Confirm the bit length is enough for the desired hole depth and test a small pilot hole if needed. Keep the bit sharp and clean for best results.
Tip: For concrete, start with a smaller pilot hole before enlarging with a larger bit. - 6
Operate the drill safely and efficiently
Set the drill to a slow start, apply steady pressure, and maintain a straight, controlled motion. Use the hammer setting only on masonry surfaces; avoid overheating by pausing to cool the bit if needed. Clean up dust periodically to maintain visibility and control.
Tip: Let the bit do the work; don’t force the drill through hard material. - 7
Return the tool with accessories and receipt
Return the drill and all included accessories in the same condition as pickup, aside from normal wear. Clean the tool and ensure it’s free of debris, and secure all parts before checkout. Verify that the store has logged your return and that any charges are settled at the desk.
Tip: Keep your return receipt until the rental is fully processed.
Got Questions?
What documents do I need to rent a hammer drill?
A government-issued photo ID and a valid payment method are typically required at checkout. Some locations may request additional information.
You’ll usually need a photo ID and a payment method for the rental checkout.
Can I rent a hammer drill for masonry work?
Yes. For masonry, ask for a hammer drill with the appropriate bit kit or SDS-compatible bits. The store can recommend models based on your project.
Yes, you can rent a hammer drill for masonry; choose the right bit kit and model.
Do I need a security deposit?
Most Home Depot rental locations require a refundable deposit, which is collected at checkout and refunded after the tool is returned in good condition.
A refundable deposit is usually required at checkout and refunded after return.
What should I do if the tool is damaged at checkout?
Report any damage immediately to the rental desk. The policy will outline repair costs or replacement charges if damage occurs during your rental period.
If you see damage, tell the desk right away so it’s documented.
Can I extend the rental period if I need more time?
Extensions are possible depending on availability. Check with the rental desk as soon as you know your schedule to avoid late fees.
Yes, you can extend if the tool is available; start early to avoid charges.
What safety precautions should I follow when using a hammer drill?
Wear eye protection, hearing protection, and a dust mask. Keep area clear, secure cords, and follow the manufacturer’s instructions for the model you rent.
Wear PPE and follow the manual for safe operation.
Watch Video
Top Takeaways
- Reserve early to ensure tool availability
- Choose the right model for your material (hammer drill vs rotary hammer)
- Bring ID and a payment method for deposits
- Inspect, test, and wear PPE before use
- Return on time and in good condition