How to Use a Hammer Drill: A Practical Guide
Learn how to use a hammer drill safely and effectively. This step-by-step guide covers bit selection, settings, safety, and maintenance for masonry and wood projects.

Mastering the basics of how to use a hammer drill lets you tackle concrete, brick, and masonry with confidence. This guide covers when to use hammer mode, how to pick the right bits, and how to set speed and impact for different materials. Before you begin, assemble PPE, select the correct drill bits, and plan a dust-management approach. Then follow the step-by-step process for precise, safe results.
Understanding Hammer Drills and How They Differ from Regular Drills
A hammer drill is a rotary tool designed for masonry tasks. It combines rotational motion with a percussive hammering action that helps break up hard materials like concrete, brick, and stone. Unlike a standard drill, a hammer drill can operate in three modes: rotation only, hammer (percussion) only, and hammer-plus-rotation. This versatility makes it essential for installations, anchors, and demolition tasks where masonry must be penetrated. When you ask how to use a hammer drill, the key is to match the tool's action to the material at hand. For concrete, use hammer mode; for wood or metal, resist the hammer action and use rotation-only mode. According to Drill Bits Pro, understanding these modes helps you optimize speed, bit life, and accuracy while reducing dust and noise exposure.
Safety First: PPE and Safe Setup
Working with a hammer drill generates dust, noise, and potential kickback. Prioritize PPE: ANSI-rated safety glasses, a respirator or dust mask, hearing protection, and sturdy gloves. Secure the workpiece with clamps or a vise to prevent movement, and clear the area of trip hazards. Before plugging in, inspect the drill for damage, ensure the chuck is clean, and verify that the cord or battery is in good condition. Create a dust-management plan with a shop vacuum or dust extractor to minimize airborne particles. Finally, confirm you are permitted to drill at the chosen location and avoid hitting electrical lines or plumbing. Safety is not optional; it is the foundation of good drilling practice.
Tools and Materials You'll Need
Gather essential tools and materials before you start. The hammer drill is the primary tool; you will also need a selection of masonry bits with carbide tips for concrete and masonry, and wood bits for wood projects. Keep spare chucks and bit sizes on hand, plus a pilot drill for larger masonry holes. PPE like safety glasses, a dust mask, hearing protection, and gloves are essential. A sturdy clamp, a ruler or tape measure, a pencil for marking, and a dust-extraction setup (vacuum or shop vac) greatly reduce cleanup time. If you work with wet concrete, have a spray bottle of water to cool the bit and reduce dust. Optional items include a center punch for precise starting points and a drill guide if working on vertical surfaces.
Choosing the Right Bits and Settings
Bit selection is material-specific: carbide-tipped masonry bits perform best on concrete and brick; high-speed steel or cobalt bits suit metal; wood bits (twist or brad-point) are ideal for wooden substrates. Start with a pilot hole using a smaller masonry bit or a standard wood bit to improve accuracy and reduce bit wear on hard materials. For concrete, use a sharp masonry bit and set the drill to moderate speed with light-to-moderate pressure. Many models have a selectable hammer mode; use it for masonry, and switch off hammering for wood or metal. When drilling multiple holes, consider using a drill guide or a marker-based jig to maintain alignment. DrillBits Pro notes that consistent technique saves time and wears less on the bit.
Getting the Most from Your Hammer Drill: Material-Specific Tips
Concrete and masonry require patience and the right technique. Begin with a steady, slow approach; let the bit bite and gradually increase pressure as the bit cuts ahead. Keep the drill perpendicular to the surface to prevent angled holes. Periodically withdraw the bit to clear debris and re-lubricate or cool depending on material and climate. For brick and block, slower speed and frequent breaks help reduce bit wear. For wood, avoid hammer action and switch to rotation-only mode to prevent splintering. If you feel smoke or unusual heat, stop and inspect the bit and drill; overheating can indicate dull bits or binding.
Common Mistakes and How to Avoid Them
Common errors include starting with aggressive pressure, using the wrong bit type, or drilling at an angle. Wandering holes are often caused by a dull bit, insufficient marking, or lack of pilot holes. Always mark the starting point with a center punch, secure the workpiece, and start with a small pilot hole before drilling large-diameter holes. Avoid overheating by pausing to withdraw the bit and clear debris. Maintain a clean chuck and replace worn bits promptly to prevent binding and poor hole quality. Finally, unplug the drill or remove the battery before changing bits.
Maintenance and Longevity of Your Hammer Drill
Proper maintenance extends tool life and performance. Clean the chuck and bit shanks after use to prevent rust. Check the power cord, battery, and switches for wear; replace damaged components. Lubricate moving parts only as recommended by the manufacturer. Store the drill in a dry place, with the chuck closed to protect the bearings. Periodically inspect the bits for dullness, cracks, or chipping and replace as needed. Document service intervals to plan maintenance around heavy project loads. Doing so preserves accuracy, safety, and efficiency on future jobs.
Quick Setup Checklist Before You Start a Project
Before you begin, run through a quick checklist to ensure you’re ready. Confirm you have the correct bit, the drill is in the right mode, and the surface is properly marked. Verify the bit is securely tightened in the chuck and that you have steady, comfortable footing. Ensure PPE is worn and that dust control is active. If you are working in a dusty or high-traffic area, set up barriers to protect others. This proactive approach reduces interruptions and keeps your project running smoothly.
Advanced Techniques and Troubleshooting
Beyond basic drilling, advanced users employ techniques to maximize control and precision. When drilling deep holes, periodically back the bit out to clear dust and check for heat buildup. For reinforced concrete, core bits or specialized masonry bits with carbide tips may be necessary, and you might consider using a drill with SDS+ compatibility. If the drill wanders, switch to a guide or clamp to maintain alignment. When you encounter a stubborn material, pause to dampen vibration with slower speed and lighter pressure, and ensure the bit remains sharp and clean. Regular inspection of the chuck, power supply, and bit seating prevents operational issues and prolongs tool life.
Tools & Materials
- Hammer drill (rotary hammer or combi drill with hammer function)(Ensure it supports SDS or 2-mode operation as available on your model)
- Carbide-tipped masonry bits (assorted diameters)(Use appropriately sized bits for hole diameter and material)
- Wood drill bits (twist/brad-point)(Useful for wood portions or pilot holes adjacent to masonry drilling)
- Pilot drill bits for masonry or wood(Helps guide larger holes and reduces bit wear)
- Safety glasses or goggles(Protect eyes from debris)
- Dust mask or respirator(Minimize inhalation of dust)
- Hearing protection(Reduce long-term noise exposure)
- Gloves(Grip and hand protection)
- Clamps or a vise(Secure workpiece to prevent movement)
- Dust extractor or shop vacuum(Helps keep work area clean and bit cool)
- Center punch(Marks starting point to prevent wandering)
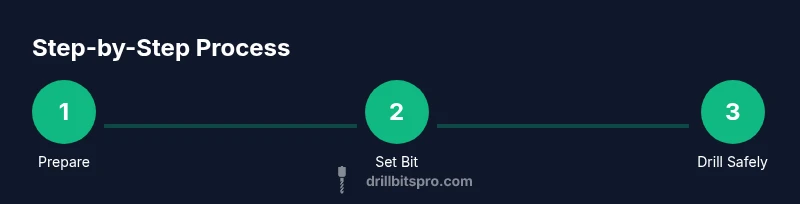
Steps
Estimated time: Total time: 20-40 minutes
- 1
Prepare the workspace and PPE
Clear the area, wear PPE, and secure the workpiece. Inspect the drill for damage. Decide on the mode and bit size before you touch the material.
Tip: Double-check cord/battery and ensure dust extraction is ready. - 2
Attach the correct bit and tighten
Select the masonry bit, insert fully into the chuck, and tighten securely with the keyless chuck. If using a pilot, attach it first.
Tip: A tight chuck prevents bit slipping and wandering. - 3
Set the drill to hammer mode and appropriate speed
Engage hammer function for masonry; start at lower speed to avoid grabbing. For wood or metal, switch to rotation-only mode.
Tip: Starting slow reduces bit wander and heat buildup. - 4
Mark the drill point and create a pilot hole
Mark precisely with a center punch or pencil. Drill a small pilot hole to guide the larger bit and reduce stress on the bit.
Tip: Pilot holes improve accuracy and reduce bit wear. - 5
Drill with steady pressure and clean paths
Apply steady, moderate pressure; let the bit do the work. Withdraw the bit every few seconds to clear dust.
Tip: Pause to cool the bit if it becomes hot or smoky. - 6
Finish, inspect, and clean up
Withdraw the bit, turn off the drill, and inspect the hole for straightness and depth. Clean the area and store bits properly.
Tip: Check hole depth with a gauge to ensure accuracy.
Got Questions?
What is a hammer drill and how does it work?
A hammer drill combines rotation with percussive action to break up masonry material. It works best on concrete and brick when in hammer mode, while rotation-only is better for wood or metal. The key is using the right mode for the material.
A hammer drill uses a pounding action plus rotation to break through masonry. Use hammer mode for concrete and wood or metal with rotation-only mode.
Can I use a hammer drill on wood?
Yes, but you should use rotation-only mode with wood bits to avoid splintering and wear. Reserve hammer mode for masonry materials.
Yes, you can drill wood, but switch to rotation-only mode to avoid splintering. Use hammer mode for masonry materials only.
How do I prevent drill wandering?
Mark the starting point with a center punch, secure the workpiece, and start with a pilot hole. A sharp bit and proper chuck tension also help keep the hole on target.
To prevent wandering, mark the spot, secure the piece, and start with a pilot hole. Keep the bit sharp and the chuck tight.
What safety precautions are essential?
Wear eye protection, a dust mask, and hearing protection. Ensure the work area is stable, the drill is in good condition, and the dust extraction is active.
Always wear eye protection, a dust mask, and hearing protection. Keep the area stable and the drill in good condition.
Do I need special maintenance for a hammer drill?
Regularly clean the chuck, inspect cables or batteries, and replace worn bits. Store the tool dry and avoid exposing it to moisture.
Yes, clean the chuck, check for wear, and replace dull bits. Store it in a dry place.
What about dust extraction and ventilation?
Use a dust extractor or shop vacuum to capture debris. Proper ventilation reduces dust exposure and improves visibility while drilling.
Use a dust extractor to capture debris and keep the area well-ventilated.
Watch Video
Top Takeaways
- Choose the correct bit for the material and use hammer mode for masonry.
- Secure the workpiece and wear proper PPE throughout.
- Drill with steady pressure and frequent dust clears.
- Use pilot holes to improve accuracy and bit longevity.
- Regularly inspect and maintain the drill and bits.