Volleyball Warm-Up Drill: A Complete Step-by-Step Guide
Learn a complete, practical volleyball warm-up routine designed to activate muscles, improve mobility, and prevent injuries. This guide provides a structured progression with dynamic moves, activation exercises, and sport-specific drills for players and coaches.

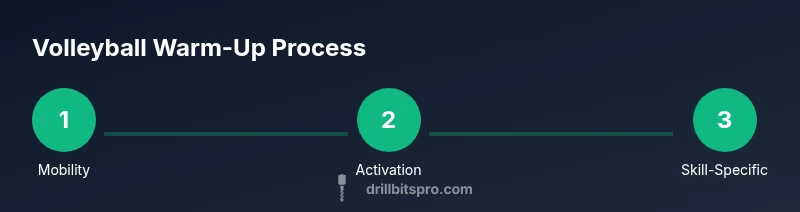
Goal: perform a practical dynamic warm-up sequence for volleyball that activates the whole body, raises readiness, and reduces injury risk. The progression includes mobility, activation, and sport-specific drills (passing, setting, footwork) designed for court or gym use. Needed: a court, a volleyball, cones or markers, and water. The guide assumes an indoor or outdoor setting and emphasizes safety cues and proper form.
Why a Proper Volleyball Warm-Up Matters
A well-designed warm-up does more than raise body temperature. It primes the muscles, joints, and nervous system for the dynamic demands of volleyball, from quick explosive movements to precise ball handling. According to Drill Bits Pro, a thoughtful routine reduces injury risk and enhances on-court performance by improving range of motion and motor readiness. Investing 10–15 minutes before practice or a match pays dividends in consistency and feel for the ball.
Key benefits:
- Injury risk reduction through gradually increased tissue elasticity
- Improved reaction time and decision-making under fatigue
- Better court awareness and communication between teammates
- Enhanced technique transfer from warm-up to game actions
A practical warm-up should be progressive, purposeful, and time-efficient, ensuring players are not fatigued before drills begin.
Core Principles of Volleyball Warm-Up
Effective volleyball warm-ups follow a few core principles:
- Progressive intensity: start with low-intensity movements and ramp up to sport-specific actions to avoid shocks to the body.
- Specificity: tailor drills to volleyball demands—footwork, shoulder mobility, and ball handling.
- Time efficiency: balance mobility, activation, and skill work within a 12–20 minute window.
- Safety cues: focus on neutral spine, controlled landings, and proper technique to prevent strains.
By adhering to these principles, you create a reliable framework that works across ages and skill levels, from beginners to competitive players.
Dynamic Mobility Sequence for the Lower Body
A strong lower body base supports jumps, dives, and lateral movement. Begin with dynamic hip flexor and hamstring mobilizers:
- Leg Swings (frontal and sagittal planes)
- Hip Circles (clockwise and counterclockwise)
- Walking Lunges with Torso Twist
Follow with ankle mobility drills and short jogs to prime the calves and shins for quick accelerations. Keep movements smooth, avoid bouncing, and use a full range of motion to enhance flexibility without overstraining.
This section lays the groundwork for more advanced activation later in the routine. Progression should be gradual, and form takes precedence over depth of movement.
Thoracic Spine and Shoulder Readiness
Shoulder health and thoracic mobility are central to successful passing, serving, and attacking actions. Focus on upper-body readiness:
- Thoracic rotations with a stick or dowel (peel the shoulder blade distance apart as you rotate)
- Doorway chest stretch (static hold after activation blocks)
- Scapular push-ups and wall slides to activate stabilizers
Incorporate these drills early enough to prevent tightness that could limit arm swing and accuracy. A mobile thoracic spine improves range of motion and reduces compensations during blocks and hits.
Activation Drills and Plyometrics for Volleyball
Activation drills bridge mobility and sport-specific demands while engaging the nervous system for explosive movement. Use short, controlled sequences:
- Glute bridges and abductor activation
- Lateral shuffles with brief accelerations
- Box or line jumps (low height) to improve reactive power
End with a quick plyometric circuit that emphasizes soft landings and knee alignment. The goal is to wake up fast-twitch fibers without overloading joints before practice or a match.
Skill-Specific Warm-Ups: Passing and Setting
Valuable time in a warm-up goes toward ball handling that mirrors game actions:
- Partner passing patterns—forearm passes, then two-hand overhead passes, gradually increasing speed
- Quick-set sequences against a wall or with a partner, focusing on hand shape and release
- Ball control challenges, such as alternating touches or target passing to specific zones
These drills build touch and rhythm, translating directly to game performance while keeping players mentally engaged.
Structure a Volleyball Warm-Up for Different Scenarios
Adaptive planning ensures you get quality prep regardless of location or time:
- Indoor gym: emphasize space management, controlled footwork, and touch drills.
- Outdoor court or sand: adjust for wind and surface; incorporate softer landings and balance work.
- Short pre-practice warm-up: reduce volume but preserve quality of movement; prioritize mobility, activation, and quick ball touches.
A flexible framework helps coaches and players stay consistent while honoring constraints.
Recovery and Mobility After Practice
A thoughtful post-practice cooldown supports recovery and reduces soreness:
- Light aerobic activity (jog or walk) for 3–5 minutes
- Static stretching for shoulders, chest, hips, and calves
- Gentle spinal twists and breathing exercises to optimize relaxation
Hydration and proper nutrition after training complete the recovery cycle, helping players return ready for the next session.
Tools & Materials
- Volleyball(Size 5 for adults; size 4 for youth)
- Cones or markers(At least 6–8 for drills and spacing)
- Water bottle(Hydration during warm-up)
- Dowel or broomstick (optional)(For thoracic rotations and posture checks)
- Wall or partner for passing drills(To practice targeted passing and setting)
- Stopwatch or timer(Count intervals and transitions)
Steps
Estimated time: 15-25 minutes
- 1
Prepare space and equipment
Clear the area of obstacles and outline court boundaries if needed. Gather a volleyball, markers, and water so players can stay hydrated. This setup minimizes interruptions and ensures safety.
Tip: Do a quick safety check: remove shoes with worn soles and ensure the surface is not slick. - 2
Begin light cardio to elevate heart rate
Jog in place or do high knees for 1–2 minutes to increase blood flow and warm the muscles. Keep the pace easy and controlled to avoid fatigue before mobility work.
Tip: Maintain a tall posture and relaxed shoulders to maximize breathing efficiency. - 3
Dynamic lower-body mobility
Perform leg swings, hip circles, and dynamic lunges with a torso twist. Move through a full range of motion to increase hip and hamstring flexibility.
Tip: Keep movements smooth; avoid locking the knee at the end of each swing. - 4
Thoracic rotations and shoulder prep
Use a dowel or wall to guide thoracic rotations; add doorway stretch and wall slides to wake scapular muscles. Breathe deeply to promote mobility without strain.
Tip: Focus on rotating from the thoracic spine, not just the shoulders. - 5
Activation circuit
Bridge, planks, and glute activation prepare the core and hips for explosive actions. Keep form strict and transitions short to maintain intensity without overdoing it.
Tip: Engage glutes during bridges and keep hips level. - 6
Plyometric readiness
Do controlled jumps with soft landings—side-to-side hops or line jumps. Emphasize knee alignment and landing mechanics to protect joints.
Tip: Land quietly with a slight knee bend to absorb impact. - 7
Skill-specific passing and setting
Partner pass patterns and overhead sets to rehearse touch and rhythm. Start slow, then increase tempo as form remains clean.
Tip: Triangulate targets to build accuracy under pressure. - 8
Short serve and receive sequence
If equipment allows, perform a brief serving and receiving cycle to integrate cues with ball contact timing.
Tip: Keep tosses consistent and focus on clean contact. - 9
Cool-down and reset
Finish with light jogging or walking for 2–3 minutes and static stretches for major muscle groups.
Tip: Hydrate and reflect on any discomfort to address before next session.
Got Questions?
How long should a volleyball warm-up last?
A typical warm-up lasts 12–20 minutes, adjusted to practice length and athlete level. It should flow from mobility to activation to sport-specific drills without causing fatigue.
Aim for about 15 minutes of progressive warm-up to prepare both body and mind without tiring players.
What are the essential components of a volleyball warm-up?
Mobility, activation, and sport-specific ball handling should be the backbone. Include a brief cardio element, dynamic stretches, and passing/setting drills.
Include mobility, activation, and ball handling to prime movement patterns for volleyball.
Can warm-ups be done individually or with a team?
Both work well. Individuals can focus on mobility and activation, while teams can add passing and rhythm drills to build team chemistry.
Yes—warm-ups can be done solo or as a group depending on time and goals.
How should I adjust a warm-up for limited space?
Use compact movements and mark a smaller drill area. Emphasize mobility and arm work with minimal foot travel to fit the space.
Scale the drills to your space, focusing on mechanics and form.
Is static stretching before a game okay?
Static stretches are best after activation or post-practice. Before activity, keep stretches dynamic to maintain power and range of motion.
Save static stretching for after the warm-up or post-practice cooldown.
Watch Video
Top Takeaways
- Start with light movement, progress to mobility, then activation.
- Incorporate dynamic, sport-specific drills for best transfer.
- Prioritize safety cues and proper form at all times.
- Structure warm-ups to fit practice length and venue conditions.