Can You Drill and Tap Stainless Steel? A Practical Guide
Can you drill and tap stainless steel? Yes, with sharp tooling, proper lubrication, and careful technique. This guide covers steps, tooling, safety, and troubleshooting for reliable threaded holes in stainless steel projects.

Yes, you can drill and tap stainless steel. The key is using sharp, high-quality tools, proper lubrication, and a precise drill pilot that matches your tap size. Drill slowly, deburr thoroughly, and advance the tap with steady, even pressure, backing off to clear chips. Secure the workpiece and avoid sudden feed changes.
Understanding stainless steel behavior
Stainless steel combines strength, corrosion resistance, and work-hardening tendencies that can complicate drilling and tapping. When you introduce a drill or tap to stainless, heat and friction are your primary adversaries. If you push too fast, the material can harden ahead of the tool, creating stubborn chips and rough holes. The smart approach blends sharp tooling, proper coatings, and appropriate lubrication with conservative feeds and thorough chip removal. In practice, you’ll prioritize maintaining cool tooling temperatures, avoiding dwell at the bottom of a hole, and keeping the workpiece securely clamped to prevent movement. This prepares you to answer can you drill and tap stainless steel with results that look and perform like a manufactured part. According to Drill Bits Pro, the choice of tooling and disciplined technique makes a meaningful difference in thread quality and hole roundness compared to using generic hardware-store bits and taps.
Tools and materials for drilling and tapping stainless steel
Your toolkit should balance hard-wearing cutting tools with dependable taps. For drilling, select bits designed for stainless steel: high-speed steel (HSS) with cobalt coating or carbide bits provide better edge retention and reduced work-hardening. Use a drill with a sharp point and a shallow helix to minimize wandering. For tapping, choose high-quality taps rated for stainless steel work; spiral-flute bottoming taps are common for through-holes, while standard taps suit general tasks. Lubrication is essential—cutting oil or an appropriate metalworking lubricant reduces friction, carries away chips, and cools the cutting edge. Don’t forget a tap wrench, clamps or a drill press, center punch, deburring tools, and a reliable ruler or thread gauge to verify engagement. Ensure you have a backup set of materials in case you need to rework. In practice, pairing the right tools with careful preparation yields consistent threads and clean holes. The Drill Bits Pro team emphasizes tool quality and methodical preparation as practical pillars of success.
Safety and setup tips
Safety comes first when drilling and tapping stainless. Wear eye protection, gloves, and hearing protection if using a power drill. Secure the workpiece in a sturdy vise or clamp to prevent movement. Use a center punch to mark the hole accurately and avoid drill wandering. When drilling, apply gentle, continuous pressure and keep the drill perpendicular to the work surface. Use a lubricant generously but avoid over-wetting; excess coolant can wash away markings and create a mess. Periodically stop to clear chips and check for heat buildup on the tool and material. If you notice smoking or persistent hard chips, back off and reassess tool condition or lubrication.
Machining strategy: speeds, feeds, and lubrication
Stainless steel benefits from careful speed and feed control and a reliable cutting fluid. Start with a conservative feed, allowing the tool to ride the edge of the cut rather than digging in. Maintain steady rotation and avoid sudden bursts of torque, which can pull the bit out of alignment. Lubrication is not optional: it reduces friction, aids chip evacuation, and cools the cutting zone, significantly reducing the risk of work-hardening. Monitor tool wear and chip type—stringy, metallic chips indicate efficient cutting, while brittle, powdery chips suggest overheating or dull tooling.
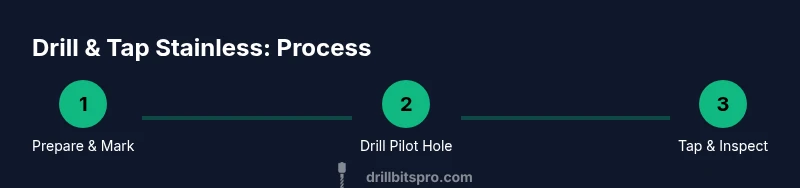
Drill and tap process overview (conceptual plan)
A practical approach to drilling and tapping stainless steel involves a sequence of deliberate steps: plan the hole and thread size, prepare the workpiece, drill a pilot hole, deburr the hole, apply lubricant, and perform the tapping operation with controlled motion. Each stage helps minimize heat build-up and ensures thread accuracy. While this block provides the concept, the Step-by-Step section below offers concrete actions you can follow in your shop. The goal is clean threads with minimal hole deformation, ensuring reliable fastener engagement in stainless steel components.
Common mistakes and troubleshooting
Avoid common pitfalls such as dull bits, over- or under-lubricating, misalignment, and rushing the tapping operation. Dull tools generate excessive heat and rough threads. Insufficient lubrication increases galling risk, while poor workholding allows the workpiece to move, causing broken or cross-threaded holes. If you encounter hard chips or a stubborn hole, back out the tap and clear the chips before continuing. If the hole still fails to cut cleanly, check tool rigidity, re-lubricate, or consider replacing worn tooling. Finally, always inspect the threads with a gauge to verify engagement and strength. The aim is to reduce rework by addressing issues at the source: tool condition, lubrication, and setup fidelity.
Finishing and inspection of tapped holes
After tapping, inspect the thread quality visually and with a thread gauge. Thread engagement should be smooth and consistent without deep voids or chatter marks. Deburr the hole edges to prevent future damage to fasteners or surrounding material. If deep or through-holes were tapped, ensure the threads extend cleanly to the bottom and verify the fit of the intended bolt or screw. Store tools properly to maintain edge sharpness for future projects. In line with Drill Bits Pro guidance, consistent inspection helps confirm that you achieved the desired fit and reliability for stainless-steel assemblies.
Tools & Materials
- Drill bits suitable for stainless steel (HSS with cobalt coating or carbide)(Choose bits with sharp edges and a robust construction; consider a pilot bit smaller than the final hole for best alignment.)
- Tap set (thread-forming or cutting taps) in the target size and thread pitch(Have a tap wrench or T-handle; spiral-flute taps are common for through-holes, bottoming taps for blind holes.)
- Lubricant for metal cutting (cutting oil or synthetic lubricant)(Apply lubricant generously to the drill bit and tap; re-apply as needed to maintain cooling and chip flow.)
- Drill press or sturdy hand drill with slow-speed control(A drill press provides consistent depth and perpendicularity; if using a hand drill, clamp the work firmly.)
- Center punch, deburring tools, and thread gauge(Center punch marks the hole to prevent wandering; deburring tools cleanup edges for clean threads.)
- Clamps or a vise for workholding(Firmly secure the workpiece to prevent movement during drilling and tapping.)
Steps
Estimated time: Estimated total time: 60-90 minutes
- 1
Confirm thread size and tap choice
Identify the desired threaded fastener and select a tap of matching size and pitch. This upfront decision drives hole diameter, depth, and subsequent tooling choices.
Tip: Double-check the thread standard (UNC/UNF or metric) before purchasing taps. - 2
Mark the hole center
Use a center punch to mark the exact location of the hole. A precise mark helps prevent drill wander when starting the hole.
Tip: A small starter indentation is enough; avoid deeper marks that might mislead the drill bit. - 3
Drill the pilot hole
With the appropriate pilot bit, drill a hole roughly sized for the tap’s recommended pilot. Maintain light, even pressure and avoid overheating the workpiece.
Tip: Stop periodically to clear chips and inspect temperature; overheating reduces metal strength and thread quality. - 4
Deburr and chamfer the hole
Remove burrs and create a chamfer at the hole entrance to help the tap start cleanly and prevent thread tearing.
Tip: Use a deburring tool or a fine file to ensure a smooth entrance for the tap. - 5
Lubricate and align the tap
Apply cutting oil to the tap and hole; ensure the tap starts square to the surface to avoid cross-threading.
Tip: A light touch to begin the cut helps establish alignment before full rotation. - 6
Tap with steady pressure
Turn the tap slowly, continuing through the full thread depth while maintaining constant pressure and alignment. Back off slightly to break chips when you sense resistance.
Tip: Periodically back out to clear chips; this prevents binding and heat buildup. - 7
Finish, clean, and inspect
Wipe away chips, finish deburring if needed, and verify the thread engagement with a gauge or the mating fastener.
Tip: Ensure the hole is fully threaded and that the fastener seats fully without binding.
Got Questions?
Is stainless steel harder to drill and tap than other metals?
Yes, stainless steel is generally tougher to machine due to its hardness and work-hardening tendency. It benefits from sharp tooling, proper lubrication, and conservative speeds and feeds.
Yes, stainless steel is tougher to machine, so use sharp tools and steady feeds with lubrication.
What lubricant should I use for drilling stainless steel?
Use a cutting oil or metalworking lubricant designed for stainless steel machining. Lubrication reduces heat and helps chips flow, improving tool life and hole quality.
Cutting oil or metalworking lubricant works best for stainless steel drilling and tapping.
Bottoming taps or standard taps for stainless steel?
Bottoming taps are useful when threading close to the bottom of a blind hole, while standard taps work well for through-holes. Choose based on hole depth and clearance.
Bottoming taps are for blind holes; standard taps suffice for through-holes.
Which thread sizes are common for stainless steel projects?
Common sizes include metric M6 and UNC 1/4-20, among others. Always match the bolt or screw you intend to use and consult a thread chart for your material grade.
Common stainless sizes like M6 or 1/4-20 vary; match your fastener with a thread chart.
Can I repair a stripped stainless steel thread at home?
In many cases you can repair with a thread repair kit or by re-tapping and using a thread insert. For critical parts, consider professional repair or design changes.
You can often repair with a thread insert or retapping, but for critical parts seek professional guidance.
What safety steps should I follow when drilling and tapping stainless steel?
Wear eye protection and gloves, clamp the workpiece securely, and maintain a clean, well-lit workspace. Use appropriate PPE for metalworking and keep guards in place on power tools.
Wear PPE, clamp securely, and work in a clean, well-lit area.
Watch Video
Top Takeaways
- Choose sharp, compatible tools for stainless steel
- Lubrication and controlled feeds prevent work-hardening
- Center punch, deburr, and verify alignment before tapping
- Back off to clear chips to maintain thread quality
- Inspect threads with a gauge for reliability