Can You Drill Through Ceramic Tile: A Step-by-Step Guide
Learn how to safely drill through ceramic tile with the right tools, technique, and safety precautions. This step-by-step guide from Drill Bits Pro helps DIYers and pros avoid cracks and damage.

Can you drill through ceramic tile? Answer to can you drill through ceramic tile? Yes—it's possible with the right bit and technique. Protect the glaze with tape, use a diamond-tipped or carbide bit, start at low speed, and cool the area to prevent cracking. According to Drill Bits Pro, patience and perpendicular drilling are the top factors for clean holes.
can you drill through ceramic tile? The basics
Ceramic tile presents a unique drilling challenge because of its glaze and underlying substrate. The glaze is hard and smooth, which can cause the drill to skate or “walk” away from the intended spot. The risk of microcracks radiating from the hole is real if you apply too much pressure or drill at too high a speed. Understanding tile composition (glaze, body, and backing) helps you pick the correct tool and technique. The most reliable approach is to use a diamond-tipped bit designed for ceramic or a carbide masonry bit in a slow, steady drill. Keep the bit cool with water or a light mist; heat is a major contributor to tile cracks. Drill Bits Pro emphasizes planning your hole’s size and placement before you begin, and practicing on a scrap tile when possible.
The practical anatomy of ceramic tile and why it matters
Ceramic tiles are layered: a glossy glaze on top, a ceramic body beneath, and sometimes a backer or substrate. The glaze’s hardness differs from the body’s abrasiveness, which means the cutting action changes as the bit transitions from the glazed surface to the body. If you strike through into plaster or drywall without a protective backing, you risk damage beyond the tile. A slow, methodical approach minimizes stress and improves hole quality. According to industry guidance adapted by Drill Bits Pro, choosing the right bit and maintaining a perpendicular angle are far more important than brute force.
Tools and materials you’ll need (and why)
Before you start, gather the essentials: (a) a diamond-tipped drill bit or carbide masonry bit, (b) a variable-speed drill, (c) painter’s tape to prevent wandering, (d) water or a spray bottle for cooling, (e) safety gear like goggles and gloves, (f) marker or tape to mark the hole, and (g) a piece of scrap tile or backing board for test runs. Using the proper bit reduces glaze chipping and helps you maintain a clean edge around the hole. Drill Bits Pro recommends testing on a spare tile first to dial in speed and pressure without risking the finished piece.
Safety first: protecting yourself and your work
Power tools require respect. Wear eye protection, hearing protection if using a loud drill, and keep hands dry and clean. Work in a well-ventilated area, and ensure the tile is clamped or held securely. Keep a steady spray of water to cool both the bit and tile; overheating is a leading cause of cracks. Don’t rush the process—tile is unforgiving when forced. A controlled approach minimizes risk and yields a precise hole.
Step-by-step drilling approach (high-level)
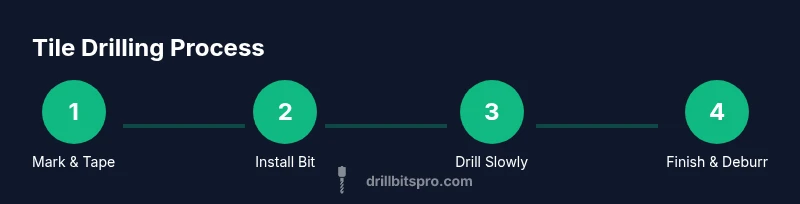
- Mark the hole location with painter’s tape to prevent chipping and slipping. 2) Install the appropriate bit (diamond-tipped or masonry) and set the drill to a low speed. 3) Begin drilling with light, steady pressure, keeping the bit perpendicular to the tile surface. 4) Periodically pause to spray water and clear debris. 5) When through the glaze, continue slowly through the tile into the substrate with the same method, then finish with deburring. 6) Clean the hole edges with a small file or sandpaper. 7) Inspect the hole for chips and re-tape if needed. 8) Clean up the work area and store tools safely.
Common mistakes and how to avoid them
A frequent error is applying too much pressure, which causes cracking. Starting at a higher speed can skitter the bit across the glaze. Not using masking tape leaves the tile vulnerable to chipping. Skipping coolant leads to overheating and glaze micro-fractures. Always practice first on a scrap tile and adjust your technique based on tile thickness and glaze type.
Finishing touches: sealing and protecting the hole
Once the hole is drilled, deburr the edge with a round file or sandpaper to remove sharp glaze chips. If the hole will host wiring or plumbing, insert a grommet or shield to protect the cable and tile edge. For visible installations, consider a ceramic-safe finishing ring to hide the bore and minimize stress concentration. Regularly inspect the area for any signs of cracking or moisture intrusion, and reseal if necessary.
Tools & Materials
- Diamond-tipped drill bit (ceramic/glass rated)(Best for glazed ceramic tiles; use a bit designed for glass/ceramic drilling.)
- Carbide masonry drill bit(Alternative if diamond bits are not available; use with slow speed.)
- Variable-speed drill(Prefer 500–1500 RPM; low speed reduces glazing damage.)
- Painter's tape(Protects surface and helps mark the drill spot.)
- Water spray bottle or coolant(Keeps bit and tile cool to prevent cracks.)
- Safety goggles(Eye protection during drilling.)
- Gloves(Grip and hand protection if desired.)
- Marker or masking tape for marking(Precise hole placement.)
- Backing board or scrap tile(Test drill on scrap to fine-tune technique.)
Steps
Estimated time: 60-90 minutes
- 1
Mark location and protect surface
Identify the exact hole location and apply painter’s tape over the mark to guard the glaze against chipping. The tape acts as a slip-proof guide and reduces friction as the bit enters the tile.
Tip: Use a center punch or a light dot with a marker to ensure the bit starts where intended. - 2
Install the correct bit
Fit a diamond-tipped or carbide masonry bit into your drill. Ensure the bit is sharp and straight in the chuck; wobble will cause uneven holes and edge chips.
Tip: Tighten the chuck securely and test on scrap tile first. - 3
Set the drill to a slow speed and start drilling
Start at the lowest speed and apply light, steady pressure. Maintain a perpendicular angle to the tile to prevent wandering or glazing damage.
Tip: Let the bit do the work; avoid pushing hard. - 4
Cool and clear debris
Pause periodically to spray water on the bit and tile, then clear debris from the hole with a thin brush or compressed air.
Tip: Overheating is a key cause of cracks and glaze damage. - 5
Drill through the glaze into the substrate
Continue drilling through the glaze, then through the underlying substrate with consistent low pressure. Switch to a bit appropriate for the substrate if needed.
Tip: If the bit hardens or grabs, stop and recheck alignment. - 6
Deburr and finish
Once through, withdraw the bit and use a small file or sandpaper to smooth the hole edge. Deburring reduces stress concentration around the bore.
Tip: A clean edge improves fit and reduces the chance of chipping. - 7
Inspect and finalize
Check the hole for chips or cracks around the edge. If the tile shows any signs of stress, re-evaluate placement or consider a larger protective backing.
Tip: Better to re-locate than risk a crack later. - 8
Clean up and store
Wipe the area, remove tape, and store tools safely. Proper cleanup reduces risk of surface contamination and tool dulling.
Tip: Label drill bits and keep spare parts handy.
Got Questions?
Can I drill through glazed ceramic tile without cracking it?
Yes, if you use a diamond-tipped or carbide masonry bit, drill slowly, and keep the area cool with water. Proper technique minimizes stress on the glaze.
Yes. Use the right bit, drill slowly, and keep it cool to prevent cracking.
What bit should I use for ceramic tile?
A diamond-tipped bit designed for glass or ceramic tiles performs best, though a carbide masonry bit on very soft tiles can work with caution.
Diamond-tipped bits work best, especially on glazed tiles.
Do I need to pre-drill a pilot hole?
A light mark and tape guide are enough for most tiles; a tiny pilot mark helps keep the bit from wandering. For large holes, you can start with a small pilot hole if the tile is very hard.
Usually, you don’t need a pilot hole, but a light guide helps.
Can I use a hammer drill for tile drilling?
Hammer drills can damage tile glaze; use a slow, steady rotary drill instead with a proper tile bit.
Avoid hammer mode; use a slow, steady drill with the right bit.
What if the tile cracks after drilling?
Stop using the area, assess the crack, and consider backing reinforcement or re-tiling. If the crack is minor, you may still extract the bit and finish with caution.
If you see a crack, pause and reassess before continuing.
How do I finish the edge of a tile hole neatly?
Deburr the edge with a small file or sandpaper and clean the area to remove any glaze chips for a clean look.
Smooth edges with a file or sandpaper after drilling.
Watch Video
Top Takeaways
- Use the right bit for tile material
- Protect glaze with tape to prevent chips
- Drill slowly and keep area cool to avoid cracks
- Mark precisely and maintain perpendicular angle
- Deburr edges for a clean finish