How to Drill into Tile: A Practical Step-by-Step Guide
Learn to drill into ceramic, porcelain, or glass tile safely with the right bits, techniques, and safety gear. This guide covers choosing tools, marking the spot, drilling without cracking, finishing, and troubleshooting common issues.

To drill into tile without cracking, start with the right bit (carbide-tipped for ceramic/porcelain; diamond-tinned for glass), use masking tape to prevent wandering, and drill at a steady, low speed with light pressure. Begin with a small pilot hole, keep the drill perpendicular, and cool the bit with water or a damp sponge. Finish by enlarging the hole to the desired size using the correct bit. This approach minimizes cracks and ensures a clean hole for anchors or screws.
What it means to drill into tile: challenges and considerations
Drilling into tile is a different proposition than boring into wood or drywall. Tiles—whether ceramic, porcelain, or glass—have a glazed or hard surface that can chip or crack if you apply too much force or incorrect angles. The thickness and adhesion of the tile to the substrate also matter; porcelain is harder and more brittle than ceramic, and glass tiles demand even gentler handling. The keyword here is control: slow speeds, precise bit choices, and controlled pressure reduce the risk of cracks or glaze chips. For anyone attempting a tile drilling project, understanding these material properties helps set realistic expectations and guides safe technique. The phrase how drill into tile often appears in DIY communities, reflecting a common challenge for weekend warriors and pros alike. According to Drill Bits Pro, recognizing tile type and choosing the right approach up front dramatically lowers the chance of waste and costly mistakes. With the right mindset, you can place a secure anchor or fixture without damaging the tile or substrate, even in tight spaces like backsplashes or shower enclosures.
In this guide we’ll distinguish between ceramic, porcelain, and glass tiles, discuss the consequences of grout-only drilling, and outline a plan that minimizes risk while delivering a clean hole ready for mounting hardware. You’ll learn to assess tile glaze, substrate support, and drill depth, all critical factors when you set out to drill into tile. The goal is to equip you with reliable steps, practical tips, and safety practices so your project looks professional and holds up under use.
What it means to drill into tile: challenges and considerations
Drilling into tile is a different proposition than boring into wood or drywall. Tiles—whether ceramic, porcelain, or glass—have a glazed or hard surface that can chip or crack if you apply too much force or incorrect angles. The thickness and adhesion of the tile to the substrate also matter; porcelain is harder and more brittle than ceramic, and glass tiles demand even gentler handling. The keyword here is control: slow speeds, precise bit choices, and controlled pressure reduce the risk of cracks or glaze chips. The phrase how drill into tile often appears in DIY communities, reflecting a common challenge for weekend warriors and pros alike. According to Drill Bits Pro, recognizing tile type and choosing the right approach dramatically lowers the chance of waste and costly mistakes. With the right mindset, you can place a secure anchor or fixture without damaging the tile or substrate, even in tight spaces like backsplashes or shower enclosures.
In this guide we’ll distinguish between ceramic, porcelain, and glass tiles, discuss the consequences of grout-only drilling, and outline a plan that minimizes risk while delivering a clean hole ready for mounting hardware. You’ll learn to assess tile glaze, substrate support, and drill depth, all critical factors when you set out to drill into tile. The goal is to equip you with reliable steps, practical tips, and safety practices so your project looks professional and holds up under use.
Why tile type matters when drilling into tile
Ceramic tile generally tolerates a bit more aggressive drilling than porcelain. Glass tile requires a delicate touch because the glaze can crack and the body may crack if the bit bites too hard. When planning a drill into tile, identify the tile type and the substrate behind it. A crack-free hole requires not only the right bit but also the right drill technique. A small pilot hole helps you guide the larger bit without wandering, especially on glossy surfaces. The Drill Bits Pro team emphasizes that selecting the proper tool first reduces trial and error, saving time and material costs later. By starting with a conservative approach, you preserve tile integrity and ensure secure anchors for fixtures and hardware.
Tools & Materials
- Hammer drill or rotary hammer(Variable speed; use at low to medium speed for control)
- Carbide-tipped masonry drill bit (for ceramic/porcelain)(Start with small pilot size; rely on gradual enlargement)
- Diamond-tipped glass tile bit (if working with glass tile)(Wear eye protection; maintain steady pressure)
- Masking tape(Place over drill spot to prevent wandering)
- Tape measure or rulers(Mark exact hole location and depth)
- Marker or pencil(Indicate center point precisely)
- Safety glasses or goggles(Eye protection is essential)
- Vacuum or damp cloth(Capture dust; keeps line of sight clear)
- Depth stop or masking tape on bit(Prevents drilling too deep into tile or substrate)
Steps
Estimated time: 30-60 minutes
- 1
Prepare the workspace and mark the drill point
Clear the area and protect nearby surfaces. Use masking tape over the tile to delineate the drill center and reduce chipping. Mark the exact center with a light pencil mark or a tiny puncture with a center punch. This step reduces wander and gives the bit a defined target.
Tip: Tape also helps resist slippage when you start the drill. - 2
Select the correct bit and set the drill
Choose a carbide-tipped bit for ceramic or porcelain tile. If you encounter glass tile, switch to a diamond-tipped bit. Set the drill to a low speed and apply gentle, steady pressure. Start with a pilot hole to guide the larger bit.
Tip: Dry run without turning on the drill to verify alignment. - 3
Create a pilot hole
Drill a small pilot hole at the marked center using a light touch. Keep the drill perpendicular to the tile and use a slow speed. A pilot hole reduces the risk of cracking the glazed surface when the larger bit engages.
Tip: If the tile is glazed, pause occasionally to cool the tip and wipe away dust. - 4
Enlarge to the final hole size
Using the appropriate size bit, gradually enlarge the hole. Do not rush; let the bit cut and not bite. Maintain perpendicular orientation and avoid applying downward pressure that could crack the tile.
Tip: Back off to clear debris every few seconds during enlargement. - 5
Cool and rinse as needed
Keep the bit and tile cool with a damp sponge or water spray. Excess heat can damage glaze and shorten bit life. Wipe away slurry to reveal a clean hole and prevent bit binding.
Tip: A damp cloth is often easier to manage than constant water spray in tight spaces. - 6
Check depth and install anchor if needed
If you’re anchoring, use a depth stop or tape on the bit to prevent drilling too deep. Clean the hole and fit the anchor or screw, testing fit before final installation.
Tip: Use a masonry anchor rated for tile installations to ensure holding power. - 7
Finish and tidy the work area
Remove masking tape, wipe the surface, and verify the fixture sits flush. If the tile surface shows minor chips, label the location for cosmetic touch-ups later. Collect waste to maintain a safe workspace.
Tip: Keeping a tidy site reduces the chance of dropping a tool onto the tile later.
Got Questions?
Can you drill ceramic tile without cracking it?
Yes, with the right technique and tools you can drill ceramic tile without cracking. Start with masking tape, use a carbide-tipped bit, drill slowly, and begin with a pilot hole before enlarging the hole.
Yes. Start with masking tape, use the right carbide bit, drill slowly, and begin with a pilot hole before enlarging.
What drill bit should I use for porcelain tile?
For porcelain tile, use a carbide-tipped masonry bit designed for hard tiles or a diamond-tipped bit when glass is involved. Piggyback pilot holes to guide the larger bit and avoid glazing damage.
Use a carbide-tipped bit for porcelain, or a diamond-tipped bit for glass. Pilot holes help guide the larger bit.
Should I drill through grout or tile first?
Always drill through the tile, not the grout. Drilling through grout can compromise the grout seal and cause cracking or spalling in the tile nearby.
Drill through the tile, not the grout, to protect the tile and grout integrity.
How do I prevent the tile from wandering when starting?
Place masking tape over the spot and mark center. Using a center punch helps create a tiny indentation that guides the bit.
Mask the spot and center-punch to guide the bit.
What safety gear do I need for tile drilling?
Wear safety goggles to protect eyes and gloves to protect hands. A dust mask is optional for concrete-back tiles, but it’s wise in dusty environments.
Wear goggles and gloves; consider a mask in dusty spaces.
Watch Video
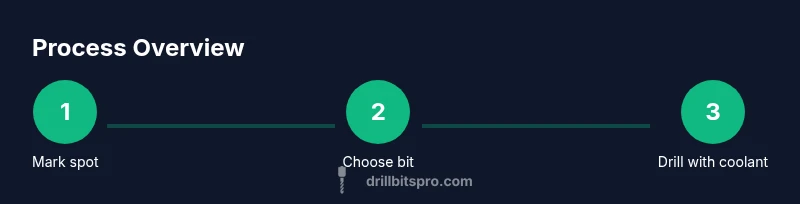
Top Takeaways
- Choose the right bit for tile type.
- Mark the spot and start with a pilot hole.
- Drill slowly with perpendicular alignment.
- Cool and clean the work area for best results.