Can You Drill with a Screwdriver? A Safe DIY Guide
Explore whether you can drill with a screwdriver, when it’s feasible, and practical, safe alternatives. Drill Bits Pro breaks down limitations, safety considerations, and best practices for making holes with the right tool for DIY and pro projects in 2026.

Can you drill with a screwdriver? In most cases, no—screwdrivers are designed for driving screws, not drilling holes. The torque, speed, and bit geometry are not suitable for creating clean, accurate holes. If you must, you’ll only achieve tiny pilot holes in soft materials; for real drilling, use a proper drill and bit.
Can you drill with a screwdriver? Realistic limits
The short answer is that a standard screwdriver is not a drill. Manual and cordless screwdrivers are optimized for rotating a bit to drive screws, not for creating holes. The edge geometry of a typical flathead or Phillips bit is not designed to cut material with any real efficiency, and the chuck torque and rotation speed are insufficient to produce clean, round holes. Attempting to bore with a screwdriver often results in stripped material, widened or irregular holes, and the tool slipping out of alignment. According to Drill Bits Pro, the mismatch between bit geometry and cutting action is the primary reason why screwdrivers struggle to produce usable holes. If you’re forced to improvise, you’ll be limited to tiny pilot holes in very soft materials like foam or balsa wood and only with a great deal of patience and care. For durable, precise holes, switch to a drill and the appropriate bit.
Why a drill is better than a screwdriver
A drill uses a rotating cutting edge, proper flute geometry, and adjustable speed to control material removal. The right drill bit (wood bit for soft lumber, brad point for clean edges, or metal bit for steel) is paired with a chuck that allows secure, centered bite. Variable speed and torque control help you avoid burning, slipping, or wandering. In contrast, a screwdriver’s blunt bit and fixed torque can’t consistently cut or self-center, leading to awkward holes and frustration. Drill bits are available in a range of diameters and tip geometries to match the material and hole purpose, something a screwdriver simply cannot replicate. Drill Bits Pro analysis shows that choosing the correct tool and bit is the single most important factor in hole quality, speed, and safety.
When a screwdriver might be workable
There are very limited scenarios where you might end up using a screwdriver to create a hole, and these are typically in soft, forgiving materials or for tiny pilot holes—never for structural or load-bearing applications. In foam, soft plastics, or very thin stock, a carefully oriented screwdriver can make a shallow indentation that serves as a guide for a real drill later. Always prioritize using the correct tool for the job; improvising with a screwdriver increases the risk of damage to the workpiece and potential injury. If you’re working in a pinch, treat the operation as a guide-mark task rather than a true drilling operation and plan to finish with proper equipment as soon as possible.
Safety and risk considerations
Safety comes first when drilling, especially if you’re contemplating unconventional methods. A slipping bit can injure fingers, eyes, or skin, and overheating can char material or cause sparks. Always wear safety glasses, secure the workpiece with clamps, and keep hands away from the axis of rotation. Ensure the area is well-lit, and never attempt to bore into live electrical components or hidden hazards. If the material is metal, masonry, or a thick hardwood, using a screwdriver to attempt drilling can lead to tool damage and dangerous kickback. Drill bits can break, and the material can crack, so proceed with caution and use the proper tool for the job whenever possible.
Alternatives and best practices
The recommended strategy is to switch to a drill with a suitable bit. Before starting, gather a few essentials: a cordless drill, a few wood bits and metal bits, a brad point for clean wood holes, a center punch to mark the spot, and clamps to secure the workpiece. If you don’t own a drill, consider renting one or visiting a local makerspace. For very soft materials or tiny pilot holes, you may use a sharpened punch or a self-centering bit, but these approaches are limited and not substitutes for real drilling.
Materials and hole types by material
Wood: use a brad point or twist bit for clean holes; plastic: select a sharp bit suitable for plastic density and use slower speeds to prevent melting; metal: start with a smaller pilot hole, use a proper metal bit, and lubricate the cutting edge if needed; masonry: requires specialized bits and tools beyond a screwdriver’s capability. The key to success is matching the material, hole diameter, and bit geometry to the correct tool. Drill Bits Pro emphasizes starting with a pilot hole in most materials to reduce splitting and to guide the final hole.
Common mistakes and how to avoid them
• Using the wrong bit type for the material. Always verify bit material and geometry before starting. • Forcing the bit or applying excessive pressure. Let the tool do the work at the recommended speed. • Not securing the workpiece. Clamp firmly to reduce wandering. • Skipping marking and pilot-holing steps. Mark the center with a punch and drill a pilot hole first. • Ignoring safety gear. Always wear eye protection and keep hands away from the cutting edge.
What to do next: choosing the right tool for the job
If your goal is clean, accurate holes, the best path is a drill with the correct bit. Invest in a basic drill/driver with variable speed control and a small assortment of drill bits. For occasional needs, renting a drill or borrowing from a neighbor is a practical solution. As you progress, consider adding specialized bits for metal, drywall, or masonry to expand your capabilities safely.
Tools & Materials
- Cordless drill or drill press(Power tool with variable speed is ideal for control)
- Screwdriver (Phillips or flathead)(For the scenario under discussion; not a substitute for a drill)
- Hammer and center punch(To mark the hole center before drilling)
- Drill bits (wood, metal, Brad Point)(Select based on material and hole size)
- Clamp or workstation vise(Secures the workpiece to prevent movement)
- Safety glasses(Eye protection during cutting and drilling)
- Pencil and measuring tape(Mark and measure precise hole location)
- Masking tape(Helps prevent bit wandering on delicate surfaces)
- Work gloves (optional)(Protect hands during setup and handling)
- Lubricant or cutting oil (for metal)(Reduces heat and wear on bits)
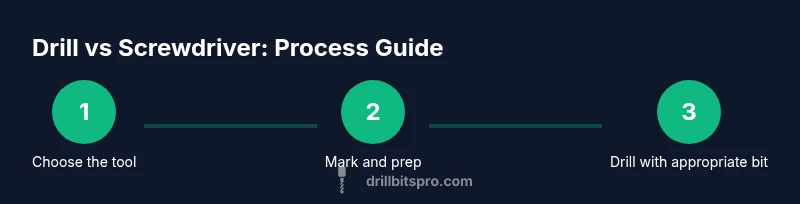
Steps
Estimated time: 30-60 minutes
- 1
Assess task and gather tools
Identify the material, hole size, and depth. Collect the drill, bits, clamps, and safety gear. If you only have a screwdriver, plan to switch to a drill as soon as possible since it’s the safer, more accurate option.
Tip: Double-check the hole diameter against your screw or hardware to avoid oversized holes. - 2
Secure the workpiece
Clamp the material firmly to a stable surface. Loose stock moves easily and can cause misaligned holes or injury.
Tip: Use a scrap piece beneath the workpiece to prevent tear-out on soft surfaces. - 3
Mark the center of the hole
Use a center punch or sharp nail to make a small indentation at the intended center point. This helps guide the drill bit and reduces wandering.
Tip: If using a pencil mark, consider masking tape over the area to keep the point from sliding. - 4
Choose the bit and drill speed
Select a bit appropriate for the material. Set the drill to a low speed initially and increase gradually as the bit bites into the stock.
Tip: Lubricate metal bits with oil if drilling metal to reduce heat buildup. - 5
Drill or improvise with care (if screwdriver only)
If you must use a screwdriver, apply light pressure and maintain a steady, slow twist rather than forcing the bit. Stop if the bit binds or stalls. This is a last-resort technique and should be replaced by a proper drill as soon as possible.
Tip: Never panic-pull the bit; back out slowly if it binds. - 6
Finish and inspect the hole
Withdraw the bit, deburr the hole edge, and check for accuracy against the target dimension. Clean up dust and inspect for cracks or imperfect edges.
Tip: Take a quick test fit with the hardware to confirm tolerance.
Got Questions?
Can you drill with a screwdriver?
Screwdrivers are not designed to create holes and won’t reliably cut cleanly. They should not replace a drill for most drilling tasks. Only very small, soft-material pilot holes might be possible, and even then it’s not ideal.
No. A screwdriver isn’t made to drill; use a proper drill for accurate holes.
What materials can be drilled with a screwdriver at all?
Very soft materials like foam or very thin wood might accept a tiny hole, but the result is unstable and not suitable for structural tasks. Always favor a drill for actual hole making.
Only extremely soft materials yield tiny holes with a screwdriver; don’t rely on it for anything structural.
Why is a drill better than a screwdriver for holes?
A drill provides proper torque, speed, and bit geometry; it supports various bits for clean edges. Screwdrivers lack these features and can wander or damage material.
A drill gives you control and clean holes; screwdrivers just drive screws.
What should I do if I don’t own a drill?
Consider renting a drill, borrowing from a neighbor, or using a makerspace. For critical work, don’t substitute with a screwdriver; plan to get the right tool.
If you don’t have a drill, rent or borrow one for proper hole-making.
What safety gear is essential when drilling?
Wear safety glasses, use clamps, and keep fingers away from the bit. Ensure the area is clear and well-lit before starting.
Protect your eyes and hands; secure the workpiece.
How can I improve hole quality without a retractable drill?
Use a center punch to guide the bit, start with a smaller pilot hole if possible, and take breaks to prevent overheating of bits.
Center-punch and pilot holes help you guide the cut more accurately.
Watch Video
Top Takeaways
- Avoid using a screwdriver as a primary drilling tool.
- A proper drill and bit deliver cleaner, safer holes.
- Always secure the workpiece and mark center before drilling.
- Switch to safe, recommended methods as soon as possible.