Drill and Tap: A Practical Step-by-Step Guide
A practical, AI-assisted guide to drilling and tapping threaded holes in metal and wood, with safety tips, tool checks, and a clear step-by-step workflow.

Goal: To create clean, durable threaded holes by drill and tap using a pilot hole and the correct tool. You will need a drill with variable speed, a set of taps, a tap wrench, cutting oil, a center punch, a vise or clamps, and the right-sized drill bits. This guide covers safety, sizing, technique, and common mistakes to avoid.
What drill and tap means
Drill and tap is the combined process of creating a hole and then cutting internal threads in the wall of that hole so a screw or bolt can be threaded in. In practice, you drill a pilot hole, lubricate as needed, and use a tap to form threads that match the screw’s diameter and pitch. When done correctly, a drilled-and-tapped hole provides a strong, reusable join in metal, plastic, or wood inserts. According to Drill Bits Pro, the success of a drill-and-tap operation hinges on two key decisions: selecting the right drill size for your target thread and using the correct tapping technique.
In metalworking, the drill size must be smaller than the final bolt diameter to leave material for the threads. The tapping process removes material to create the helical grooves that accept the fastener. Wood requires inserts or special thread-reinforcing methods, because traditional metal taps will not yield reliable wood threads. You’ll also encounter thread standards such as coarse and fine pitches, which influence the tap you choose. While the term drill and tap is often used for metal, the same concept—creating internal threads—applies across materials with appropriate tools and speeds.
Precision matters: perpendicular alignment, proper depth, and steady pressure reduce chatter and cross-threading. If you rush, you risk broken taps, stripped threads, or a hole that’s too shallow to accept a fastener. The goal is clean, accurate threads that let your fastener seat fully and bear load without failing. Drill Bits Pro analysis shows that planning sizes and testing on scrap material dramatically reduces rework and part rejection.
Tools and materials you'll need
Before you start, assemble a small kit with the right tools and materials. The quality of your drill bits and taps often determines the final fit more than anything else. Start with a vise or clamps to secure the work, a stable drill or drill press, a pilot hole drill bit set, taps with a wrench, cutting oil, a center punch, and a deburring tool. For metal, quality cutting oil is essential to prevent galling; for wood, you may need a threaded insert instead of a traditional tap, but if you plan to tap, choose a thread-cutting lubricant designed for wood experiments. Use a drill with adjustable speed and, if possible, a drill press to maintain perpendicular alignment.
- Drill: a modern cordless or corded drill with variable speed.
- Pilot drill bits: common sizes for pilot holes that correspond to the final thread size.
- Taps and tap wrench: a set that includes the size you plan to use and a spare.
- Lubricant: threading oil or cutting fluid appropriate for the material.
- Center punch to mark the location and a deburring tool to clean edges.
- Calipers or ruler helps you verify drill sizes. If you are working with metal and want consistent results, consider a drill guide or a drill press with a stable table. Finally, clamps and a scrap piece to test-fit can save you from ruining a real part.
Safety and setup considerations
Safety is the backbone of any drilling and tapping operation. Always wear ANSI-approved eye protection and, depending on the material, gloves and a face shield. Secure the workpiece firmly in a vise or clamps so it cannot move during drilling or tapping. Set the drill to a moderate speed; drilling too fast can overheat the tool and dull bits, while too slow can cause chatter and misalignment. When switching bits or changing taps, unplug or remove the battery to prevent accidental starts. Use cutting fluid or oil generously when tapping metal to reduce friction, extend tool life, and create cleaner threads. Keep the work area clean and free of loose tools that could cause a distraction or injury. If you’re using a drill press, ensure the table is level and perpendicular to the spindle to maintain straight holes and true threads. Remember: safety first saves time and money in the long run.
The Drill Bits Pro team emphasizes erring on the side of caution—start with scrap pieces to dial in settings before touching final parts.
Step-by-step overview
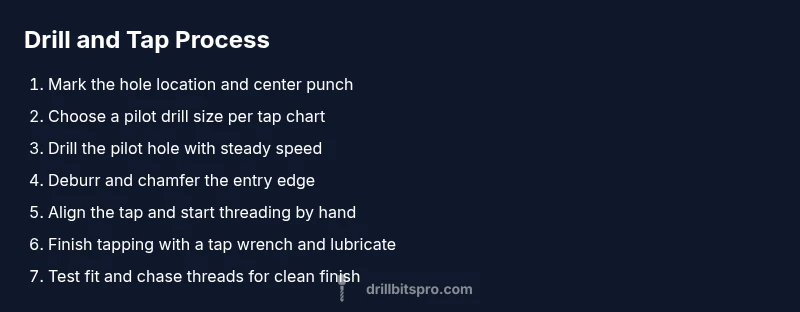
The drill-and-tap process can be broken down into four overarching phases: preparation, drilling, tapping, and inspection. Begin with precise marking and stabilization of the workpiece. Next, create a pilot hole that leaves room for the final threads and aligns squarely with the target axis. Drilling is followed by deburring to remove sharp edges and prevent binding. Finally, you mount the tap and rotate it with steady pressure, backing off periodically to clear chips. Lubrication is essential throughout to minimize heat and wear. In metal, the tap will cut threads; in certain plastics or soft metals, you may use self-cutting taps designed for those materials. The final step is a test fit with a screw or bolt of the matching size; if needed, chase the threads with a second pass to clean the grooves and ensure smooth assembly. The goal is accurate depth, straight holes, and clean threads that accept the fastener fully and securely.
For best results, work slowly, check perpendicular alignment frequently, and keep the cutting area well-lubricated. Practice on scrap metal before attempting final parts to reduce risk and waste. Drill Bits Pro’s experience shows that meticulous preparation pays off in fewer reworks and stronger joints.
Common mistakes and fixes
Common mistakes include drilling at an angle, choosing an undersized pilot hole, failing to deburr, and forcing the tap when resistance increases. Perpendicular holes ensure straight threads; if you notice any wobble, pause, re-clamp, and re-check alignment. If chips build up while tapping, back the tap out a half-turn, retract, clean, and re-lubricate before continuing. A too-warm drill or over-tight tapping can burn or gall the threads; reduce speed, apply more lubricant, and take smaller incremental turns. If the hole is over-drilled, the thread may be shallow or weak—start over on scrap and recalculate the correct pilot size. When tapping through thicker materials, consider step tapping or using a bottoming tap designed for deeper engagement. Finally, failed threads are often the result of misalignment, poor lubrication, or pocketed chips; address these root causes before repeating the process on an actual component.
The fix often involves re-centering, cleaning out the hole, and starting with a smaller pilot or a more appropriate tap size. Practice on scrap pieces to refine your technique and prevent costly mistakes on production parts.
Advanced tips for precision
For precision work, mount the workpiece on a drill press or a tightening jig to maintain straight, perpendicular holes. Use a reliable center punch and a sharp pilot bit to guide the hole and prevent wandering. Lubricate generously during tapping, and approach the task with a light touch—allow the tap to do the work rather than applying heavy pressure. If you’re tapping into hardened metals, consider a thread-cutting compound to reduce wear and heat buildup.
A slow, steady feed yields better finishes; too-fast tapping invites thread deformation or broken taps. If you are producing multiple holes, pre-start all taps in scrap stock to confirm alignment before proceeding to production pieces. Drilling and tapping on a well-prepared surface with clean tools minimizes chatter and ensures consistent thread depth. Drill Bits Pro analysis shows that using a properly sized pilot hole, paired with the right lubricant and a quality tap, significantly improves thread quality and tool life. The Drill Bits Pro team also notes the value of testing on scrap before final parts to prevent costly errors and ensure you achieve the desired fit.
Authority sources and further reading
If you want to deepen your understanding of drilling and tapping, check these authoritative resources for safety guidance, standards, and best practices:
- OSHA: https://www.osha.gov
- NIST: https://www.nist.gov
- MIT OpenCourseWare: https://ocw.mit.edu
These sources provide general safety guidance, material science context, and practical machining references that complement hands-on practice. For further reading, supplement this guide with manufacturer tapping charts and standard threads references. Drill Bits Pro’s recommended approach is to supplement practical practice with trusted safety and standards information to minimize risk and maximize success on real-world projects.
Tools & Materials
- drill (cordless or corded) with variable speed(For metal work, a drill with torque control is helpful)
- pilot drill bits(Sizes to match final thread requirements; consult a tap chart)
- taps and tap wrench(Include the sizes you plan to use and a spare)
- threading oil or cutting fluid(Lubricates and cools; prevents galling)
- center punch(Marks precise hole center to prevent drift)
- vise or clamps and a sturdy work surface(Secures the work during drilling and tapping)
- drill press or drilling guide(Helps maintain perpendicular alignment)
- calipers or ruler(Verifies hole sizes and alignment)
Steps
Estimated time: 60-90 minutes
- 1
Prepare and mark the workpiece
Secure the work in a vise and mark the exact hole location with a center punch. This reduces drill wander and ensures the hole is placed correctly relative to nearby features.
Tip: Use a sharp center punch and verify alignment with a straightedge. - 2
Choose hole size and set up
Consult the tap manufacturer's chart to select the pilot hole size for the intended thread. Confirm your chosen size on a scrap piece before working on final parts.
Tip: Double-check dimensions with calipers; a mismatched pilot hole compromises threads. - 3
Drill the pilot hole
Drill the pilot hole with steady, moderate speed. Stop just after the hole penetrates through the material; avoid drilling too deeply if you’re not tapping through.
Tip: Keep the drill perpendicular to the surface and apply cutting fluid to reduce heat. - 4
Deburr and chamfer
Remove burrs and chamfer the entry edge to prevent the tap from diving into a ragged edge. Deburring minimizes binding during tapping.
Tip: Use a deburring tool or a small file for a clean edge. - 5
Start the tap by hand
Apply a small amount of lubricant and place the tap into the hole. Turn it clockwise by hand a few threads to establish alignment before using the tap wrench.
Tip: Keep the tap square to the hole axis; any misalignment will produce cross-threads. - 6
Cut the threads with a tap
Use the tap wrench to rotate the tap, advancing slowly and evenly. Back off every quarter-turn to clear chips and re-lubricate as needed.
Tip: If resistance increases, back out, clean, re-lubricate, and try again with steady pressure. - 7
Inspect and finish
Wipe away debris, run a compatible screw into the hole to test fit, and trim any protrusions. If the fit is tight, slightly chase the threads with the same size tap.
Tip: Ensure the screw threads engage smoothly without binding.
Got Questions?
What is the best drill size for a specific tap?
Use the pilot hole size recommended by the tap manufacturer or a trusted chart, matching the thread pitch and diameter. Verify with scrap stock before working on final parts.
Choose the pilot hole size per the tap chart and test on scrap stock before final parts.
Can I drill and tap in wood?
Tapping wood often involves inserts or specialty wood-threading methods. For metal taps in wood, you may use specific wood-threading tools designed for softer substrates.
Tapping wood typically uses inserts or specialized tools, not standard metal taps.
Do I need lubricant?
Yes. Lubricant reduces friction, heat, and wear on the tap, resulting in cleaner threads and longer tool life.
Yes—apply cutting oil or threading fluid to the tap during cutting.
How deep should the threads go?
Thread depth should be at least the engagement length of the tap with the material, enough for a full thread profile without bottoming out.
Engage enough threads for full engagement without bottoming out.
What if the tap breaks?
Do not force. Back out gently, clear chips, and assess whether the hole needs to be retapped or repaired. Consider breaking torque and remove the broken segment carefully.
Don’t force. Back out, clear chips, and evaluate safely.
Is tapping safe for beginners?
Yes, with proper guidance, scrap practice, and safety measures. Start on scrap parts to learn alignment, lubrication, and how to handle taps.
Yes, practice on scrap parts to build skill and confidence.
How do I fix cross-threading?
If cross-threading occurs, back out, re-align, and re-cut the threads with a fresh pilot hole or a replacement tap size if necessary.
Back out, re-align, and re-cut the threads with the appropriate tools.
Watch Video
Top Takeaways
- Plan the correct hole size before starting drilling.
- Secure and mark precisely to prevent drift.
- Lubricate and maintain controlled, steady tapping pressure.
- Test fit and chase threads to ensure smooth operation.