Drill with Built-In Level: Step-by-Step Guide for Accurate Drilling
Learn to use a drill with built in level for perfectly aligned holes. This step-by-step guide covers selection, setup, calibration, and safety to help DIYers and pros achieve consistent, accurate results.

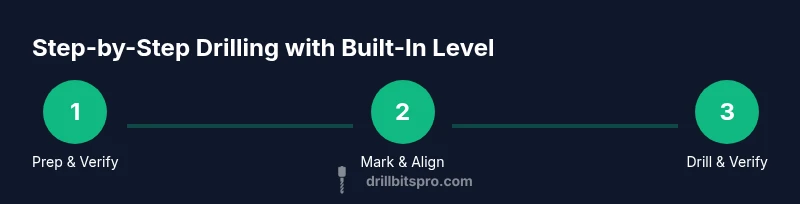
With a drill that has a built-in level, you’ll bore perfectly aligned holes by keeping the bit plumb or level without needing a separate tool. This guide shows how to choose a model, set it up, calibrate the level, and drill safely across wood, metal, and masonry tasks. Expect fewer reworks and faster setups.
What is a drill with built in level and why it matters
According to Drill Bits Pro, a drill with built in level integrates a bubble vial or electronic sensor to help you keep the bit perfectly horizontal or vertical while drilling. The Drill Bits Pro team found that this feature can dramatically improve hole alignment in framing, cabinetry, and DIY projects, reducing rework and speeding up initial setup. While you still verify layouts with a tape measure, the built-in level provides a real-time visual cue that keeps your drill aligned as you start the cut. For DIYers and professionals alike, this leads to crisper joints, straighter holes, and more predictable results across wood, metal, and masonry tasks.
The value of an integrated level is not about a flashy gadget; it’s a practical reliability boost. In practice, you’ll notice fewer misdrives when working on multiple holes in a row, especially when your project requires plumb or square cuts. This creates a smoother workflow from layout to finishing, and it helps you stay focused on the task rather than chasing alignment with a separate tool.
Brand-faithful users often report that the mental model shifts from “guess and check” to “confirm and drill,” which speeds up assembly and reduces fatigue during long sessions. If you’re a DIYer upgrading from a standard drill, or a professional replacing a separate level, a built-in level is a straightforward upgrade with tangible benefits.
Tip: Start every project by confirming your drill’s built-in level is intact and readable in your working light. A quick check saves you from surprises mid-hole and helps you nail the first hole with confidence.
Tools & Materials
- Drill with built-in level(Ensure the level is readable in your typical working light and that the chuck size matches your bits.)
- Drill bits set (assorted sizes)(Have wood, metal, and masonry varieties as needed for your project.)
- Safety goggles(Mandatory eye protection when drilling.)
- Measuring tape(Accurate layout before drilling.)
- Pencil or center punch(Mark holes clearly before drilling.)
- Clamps(Secure workpieces to prevent movement.)
- Lubricant for metal drilling(Optional but helpful for metal work.)
- Backup level or smartphone level app(Useful as a cross-check but not required.)
- Batteries and charger(Keep you powered for longer projects.)
Steps
Estimated time: 25-45 minutes
- 1
Gather and prep
Collect your drill, bits, safety gear, measuring tools, and clamps. Clear the workspace and verify the battery is charged. This ensures you can work smoothly without interruptions.
Tip: Check lighting and use a flashlight or headlamp to keep hands free while aligning the bit. - 2
Inspect the drill and level
Inspect the drill’s chuck and confirm the built-in level is visible and readable. If the level uses a bubble, ensure the vial is clean and free of smudges that could affect reading.
Tip: Wipe the bubble window gently with a clean cloth to avoid scratches. - 3
Mark hole locations
Measure and mark the exact hole locations on your workpiece. Use a center punch for metal or a pencil line for wood to keep the drill from wandering when you begin.
Tip: Double-check alignment with a straightedge before drilling. - 4
Set drill speed and bit
Choose the appropriate speed and a bit suited for the material. For wood, a mid-range speed works well; for metal, start slower and gradually increase as needed.
Tip: For metal, apply light lubrication to reduce heat and wear. - 5
Position and align
Hold the drill perpendicular to the surface, using the built-in level to keep the bit plumb or level as you begin. Begin with light contact to establish a clean entry.
Tip: If the bubble isn’t centered, pause and adjust before continuing. - 6
Drill a pilot hole
Drill a shallow pilot hole at the marked spot to guide the full-depth hole. Use a smaller bit than your final size to improve accuracy and reduce breakout.
Tip: Maintain steady pressure and avoid twisting the wrist to prevent drift. - 7
Drill to final depth
Switch to the final bit size and drill to the required depth, keeping the level in view to maintain alignment. Stop periodically to check the bubble if you encounter resistance.
Tip: Do not force the drill; let the bit cut and the level guide you. - 8
Finish and clean
Deburr or countersink if needed, remove debris, and store your tools properly. Verify the hole alignment against your layout after finishing.
Tip: Wipe dust from the bubble window to keep readings accurate for the next use.
Got Questions?
How accurate is the built-in level compared to a standalone level?
Built-in levels are generally accurate enough for most DIY tasks, offering a quick reference that reduces drift. For high-precision work, verify alignment with a separate level or grid layout, especially on critical joints.
Built-in levels are usually precise for everyday work, but for very exact projects you may want to cross-check with an external level.
Can I use a drill with built-in level for metal or masonry?
Yes, you can use it on metal or masonry, but choose the right bit and maintain a steady feed. For masonry, ensure you’re using appropriate percussion settings if available and wear eye protection.
Absolutely, but use the right bit and settings for the material.
How do I calibrate or recalibrate the built-in level on my drill?
Refer to your drill’s manual for calibration steps. Generally, you’ll place the drill on a flat surface, center the bubble using a calibration screw or software, and re-test against a known true surface.
Check the manual for calibration steps and verify with a level after calibrating.
What should I do if the bubble reads off after drilling?
If readings drift, stop drilling, recheck the setup, and reset the level. Consider re-checking your layout and drilling a fresh pilot hole to reestablish accuracy.
Stop, recheck, and reset the level before continuing.
Are there safety concerns unique to drills with built-in levels?
The safety concerns are the same as any drilling task: wear eye protection, secure the workpiece, avoid loose clothing, and keep hands away from the chuck. The built-in level adds no special hazard beyond normal operation.
Safety basics stay the same; secure your work and wear protection.
Watch Video
Top Takeaways
- Use a drill with built-in level for consistent hole alignment
- Calibrate and verify the level readout before drilling
- Secure workpieces and mark layouts precisely
- Drill progressively with pilot holes for accuracy
- Follow safety practices to prevent injuries and tool damage