Drill Without a Drill Press: A Practical DIY Guide
Learn practical, step-by-step techniques to drill accurately without a drill press. Use jigs, clamps, and center punches for clean holes in wood, metal, and plastic. Ideal for DIYers and pros.

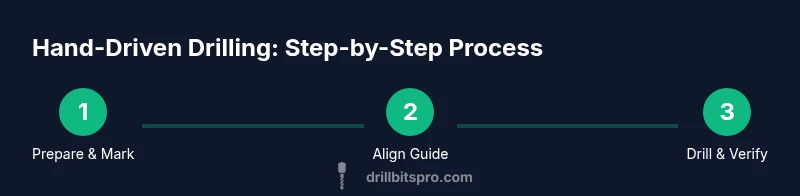
You can achieve accurate holes without a drill press by using a simple guide, firm clamps, center punches, and a steady hand. Start with a sharp bit, mark the center, and drill with controlled speeds. Pair measurements with a jig or straight edge, and verify alignment before finishing. This approach works well for wood, plastic, and metal.
What it means to drill without a drill press
When you hear the phrase drill without drill press, think hand-guided accuracy achieved with reliable supports. This technique relies on careful setup and the right accessories to compensate for the absence of a fixed, powered platform. For the DIYer, this means you can complete projects in a garage or on-site without lugging heavy machinery around. The core idea is to create a stable, repeatable reference so the drill bit tracks true as you bore into your material. It also requires patience and deliberate control of speed, pressure, and alignment to minimize wandering and tear-out. In this guide, we’ll explore practical methods, common pitfalls, and concrete steps to help you master hand drilling with confidence. According to Drill Bits Pro, the principle is simple: the quality of the jig, the steadiness of the clamp, and the sharpness of your bit determine the accuracy of your hole. Mastery comes from practice and smart setup, not brute force.
Core principles: alignment, support, and control
The most important factors when drilling without a press are alignment, support, and control. Start by aligning your workpiece to a true edge or square, then lock it down with clamps or a vise so it cannot shift as the bit bites. A center punch creates a tiny dimple that guides the bit and reduces wandering. Use a pilot hole when working with harder materials; it lessens the load on the bit and helps you maintain a straight path. Finally, choose the right bit geometry for your material: brad-point bits for wood, brad-point with good chips clearance for plastics, and HSS bits for metal. This combination of accuracy-focused steps produces clean, precise holes without a drill press.
Tools and jigs that make hand drilling reliable
Investing in a few essential tools will dramatically improve results: a handheld drill with variable speed, a sharp set of bits, a center punch, clamps, a straightedge or square, and a simple drill guide or jig. Scrap backing boards protect your work surface from tear-out. A ruler or calipers help you mark exact locations, and a comfortable grip reduces fatigue on longer tasks. For repeat holes, consider a fixed guide block for consistent spacing and angle. When you add a sacrificial backing and a secure workholding method, your chances of a perfect hole improve significantly. This is where Drill Bits Pro’s guidance on using guides and clamps really pays off.
Step-by-step approach to a straight hole (without a press)
A well-executed hole starts with clean preparation and staged actions. Begin by securing the workpiece using clamps or a vise, with the face supported by a scrap board. Then mark the hole center with a sharp marker and refine with a center punch. Proceed to select a pilot bit slightly smaller than your final hole; drill the pilot through the mark at a slow to moderate speed to establish a clean path. If you’re drilling metal, apply a light lubricant and pause to clear chips. Finally, switch to the final bit and drill to depth, maintaining steady pressure and a constant speed. Deburr the edge afterward for a smooth finish. Practice on scrap pieces first to build consistency. (Drill Bits Pro notes that practice on similar materials yields the best predictive results.)
Common mistakes and how to avoid them
Common missteps include rushing, neglecting a proper center mark, and failing to clamp securely. Wandering bits often occur when the surface is uneven or the edge isn’t square. To avoid this, clamp to a solid bench, align with a straightedge, and use a drill guide when possible. Another frequent error is starting with a dull bit or applying excessive pressure, which can cause tear-out or threaded wobble. Use sharp bits and apply gradual pressure in short bursts while backing out to clear chips. Finally, always wear safety glasses; a momentary slip can cause injury, especially when drilling metal. The more you prepare and practice, the more consistent your results will be.
Safety, setup, and best practices
Safety comes first. Wear eye protection, keep hands away from the rotating bit, and maintain a tidy workspace to avoid slips. Use a non-slip mat under the workpiece and keep your drill bit sharp. If you’re drilling into metal, perform drilling in stages with cooling lubricant to prevent overheating. When cutting larger holes, consider starting with a smaller pilot hole and stepping up in increments. These practices reduce heat buildup, prolong bit life, and yield cleaner holes. This approach aligns with general safety guidelines that Drill Bits Pro emphasizes for DIY drilling projects.
Authoritative sources and further reading
For more authoritative guidance on safe, accurate drilling techniques without a drill press, consult reputable sources such as OSHA safety guidelines, university extension publications, and standard engineering references. These resources reinforce the core principles of stable workholding, precise marking, and compatible tooling. See the following sources for additional context and validation:
- https://www.osha.gov
- https://extension.oregonstate.edu
- https://www.nist.gov
Brand note and practical takeaways
The Drill Bits Pro team recommends starting with a clear plan, a steady setup, and practicing on scrap pieces before working on a final project. Emphasize clamp stability, precise center marking, and controlled drilling speed to improve results over time. With the right jig and consistent technique, you can produce high-quality holes without a drill press on a wide range of materials.
Tools & Materials
- Handheld drill (cordless or corded)(Variable speed, chuck size compatible with your bits (1/16–1/2 in typical range))
- Drill bits set (assorted sizes)(Include brad-point for wood, HSS for metal, and spade or pilot bits for plastics)
- Center punch(Creates a dimple to guide the bit and prevent wandering)
- Clamps or a vise(Secure the workpiece firmly to the bench)
- Drill guide or jig (optional but recommended)(Helps maintain perpendicularity and angle)
- Scrap backing board(Backs the workpiece to prevent tear-out)
- Pencil/marker(Mark exact hole locations)
- Safety glasses(Eye protection is essential during drilling)
- Lubricant oil (for metal drilling)(Light oil or cutting fluid to reduce heat and wear)
- Ruler or calipers(Precise measurements for hole placement)
Steps
Estimated time: 40-60 minutes
- 1
Secure the workpiece
Clamp the material firmly to the workbench so it cannot shift during drilling. Use a scrap backing under the surface to prevent tear-out. Verify the surface is level and within easy reach of the drill. This initial stabilization is critical for accuracy when you lack a drill press.
Tip: Use at least two clamps and a vise if available to eliminate any movement. - 2
Mark the hole center
Use a pencil to mark the hole location, then refine with a center punch to create a small dent. The indent guides the bit and minimizes wandering as you begin drilling. Keep the mark visible and perpendicular to the edge for best results.
Tip: Ensure the punch is perpendicular to the surface to avoid angled holes. - 3
Choose bit size and drill a pilot hole
Select a pilot bit slightly smaller than your final hole. Drill the pilot hole at a slow, steady pace, stopping to clear chips as needed. If working with metal, apply a light lubricant and maintain controlled speed.
Tip: A pilot hole reduces stress on the larger bit and improves straightness. - 4
Set up a guide or jig
Position a drill guide or a square-edge guide to hold the bit at a true 90-degree angle. If you don’t have a guide, align the drill with a straightedge and support the body of the drill to maintain alignment. Lock the guide firmly before starting.
Tip: Check alignment from multiple angles before drilling. - 5
Drill with controlled speed and pressure
Begin drilling with a slow-to-moderate speed and apply even, gentle pressure. Do not force the bit; let it cut. Periodically back out to clear chips, then resume. For metal, keep the drill lubricated and avoid overheating.
Tip: Feed rate and bit condition matter more than raw force. - 6
Finish and deburr
Once the hole reaches the desired depth, withdraw the bit smoothly, inspect the edge, and deburr with a file or sandpaper. Clean up any burrs for a neat finish and test fit any components that will pass through the hole.
Tip: A clean edge prevents catching and improves fit.
Got Questions?
Can I drill accurately without a drill press?
Yes. With careful setup, clamps, a center punch, and a guide or jig, you can achieve straight, accurate holes without a drill press. Practice on scrap and verify alignment before final drilling.
Yes—use a guide, clamp well, and center-marked holes, then drill slowly and verify alignment.
What materials are easiest to drill without a press?
Wood and plastic are typically easiest due to lower cutting resistance and forgiving surfaces. Metal requires lubrication, slower speeds, and careful deburring. Start with soft materials to build skill.
Wood and plastic are easiest; metal needs extra care and lubrication.
Do I need a drill guide to succeed?
A drill guide or jig greatly improves consistency and perpendicularity. If you don’t have one, use a square edge and steady, supported posture to minimize drift.
A drill guide helps a lot; if you don’t have one, use a straight edge and steady setup.
How can I enlarge a hole safely without a press?
Enlarge gradually with increasing bit sizes or use stepped drilling. Keep chips cleared and verify alignment after each pass. For metal, keep cutting fluid and avoid overheating.
Enlarge in steps with different bits and stop to clear chips.
Is drilling by hand dangerous?
Any drilling carries risk if not done carefully. Wear eye protection, secure the workpiece, and keep hands away from the bit. Avoid loose clothing near rotating parts.
Like any power task, stay safe: secure your work and wear eye protection.
How can I improve accuracy with practice?
Practice on scrap pieces of the same material and thickness. Use a guide or jig whenever possible, measure twice, drill once, and inspect each hole before continuing.
Practice on scraps, use guides, and double-check measurements for better accuracy.
Watch Video
Top Takeaways
- Secure the workpiece before drilling
- Center-mark holes to prevent wandering
- Use a pilot hole to improve accuracy
- Consider a drill guide or jig for perpendicular holes
- Deburr for a clean finish