How to Drill Without a Drill: Practical DIY Techniques
Learn practical, safe methods to make holes without a power drill. This expert guide from Drill Bits Pro covers manual options, safety, materials, and a step-by-step workflow to help DIY enthusiasts and professionals drill without a drill confidently.

Goal: learn how to drill without a drill using common hand tools. You’ll learn safe setups, essential materials, and step-by-step techniques for starting holes, guiding bits, and finishing cleanly. This Drill Bits Pro guide helps DIYers and professionals drill without a drill confidently and safely.
Why you might need to drill without a drill
There are many everyday situations where a powered drill isn’t available or practical. You might be working in a cramped space, on a temporary outdoor project, or replacing a lost tool mid-job. In these moments, knowing how to drill without a drill expands your options, reduces downtime, and keeps the project moving. The keyword drill without a drill highlights a core DIY capability: using hand tools and simple techniques to create clean, accurate holes. While not every material or thickness is ideal for non-powered drilling, understanding reliable hand methods sets a strong foundation for safe, accurate results. Drill Bits Pro emphasizes practicality, safety, and the right moment to transition to a powered alternative if needed.
Key takeaways from this section: manual approaches are feasible for small holes and soft materials when handled with care and the right layout. Always plan your hole location carefully and protect your work surface. In most scenarios, a patient, deliberate approach yields best results over rushing with improvised tools.
Safety first: essential precautions
Before you touch any material, prioritize safety. Drill without a drill can generate chips, burrs, and unexpected kickback if the workpiece isn’t secured. Always wear eye protection and gloves when appropriate, and keep hair, clothing, and jewelry away from the work area. Secure the workpiece with clamps or a vise to prevent slippage, and use a stable surface to reduce vibrations. If you’re working with metal, plastics, or masonry, consider hearing protection and a dust mask where applicable. By planning the process, you minimize the risk of injury and damage. Drill Bits Pro reiterates that safety is non-negotiable when improvising with hand tools and manual methods.
Practical safety checks you can apply right now: verify line of sight to your hole, ensure the work surface is flat, and keep a spare set of eyes on the task as you progress. A well-lit workspace reduces mistakes and helps you maintain control over the tool and the mark.
Hand tools and improvised power substitutes
If you’re without a drill, you still have a toolkit. A center punch, a hammer, an awl or sharp nail, and a brace with hand bits are your core kit for starting holes. A ruler, pencil, and clamps help with alignment. For larger holes in wood, a brace-and-bit setup provides torque and grip to gradually widen the hole. In steel or harder plastics, you’ll need patience, slower feeding, and smaller pilot holes to keep the bit from wandering.
Consider improvised substitutes with care. A nail or screw can serve as a makeshift starter in soft material, then be widened with progressively larger hand tools. Always verify the tool’s suitability for the material and thickness you’re working with. Drill Bits Pro advises testing your setup on a scrap piece to ensure your hole will be clean and accurate without a drill.
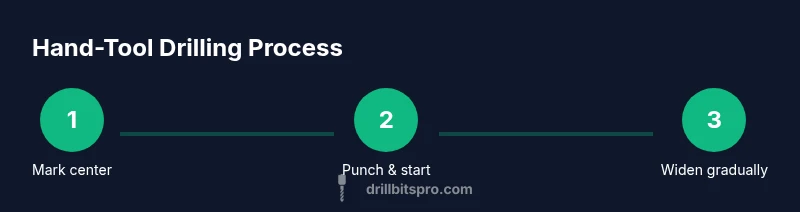
Method 1: Center punch and hammer to start a hole
Starting a hole cleanly without a drill begins with a center punch or sharp nail. Use a hammer to create a small dimple at the intended center point. The mark acts as a guide for subsequent tools and prevents wandering when you begin to bore. Once the dimple is established, switch to a sharp awl or a small drill-like tool if available and begin to create a shallow guide.
Why this helps: the initial indentation concentrates force and reduces the risk of the tool skidding. For wooden workpieces, this method works well with a sharp punch; for metal, a hardened punch will yield a more defined start. Go slow and maintain steady pressure to avoid tearing or bending the material.
Method 2: Brace-and-bit or hand drill technique
A hand brace and bit can replace a cordless drill in many wood and soft metal applications. After marking the center, position the bit at 90 degrees to the workpiece and apply even, clockwise pressure. Use short, controlled strokes rather than a long pull to keep the hole clean and straight. Periodically back the bit out to clear debris and prevent binding.
Why the brace is effective: it provides mechanical advantage, giving you greater control and precision than many improvised tools. If you don’t own a brace, you can improvise with a sturdy metal rod and a fit bit, but ensure it’s secure and balanced before applying force. Drill Bits Pro emphasizes patient, gradual drilling to avoid overheating or wandering in the absence of power.
Method 3: Screw-pilot technique to start a hole
In some cases, driving a screw into the material creates a natural guide for a pilot hole. Start with a philips or slotted screw just under the intended hole diameter, driving it in only a short distance to form a starter groove. Remove the screw and use an awl or punch to widen or locate the hole, then proceed with a brace or hand bit.
This method is particularly handy for soft woods and plastics where mikro-wandering is a concern. Limit the screw’s bite to prevent splitting, especially near edges. After the starter groove is established, widen gradually with the appropriate hand tool to reach the final diameter.
Marking, measuring, and aligning without power
Accuracy begins with layout. Use a ruler or tape measure to verify distance from edges and engineer the center line. A square helps if you need square corners or precise perpendicular holes. Mark the center with a pencil, then double-check your measurements from multiple reference points. Once aligned, proceed with your chosen starting method and maintain symmetry throughout.
Why alignment matters: a misaligned hole can compromise the project’s strength and aesthetics, particularly in joinery or hardware installation. Drill without a drill becomes easier when you take the time to verify constants before you begin.
Material-specific tips: wood, metal, plastic, masonry
The material you’re drilling dictates your approach. Wood accepts larger, sharper bits with gentle pressure and a steady hand. Metal requires slower progress, a sharper punch or center mark, and consistent lubrication with a safe, non-flammable agent like oil. Plastic is forgiving but can crack under too much force; use a small starter hole and work up in steps. Masonry may be very challenging without a drill; you might opt for a masonry punch or attempt to create a small pilot with a hardened punch, but avoid excessive force to protect the surface and the tool.
When in doubt, test on a scrap piece first. Drill Bits Pro reminds readers that material behavior varies, so adjust pressure and speed accordingly to avoid warped holes or cracked components.
Finishing touches and cleanup
After you’ve created the hole, deburr edges with a deburring tool, utility knife, or sandpaper. Clean the area of chips and dust to prevent interference with fasteners or inserts. If you’ve created a hole in metal, lightly chamfer the opening to reduce sharp burrs. Re-check alignment and depth, and adjust if needed before proceeding with hardware installation. Finishing touches ensure a professional appearance and increased functional integrity.
This stage is as important as the drilling itself. A clean hole makes screws seat properly and reduces wear on the surrounding material. Drill Bits Pro advises documenting any adjustments you had to make so you can refine your approach in future projects.
When to transition to a powered drill or other tools
Even the most skilled DIYer benefits from a powered drill when precision, speed, or hole quality matters. If the manual methods you’re using begin to take longer than expected or threaten material integrity, consider pausing to switch to a drill, drill press, or appropriate cutting tool. An upgrade doesn’t indicate failure—it’s a practical decision to protect the project and improve results. Always evaluate the hole diameter, depth, and material properties before deciding.
Finally, practice makes perfect. The more you drill without a drill, the quicker you’ll assess whether a hand method is appropriate, how to manage feed rate, and how to maintain straight, clean holes. Drill Bits Pro’s guidance emphasizes this balance between patience and efficiency for better outcomes.
Tools & Materials
- Center punch(Used to mark the starting point and create a dimple for guidance)
- Hammer(Standard claw hammer for starting marks and control)
- Awl or sharp nail(For initial indentation and to widen starter holes)
- Brace and hand bits (hand drill)(Provides leverage and control when not using a powered drill)
- Tape measure and pencil(For accurate layout and marks)
- Safety gear (eye protection, gloves)(Protect eyes from chips; gloves optional for grip)
- Clamps or vise(Secures workpiece)
- Utility knife(Scoring lines and deburring edges)
- Scratch awl or thin punch(Fine-tines for tiny adjustments)
Steps
Estimated time: 60-90 minutes
- 1
Prepare workspace and gather tools
Clear the area, secure the workpiece, and lay out your measurements. Gather all hand tools you plan to use so you won’t pause mid-task to search. Ensure lighting is good and your clamps are ready for securing the piece.
Tip: Double-check your layout before touching any tool. - 2
Mark the center point with a center punch
Place the center punch on the marked center point and strike firmly with a hammer to create a small indentation. The indentation will guide subsequent tools and reduce wandering when you begin to bore.
Tip: Keep the punch perpendicular to the surface for an accurate start. - 3
Create a starter indent with an awl
Use the awl to deepen the indentation slightly and form a pilot groove. In wood, this helps the brace or hand bit start true; in metal, it minimizes chatters.
Tip: Apply steady pressure and let the tool do the work. - 4
Begin with a brace-and-bit (if available)
Fit a bit that matches your final hole diameter. Align the bit with the center, then turn the brace with controlled, even pressure. Stop periodically to clear debris.
Tip: Back off and wipe away chips to prevent binding. - 5
Alternative: drive a starter screw (for soft materials)
If you don’t have a brace, drive a screw slightly into the center to form a guide groove. Remove the screw and widen the hole with an awl or punch before continuing manually.
Tip: Use a small-diameter screw to avoid tearing edges. - 6
Expand the hole gradually with hand tools
Progressively use larger bits or tools to reach the final diameter. Maintain even pressure and keep the workpiece steady with clamps. Avoid forcing tools beyond their bite to prevent material damage.
Tip: Stepwise widening yields cleaner holes. - 7
Check alignment and depth
Remove any guides and verify the hole’s alignment and depth with a ruler or gauge. Correct any deviation before final assembly or fasteners.
Tip: If misaligned, pause and reset the center point. - 8
Deburr and finish edges
Use a deburring tool or sandpaper to smooth the hole’s edge. Clean debris and ensure no burrs remain that could hamper fasteners or inserts.
Tip: A clean edge improves screw seating and reduces snagging. - 9
Evaluate the need for a powered drill
Assess whether the project requires a powered drill for speed or precision. If you’re not satisfied with manual results, plan to switch tools to complete the job safely.
Tip: Don’t overwork manual methods; know when to escalate. - 10
Document and practice
Record what worked, what didn’t, and the material specifics for future projects. Practice on a scrap piece to refine your technique and save time on real tasks.
Tip: Practice makes smoother non-powered drilling.
Got Questions?
Is it safe to drill without a drill?
Manual drilling can be safe if you use proper tools, secure the workpiece, wear eye protection, and work slowly. Avoid forcing tools and always verify your layout before cutting or drilling.
Yes, with the right tools and precautions you can drill without a drill safely.
What tools do I need to start a hole by hand?
At minimum, you’ll want a center punch, hammer, awl or sharp nail, and a brace with bits. Measuring tools and clamps help with alignment.
A center punch, hammer, awl, brace, and clamps are your essential kit.
Can I drill metal without a drill?
Drilling metal by hand is possible with a center punch, awl, and a hand brace with the correct bit, but it requires slower speed, steady pressure, and proper lubrication. For thicker metal, a powered drill is recommended.
It’s possible but challenging; consider a powered drill for metal.
How do I prevent the bit from wandering when starting?
Create a precise center mark with a punch, then use an indent with an awl before starting to bore. Clamping the workpiece and using a stable surface also helps maintain accuracy.
Center marks and clamps keep the hole on target.
What are common mistakes to avoid?
Rushing the start, skipping alignment checks, and not securing the workpiece lead to wandering and crooked holes. Overly aggressive pressure can break bits or crack materials.
Take your time and secure everything well.
When should I switch to a drill?
If the hole must be precise, is large in diameter, or the material resists hand tools, switch to a powered drill or alternative method like a drill press to finish cleanly.
If precision or speed is critical, switch to a drill.
Watch Video
Top Takeaways
- Plan layout precisely before starting
- Secure the workpiece to prevent slips
- Start with a punch mark, then widen gradually
- Choose hand tools suitable for the material
- Switch to a drill when accuracy or speed is required